To make the chess pieces I'd use this offcut of sapele for the black pieces and some beech for the white pieces, so I started by ripping the beech to the same size as the sapele which was 27mm square.
This beech came from an old table frame that I found by some bins. I also have the table top from the table which I haven't got round to using for anything yet.
Next I started cutting the pieces to length at the mitre saw. I started with the longest pieces which would be the king and the queen, and gradually made the pieces shorter and shorter until I got to the pawns which would be the smallest. I used a stop block to ensure that all of the pieces of the same type would be the same height.
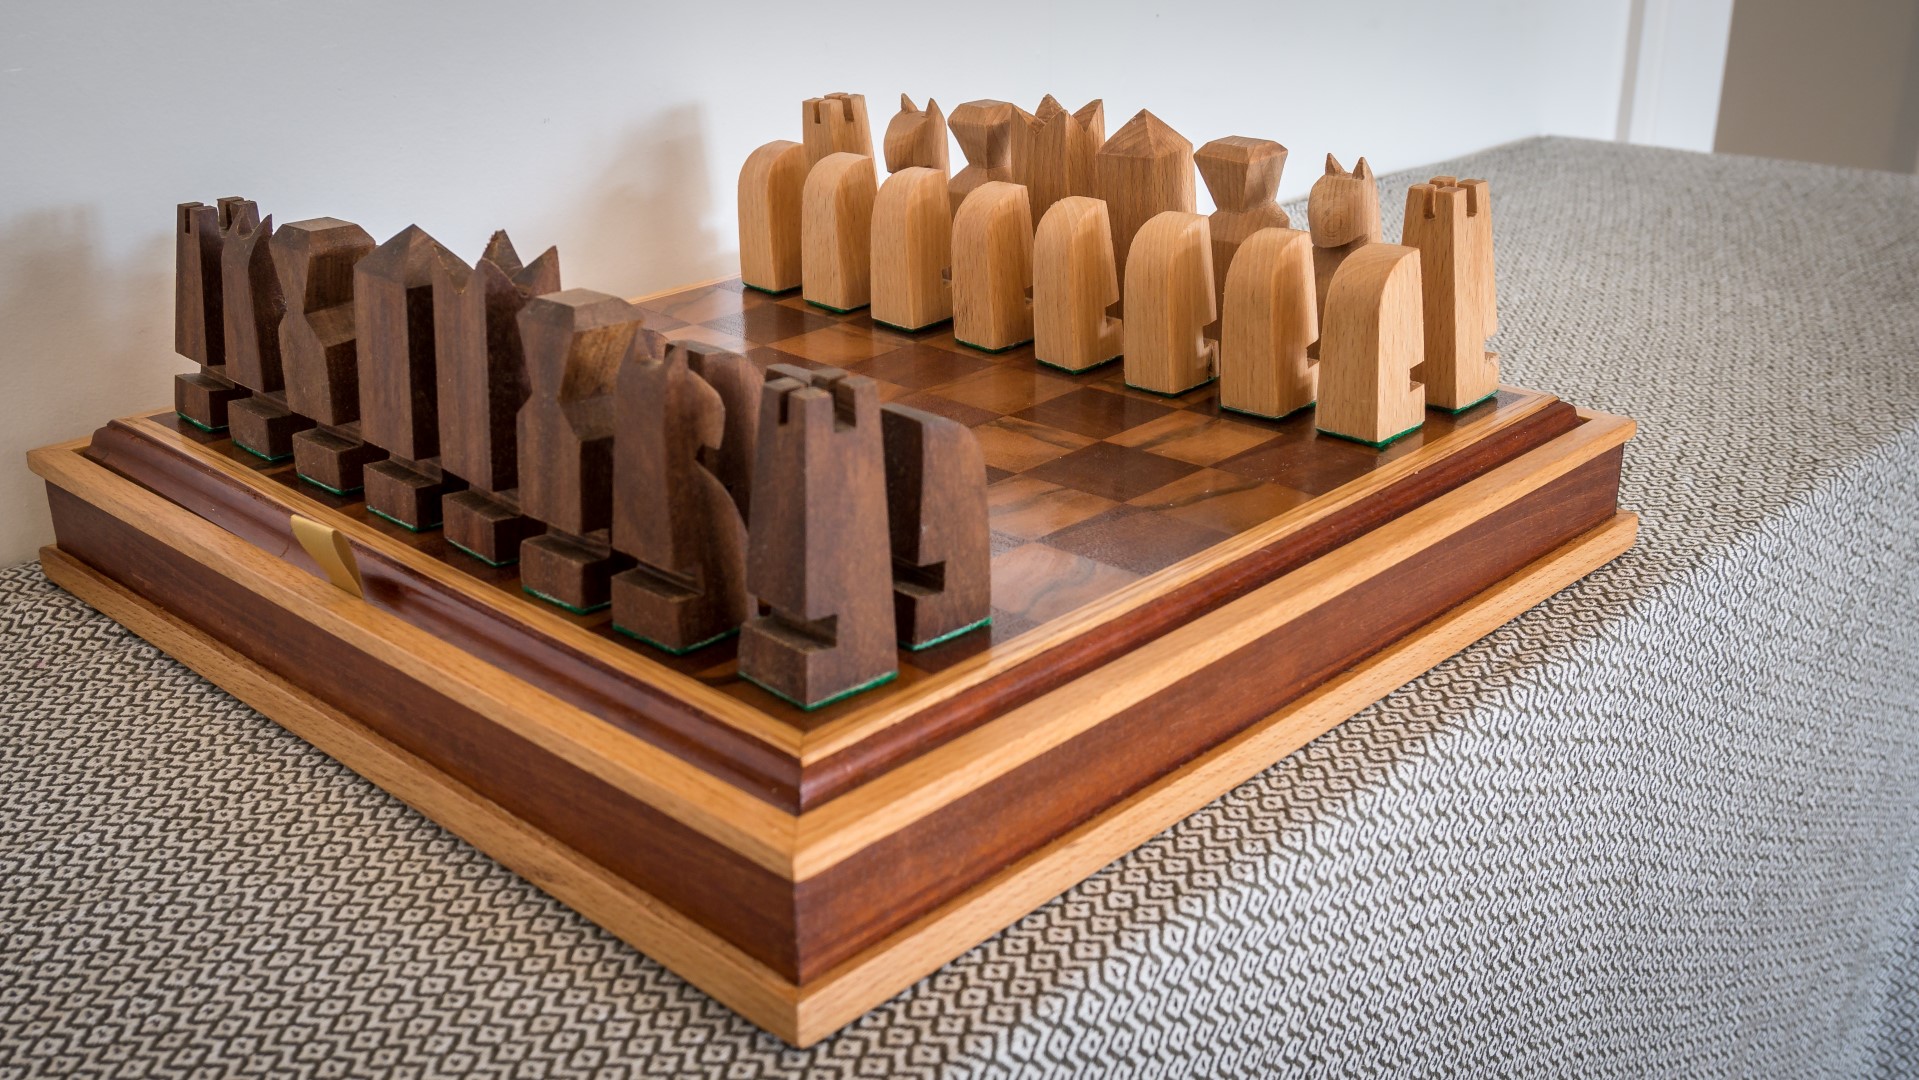
I didn't have much of a vision for what each of the chess pieces would look like at this point, but I had a few ideas and I wanted them to be quite minimal and sculptural in design
I'd start with making the pawns and I had the idea to make a tapering jig so that I could add a taper to the left and right hand side of each piece. I used a scrap piece of wood which I stuck to the bandsaw table using hot glue as an attempt to get consistent cuts to each piece.
This method didn't work too well because as I pushed the pieces through the blade with a slight sideways force, the blade was deflecting a bit so I wasn't getting the best cuts. But I perservered with it anyway just to finish all the pawn pieces in the same way, but as soon as those were done I wouldn't use that method again for the others.
Once all the tapers were cut, I used a large washer to mark up a rounded edge at the top. It would have made more sense to do this before I cut the tapers, but this is what happens when you're making stuff up as you go along!
I cut off the corners crudely on the bandsaw, and then did the more refined shaping at the disc and belt sander.
At this point I put them on the board and then decided that they would look better with a taper on the back too, so that they would appear to be leaning forward slightly. So I made a mark about 5mm in on each piece and then drew a line from that mark to the bottom corner.
And then I made those cuts freehand at the bandsaw and cleaned up the cuts on the belt sander.
That was the pawns done, and next I moved on to the rooks
First I marked up a taper to th e sides and backs again as I had for the pawns but this time I made the cuts freehand at the bandsaw which worked much better than using a jig as I had previously.
I cleaned them up on the bandsaw and then marked up a design for the top, the shaded areas would be the waste material. I made the cuts on the bandsaw, and then did some filing to the top to clean up the bandsaw cuts.
Next I could make the knights, and I knew this one was likely to be the biggest challenge out of all of the pieces
I decided to make a cardboard template for this, so started by marking up a taper and then sketching the outline of a horse shape. I am not good at drawing, but just did the best I could. I cut out the template with a knife and then used this to mark up the shape on to each of the four pieces of wood
I then cut out the profile on the bandsaw
Then I marked up a taper for the sides and cut those too
And then I cleaned the tapered cuts at the belt sander.
Next I marked up the shape of the ears and cut those out on the bandsaw too.
And then I did some shaping of the horses head using back strokes on the blade to carve away material. And I recognise that this isn't the safest of methods, so please don't try this at home and also don't feel the need to point this out in the comments.
Next with my electric file held securely in the vise, I did some more shaping
And then I did some final work with a chisel and some sand paper to clean them up.
And they ended up looking a bit like a moomin.
Next I made the bishops. I cut a taper at the back the same way as I had on the others.
Then I marked up a shape for the heads
I made the cuts on the bandsaw
And then I did some more shaping with a chisel.
And I wasn't keen on how they looked at this point so I decided to add a bevel to the top of the pieces too which I did on the disc sander.
And after some more cleaning up with a chisel I was happy with them.
Next I made the King pieces.
And for these after cutting another taper on the back to match the other pieces, I marked up a shape on top that would look kind of like a crown, and made the cuts on the bandsaw again.
And finally the Queen, once again cut a taper on the back, and then marked up a point for the top of the piece which was again cut at the bandsaw.
I did some sanding by hand just to break over any sharp edges so that they'd be nice in the hand.
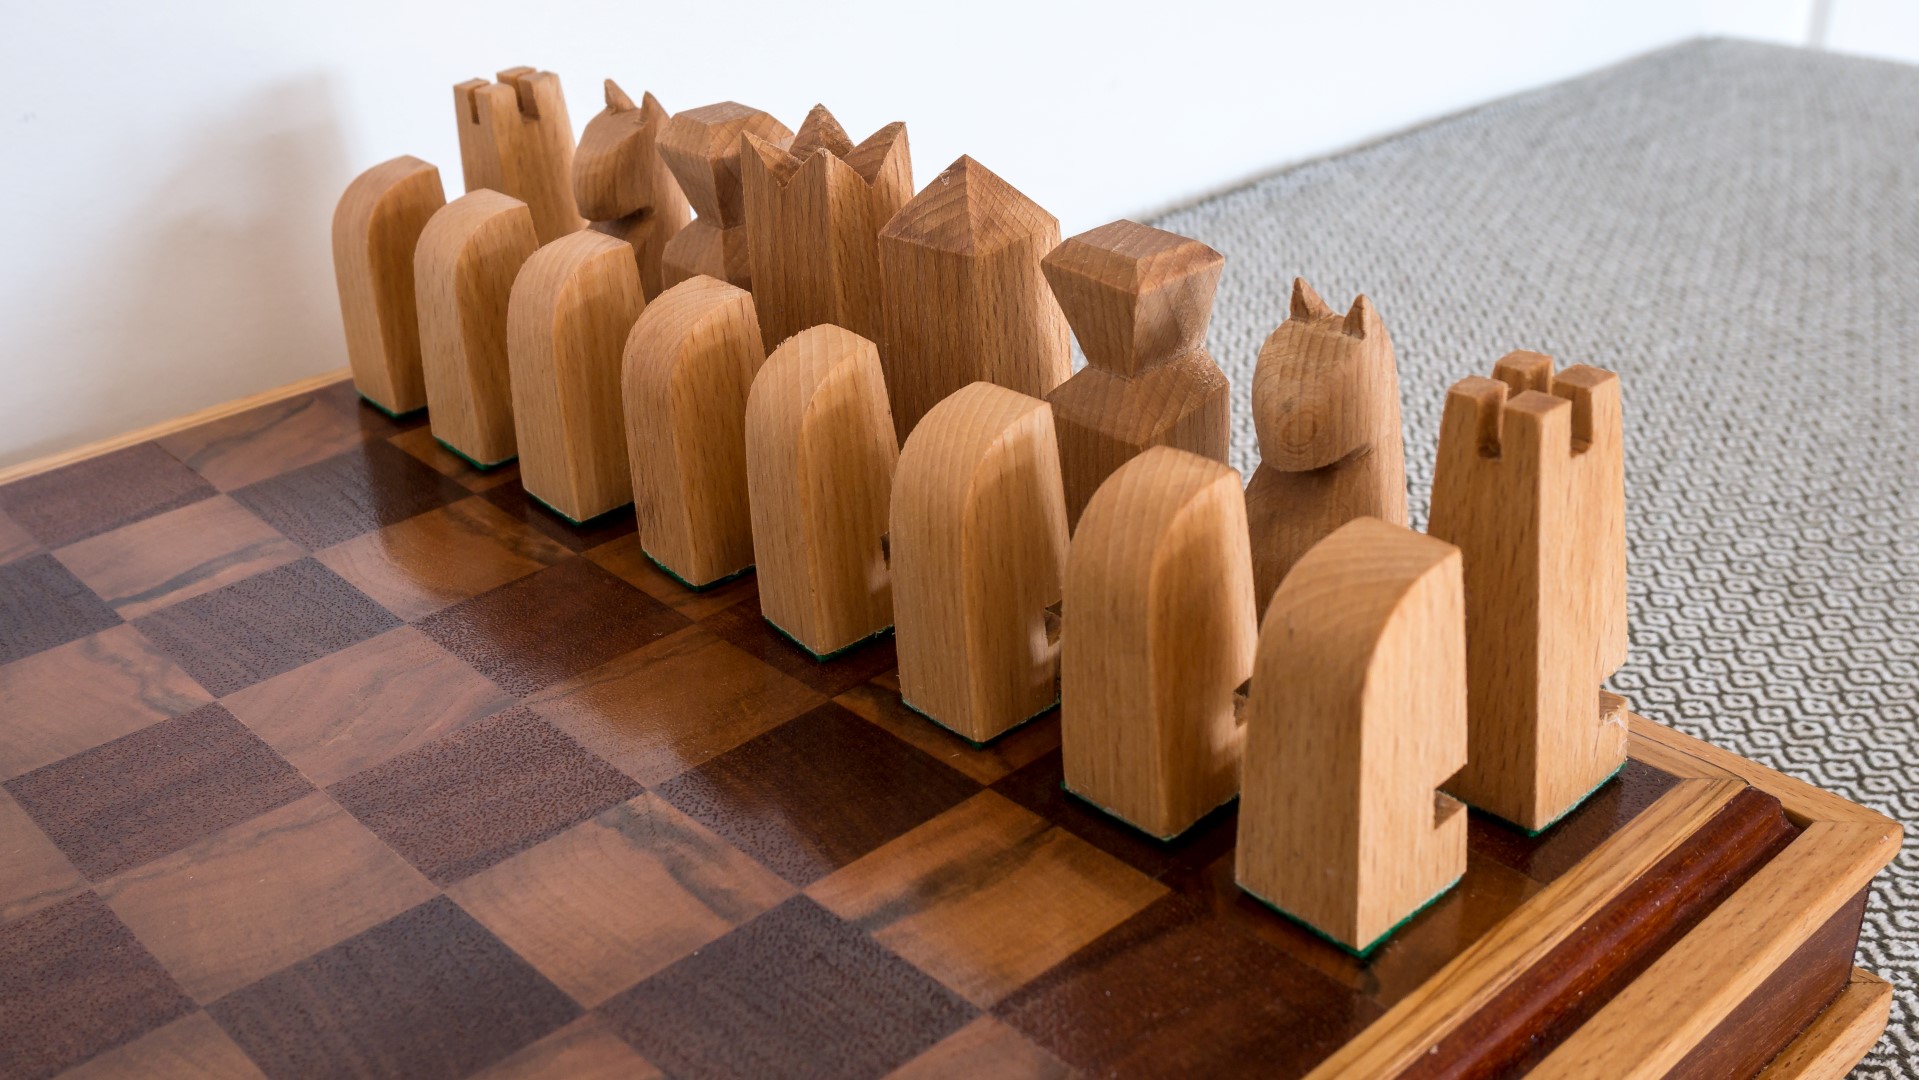
I applied a teak oil finish to the chess pieces which brought out the grain really nicely.
And the most observant of you may spot that the chess pieces now have a groove cut in the back of them. I'll explain the reasons behind that later in the project - in part 3
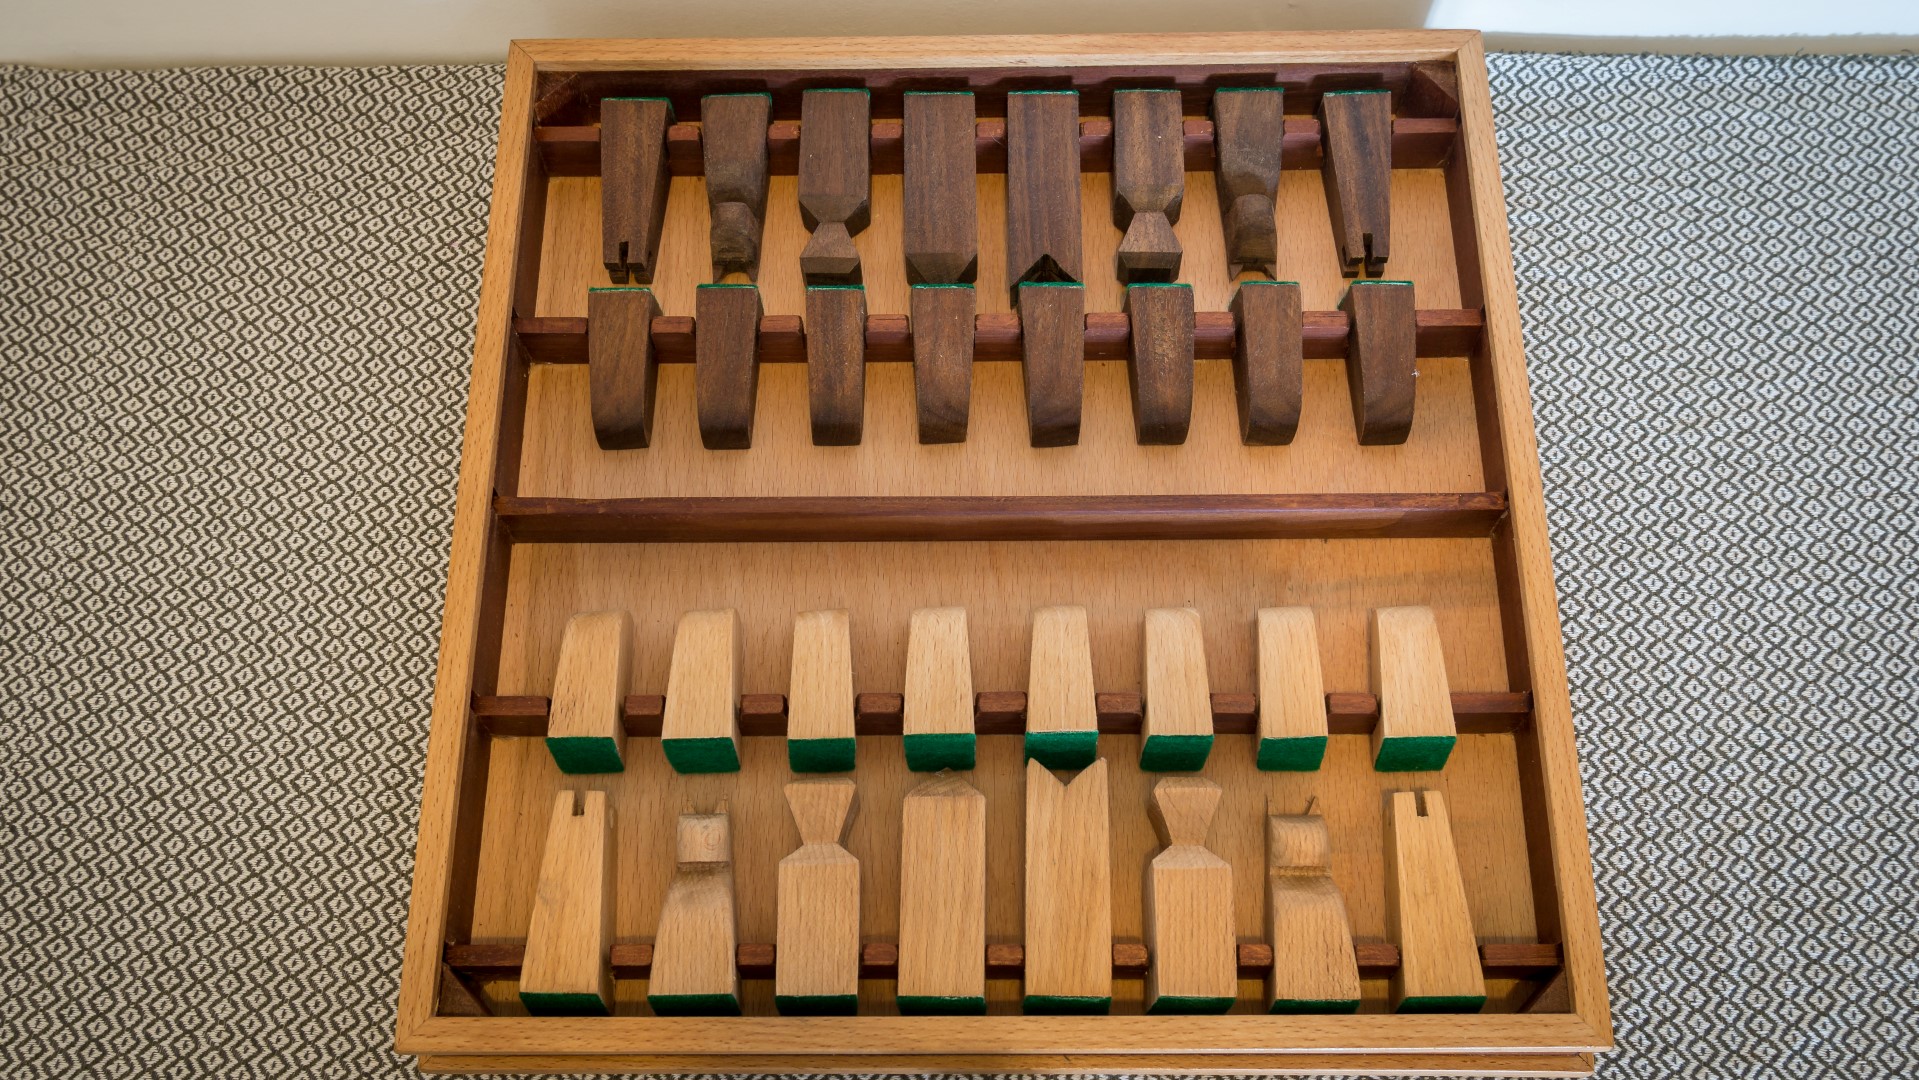
The final job to finish the chess pieces was to add felt to the bottom so that the pieces won't damage the chess board. I picked up this green felt from a shop called hobbycraft - it was only 55p for a sheet this size. I used pound world epoxy to glue the felt to the bottom of the pieces, this stuff has always worked really well for me. It smells a bit, but no big deal.
Then I just used scissors to trim off any excess felt
Images: