in this video I work on 2x CC41 utility furniture dining chairs from the 1940s for a makeover, repair and restoration. I convert their webbed upholstery to solid chair seat pads. I also re-upholster them and give the wooden frames a clean up and a re-finish.
In this video I'm going to be working on a pair of dining chairs. I bought these at a local house clearance and I'll talk some more about that at the end of the video.
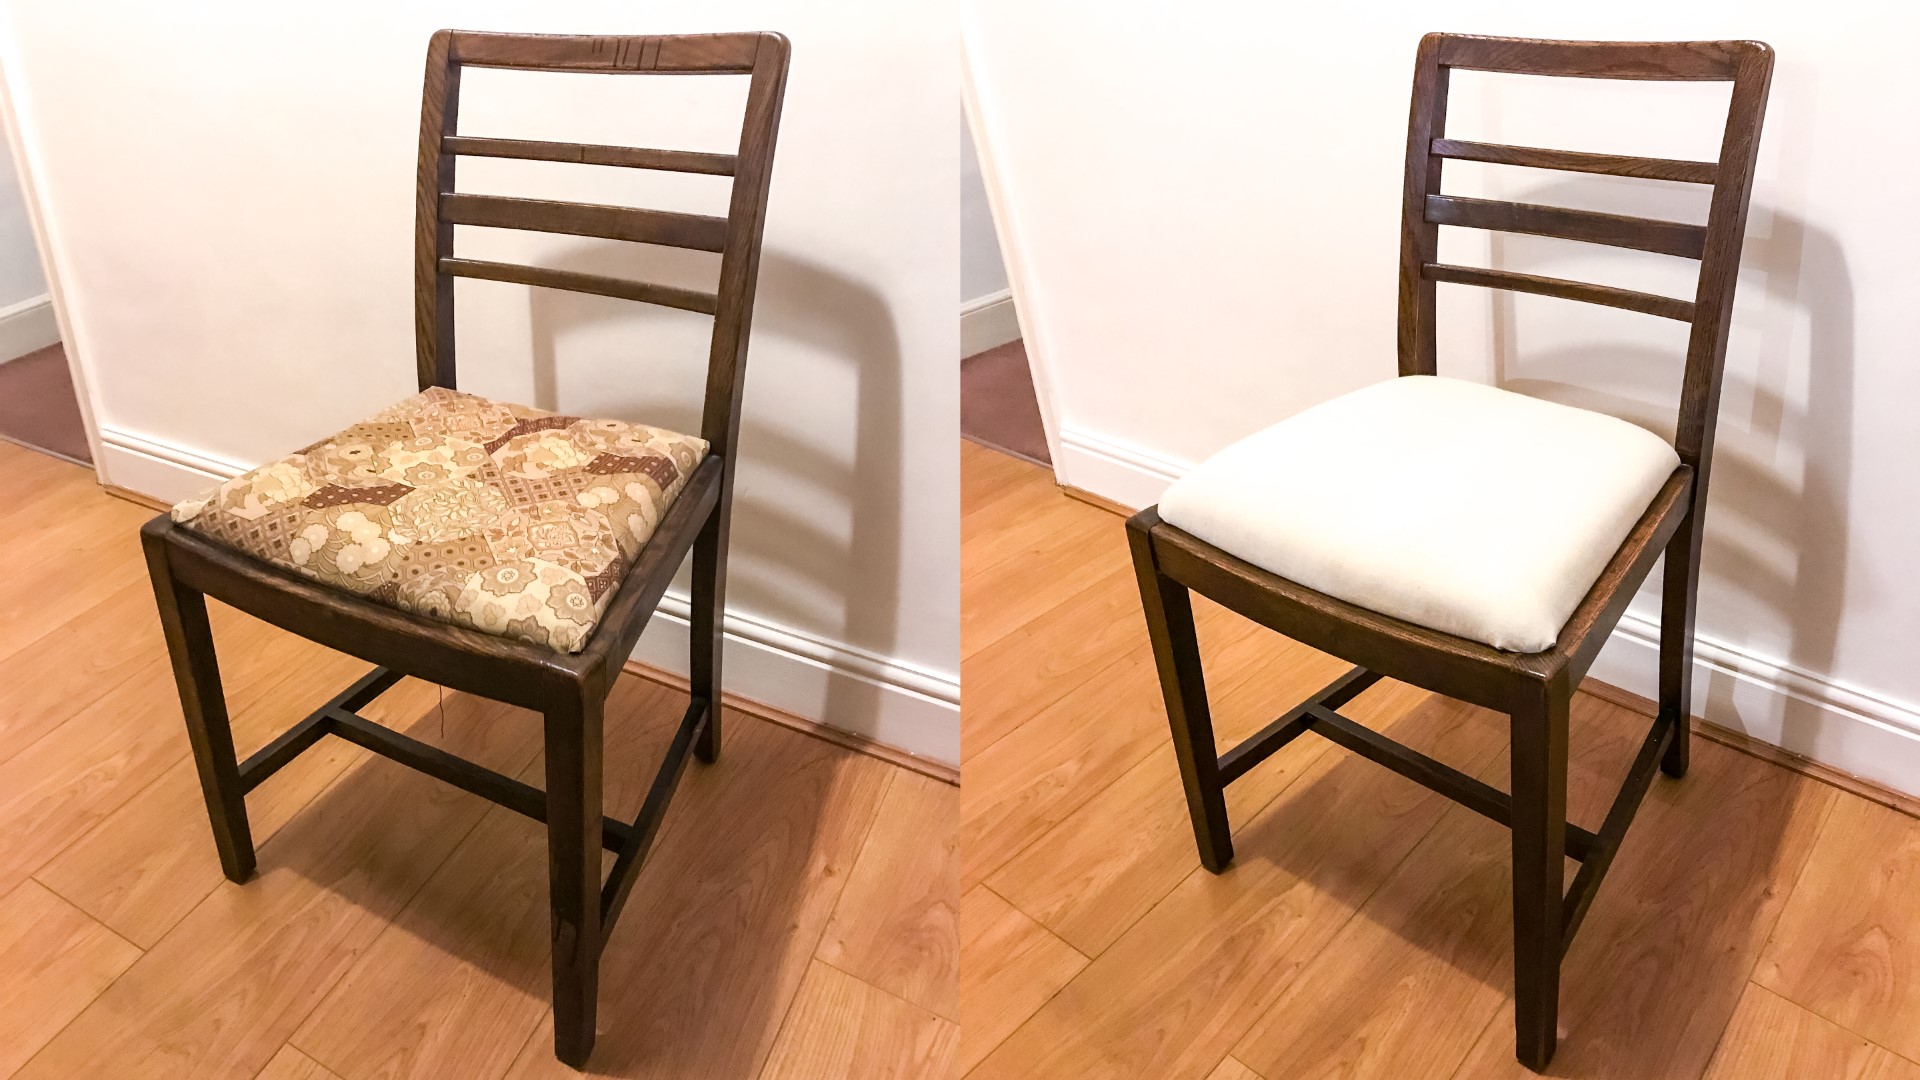
The chairs had a few problems, the webbing on the bottom had failed, and the foam and fabric was in a pretty bad state too. On the plus side though all the joints on the chair were really solid.
When I popped the seat pad out I saw this marking on the inside, and at the time I didn't know what this was, but now I do and I'll talk some more about that at the end of the video too as I think it's quite interesting.
I removed the top layer of fabric which had just been glued on to the frame.
And underneath that was a layer of vinyl, that had just been glued on too. I don't if that was the original covering or not.
I took that off too to find some nasty looking wadding and foam, and underneath that a dust cover.
That was held in place with small tacks, so I removed those using my pincers
And the webbing was held in place with those too.
I did a bit of clean up with my scraper and a sanding block because the wood was very rough and splintery with sharp edges. I think the wood here is beech.
I wanted to convert this seat pad from being a webbed one with the strapping I'd removed earlier to one with a solid bottom - and that was mainly because I didn't have the right tool to be able to stretch out the webbing tight enough, and I think that tool I'm referring to is called a webbing stretcher.
So I thought about routing out a rebate on the inside of the top of the frame so that I could insert a solid base inside the existing frame. The problem with that was that it was curved at the front, and if I used a rebate bit to route out around the edge, the base of the router would follow that curve and cut a rebate that was too low down to support the solid seat pad at the front.
The solution I came up with was to first make a paper template of the shape of the curve, and I could then take a rubbing using the side of my pencil lead.
Then I could mark up where the top of the sides of the frame were on both sides.
And then I joined those two marks with a straight line.
I hot glued two pieces of 12mm MDF together, and then using a glue stick I stuck the piece of paper to the MDF block with the straight line flush with the straight edge of the MDF.
And then i cut out the shape at the bandsaw
This gave me a curved shim which I could hot glue to the curve at the front, so that I could then use a rebate bit in my router to cut a rebate the same depth all of the way around the inside of the frame.
I did this in multiple passes lowering the bit each time until the rebate was as deep as I could get it. Here you can see I'm cutting through the sacrificial piece of MDF rather than the frame itself.
By the way, the reason you can see what I'm filming here is because I'm using these LED lights that HiKOKI sent to me, they have a torch on one side, and an LED panel on the other and they run off the usual HiKOKI batteries and they're going to be so useful to have around for filming in the dark among other things! So a big thank you to HiKOKI!
Now that the MDF had done it's job I could remove that
I could then square up the round corners with a chisel.
Next I needed a template to cut a solid bottom, so once again I taped some paper together and then took a rubbing around the inside edge. The rebate along the front curve through the rubbing off slightly so here I'm marking up a straight edge to follow.
I glued that to some MDF too and cut that at the bandsaw, and I tried to cut right on the line or slightly on the inside so that it would drop right in to the frame.
It didn't quite fit on first attempt so I made some marks where it was too big and then used my block plane and then it fitted great.
I was a bit worried about how high the seat pad was sticking up, particularly at the front, but I couldn't cut the rebate any deeper because I didn't have a deeper bit, so I decided to mark up the curve at the front, and then using a spokeshave I carved a curve following those marks to ease the transition from the frame to the solid panel a bit.
I also rounded over the back and side edges with the spokeshave too.
And that looked better and by the time I got some foam on top I figured it should be OK.
Then I was ready to upholster the pads so I cleaned up my bench
I got some 25mm foam from eBay, I think I paid £2.
And I bought some wadding from my local fabric shop, this I think was £4.50 per metre so I got 1m which was enough to do 4 dining chairs even though I only had 2. Wadding is available in different thicknesses and is sold by the ounce, and the lady in the fabric shop was super helpful and suggested 6oz so that's what I got.
I already had some fabric I could use, this was from a pair of curtains I bought in a charity shop and it was quite hardwearing and not stretchy so I thought it'd work well.
I positioned the seat pad upside down on the foam and then using a freshly sharpened knife I could score around the shape to cut the foam.
Then I put the seat pad and the foam on to the wadding and I stapled one side. I'm using my Clarke air stapler here, it was pretty cheap but it works well.
Then I cut the wadding and pulled it taut, but not too tight, and stapled the opposite side.
And I did the same again at the front and the back.
And that just left the corners which are the tricky part, there's definitely a knack to it but each time I upholster something I seem to get a little better at it. Although I'm sure an expert will say that I'm using way too many staples here.
That looked pretty good!
Next I placed it on to the fabric and cut away the excess.
And I did the same as I did with the wadding, which was stapling one side, then pulling taut and doing the opposite side, and then same on the remaining two sides and then working on the corners.
And I have to say I was super happy with how they turned out, definitely the best upholstering I've ever managed to do anyway although I'm far from being an expert.
Next I wanted to clean up the chair frames, as it looked like someone had applied some more stain at some point in their life but applied way too much so there were some nasty looking drips.
I used my scraper to remove the old finish and stain to get down to bear wood.
I didn't do the whole of both chair frames, I just did the bits that looked bad, as I was hoping I could blend in the old finish with the new.
Then I applied some walnut dye to match the old colour, and I applied two coats as it didn't look quite dark enough at first.
I then left the chairs out in the sun for the dye to dry.
Then I used some spray varnish just to touch up both the areas that I had re-finished and the rest of the frames too just to help it ll blend in and that came out great, it brought out the wood grain really nicely and gave the frames a nice satin sheen too. I only applied one coat, as I don't think chair frames need much protection, and I found that the finish didn't need de-nibbing either because it felt super smooth, so that was all there was to it. After waiting 20 minutes or so for the varnish to cure I added the seat pads.
I mentioned earlier in the video that I saw CC41 stamped on the inside of the chair frame, and I had no idea what that was and it wasn't until I was editing the video for this project that I did some research on it... A CC41 stamp represents a government sanctioned utility scheme established during the Second World War, and furniture with the CC41 stamp meant it met the government’s austerity requirements. CC stands for Controlled Commodity and 41 represents the year the scheme started, and the stamp was used for about 10 years, so that means these chairs were made some time between 1941 and 1951 - so the chairs are about 70 years old! Really interesting, I didn't expect the chairs to be that old...
I mentioned at the start of the video that I picked up these chairs at a house clearance, and that was the same house clearance where I bought the mid century coffee table that I worked on from a previous video. And to be honest I didn't really want to buy these chairs because a) I didn't need them and b) t was going to be tricky to sell these chairs on because most people want a set of 4 or 6 dining chairs rather than 2, and also dark wood furniture isn't popular with a lot of people so it's not valuable. So why did I buy them? Well, I happen to think they're really good looking chairs, they're also really well made and the joints were good so I knew it would be a quick and easy project to turn around, but I also took pity on them a bit because the owner said he'd be taking them to the dump the following week if they didn't sell, so I felt like I just had to save them. I paid £5 for both chairs, and spent about £10 on materials, and it took me about 6 hours of my time fixing them up. Once I add my day rate to the cost of the chairs and the materials, that figure far outweighs what most people would be prepared to pay for them which is a shame, but I am going to try and find a buyer and a new home for them anyway. I can't really keep doing projects at a loss now that I'm running this as a business and that's why I'd like to talk briefly about Patreon. If you enjoy these videos and want to see more projects like this future you can support my work via Patreon and receive other benefits like early access to my videos, exclusive content and your name as a credit at the end of my videos too.
I hope you enjoyed this video, please subscribe to my channel for more weekly woodworking videos and thank you for watching.
Images: