In this video I make some bench seat / window display units as a commission for a local barber shop Courage Noble which is here in Norwich.
Part 2: https://bit.ly/2H8UdFI
In this video I’ll be working on a commission for some good friends who are opening a new independent barber shop called Courage Noble here in Norwich where I live.
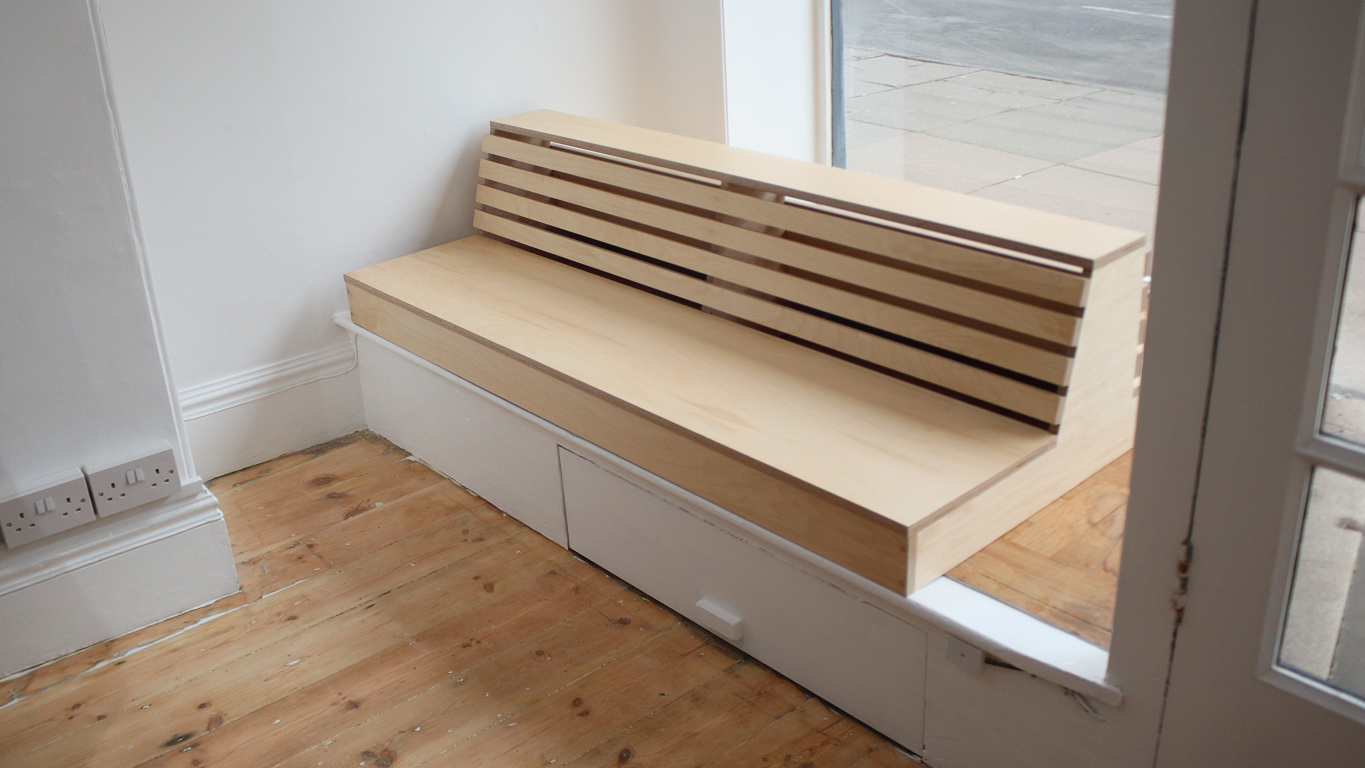
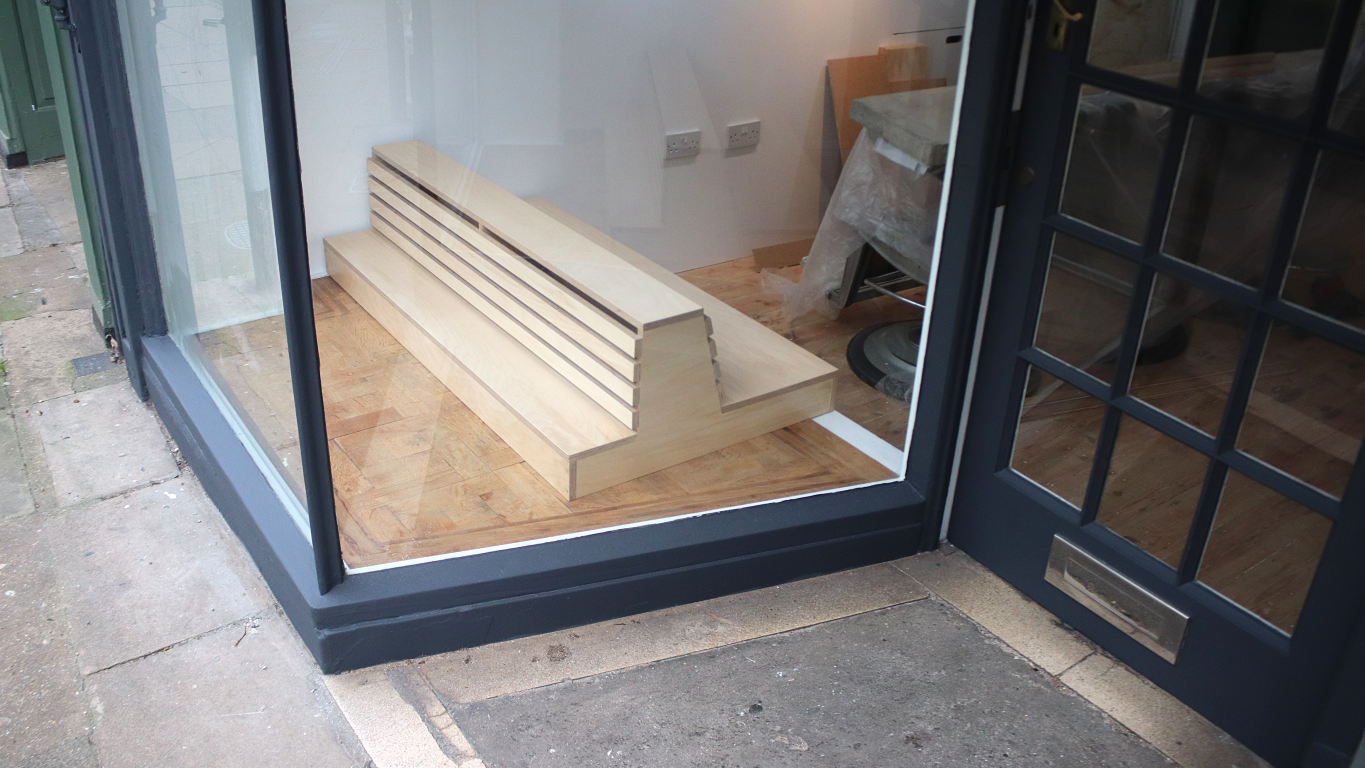
The main requirement was for a benched seating area to be made for the two bay window alcoves at the front of the shop. After taking some measurements and discussing the design options, I did some 3d drawings in SketchUp and here’s what we came up with: These units would provide enough seating for 2 to 3 people on each side of the shop, and as the units would be sitting on top of a raised floor area they needed to be made at quite low so that once installed, they would be at a comfortable sitting height. As the back of the units would be visible from the windows of the shop front, we incorporated some stepped shelving to hold some nice plants. There’d be a small gap at the side of the units so that the shop front would still be accessible – like when the plants need watering, or the windows need cleaning. They wanted the wood to be as light in colour as possible, so we settled on birch ply for materials. And the design for the interior of the rest of the shop was going to include some metallics, so I suggested using brass dowels as an accent for the joinery.
I also made a drawing of the cuts I’d need to make to figure out how much plywood I needed – and I’d need two sheets.
The first job was to collect the plywood at my local timber yard. My plan was to get them to make a cross cut in the sheets so that I could fit them in to my van and to make them easier to carry. But unfortunately their panelsaw wasn’t working, so I had to take them away as full sheets on my roof rack.
Once I got them back to the workshop I had the challenge of getting them down on my own. A full sheet of plywood is always difficult to manoeuvre due to the size and the weight, and birch ply is particularly heavy. Balancing them on my head seemed to work best. Another pair of hands would have been great but there was no one around so I had to just man up and get on with it - but I did ache for a few days after this! Fortunately I have a one of these sheet material carrying handles which made the job of carrying it much easier. This works great and I'll leave a link to it in the description box.
I set up a bit of a workstation in the garden on my sawhorses. Then I contemplated how to lift the plywood on there. And then I could measure up for that first cross cut that I had wanted to get done at the timber yard. A tracksaw would have been ideal for this but I don’t have one of those. But my circular saw, a straight edge and a couple of F clamps did a good job instead. This 36v saw from HiKOKI is so powerful, and the cut quality was impressive especially as this was a cross grain cut. Once I made that cut to both sheets I decided to make one rip cut to the sheets using the circular saw too, to cut out the seat panel, and then with the pieces a more manageable size, I could do the rest at the tablesaw. I set it up in the garden where I had a bit more space to work and it was a nice day in the winter sun.
This was my first time working with birch ply, it's pretty expensive stuff, but it's so much nicer than the far eastern hardwood ply that I normally use, you can see that the face veneers are much much thicker which makes this much better for sanding, no risk of sanding through the veneer. Also there are more layers of veneer than the stuff I normally use - X layers and layers here which makes it more stable and hardwearing and also the grain on the edges looks really cool.
Here I’m cutting the shelves, the front and back of the base, and I set up a little outfeed area using pretty much anything I could find to catch the pieces as they came off the saw. And then I cut out the slats for the backrest. I spent some time to label up all the pieces because one of the units was going to be 100mm longer than the other so I wanted to keep everything organised to save time later.
With all those cuts made I brought everything in to the workshop so that I could start working on the side and centre panels for the units, and I did that by referencing from the pieces I'd already cut. And this is where I made a mistake, which I'll talk about later in the video. If I show you the drawing again, you might be able to figure out for yourselves what I did wrong.
The backrest for the benches would be angled at 15 degrees from 90 so I set my protractor to 75 degrees to mark that up.
With that shape carefully marked up, I made as many of the straight cuts as I could at the tablesaw to get the cleanest, most accurate cuts and I stopped shy of the line because the circular blade obviously cuts further forward on the underside of the sheet.
And I cut the 15 degree angle with my jigsaw, which to my surprise cut super cleanly. I had planned to make this cut at the bandsaw, but I didn't have quite enough throat cutting capacity.
I then spent some time cleaning up the stepped areas where the end of the tablesaw blade cut met the jigsaw cut using a chisel.
This panel would become a template for the other 5 panels that I'd need to cut. So I marked around it with a pencil. Then I cut them out just very roughy cutting on the waste side of the line at the bandsaw.
And then I could clamp each of those rough cut panels on to my template and used a flush cut bit which has a bearing to ride along the template.
This worked really well and gave me 6 identically shaped panels.
I then clamped all of the panels together flush, and put them in my vise so that I could then work on the corners with a chisel, because the router bit left a circular cut.
Before moving on to assembly there was one more cut to make, and that was to cut the back edge of the seat panel to 15 degrees to match the backrest. So I set my blade to 75 degrees and made the cut.
Now it was time for assembly, and this is where I realised the mistake I mentioned earlier on.
When I marked up the side panels earlier in the video I'd forgotten to account for the front and back base panels, which meant that I needed to trim 18mm from the length at both ends for each of them. Fortunately it was an easy fix, I offered up a small piece of the plywood, scribed a line and then I could line that up with my mitresaw blade to trim off the excess.
Assembly for this one was quite straight forward, just glued and clamped up butt joints and I used my parallel clamps.
I started with the two end panels, making sure that all the edges were nice and flush and then I found the centre so that I could glue and clamp the panel in the middle. I used a small square to check it was plumb. And then I wiped away excess glue with a damp cloth
Then I could glue on the seat panel. Here you can see that 15 degree angle meeting the backrest. And I used F clamps to hold them in place.
I then did the same with the two shelves. I couldn't get an F clamp in the centre though so I applied some heavy weights to the top shelf instead.
Images: