In this video, my brother Alan visits my workshop bringing with him some scraps of sheet materials found in his shed - some pieces of various sizes of MDF, ply and chipboard.
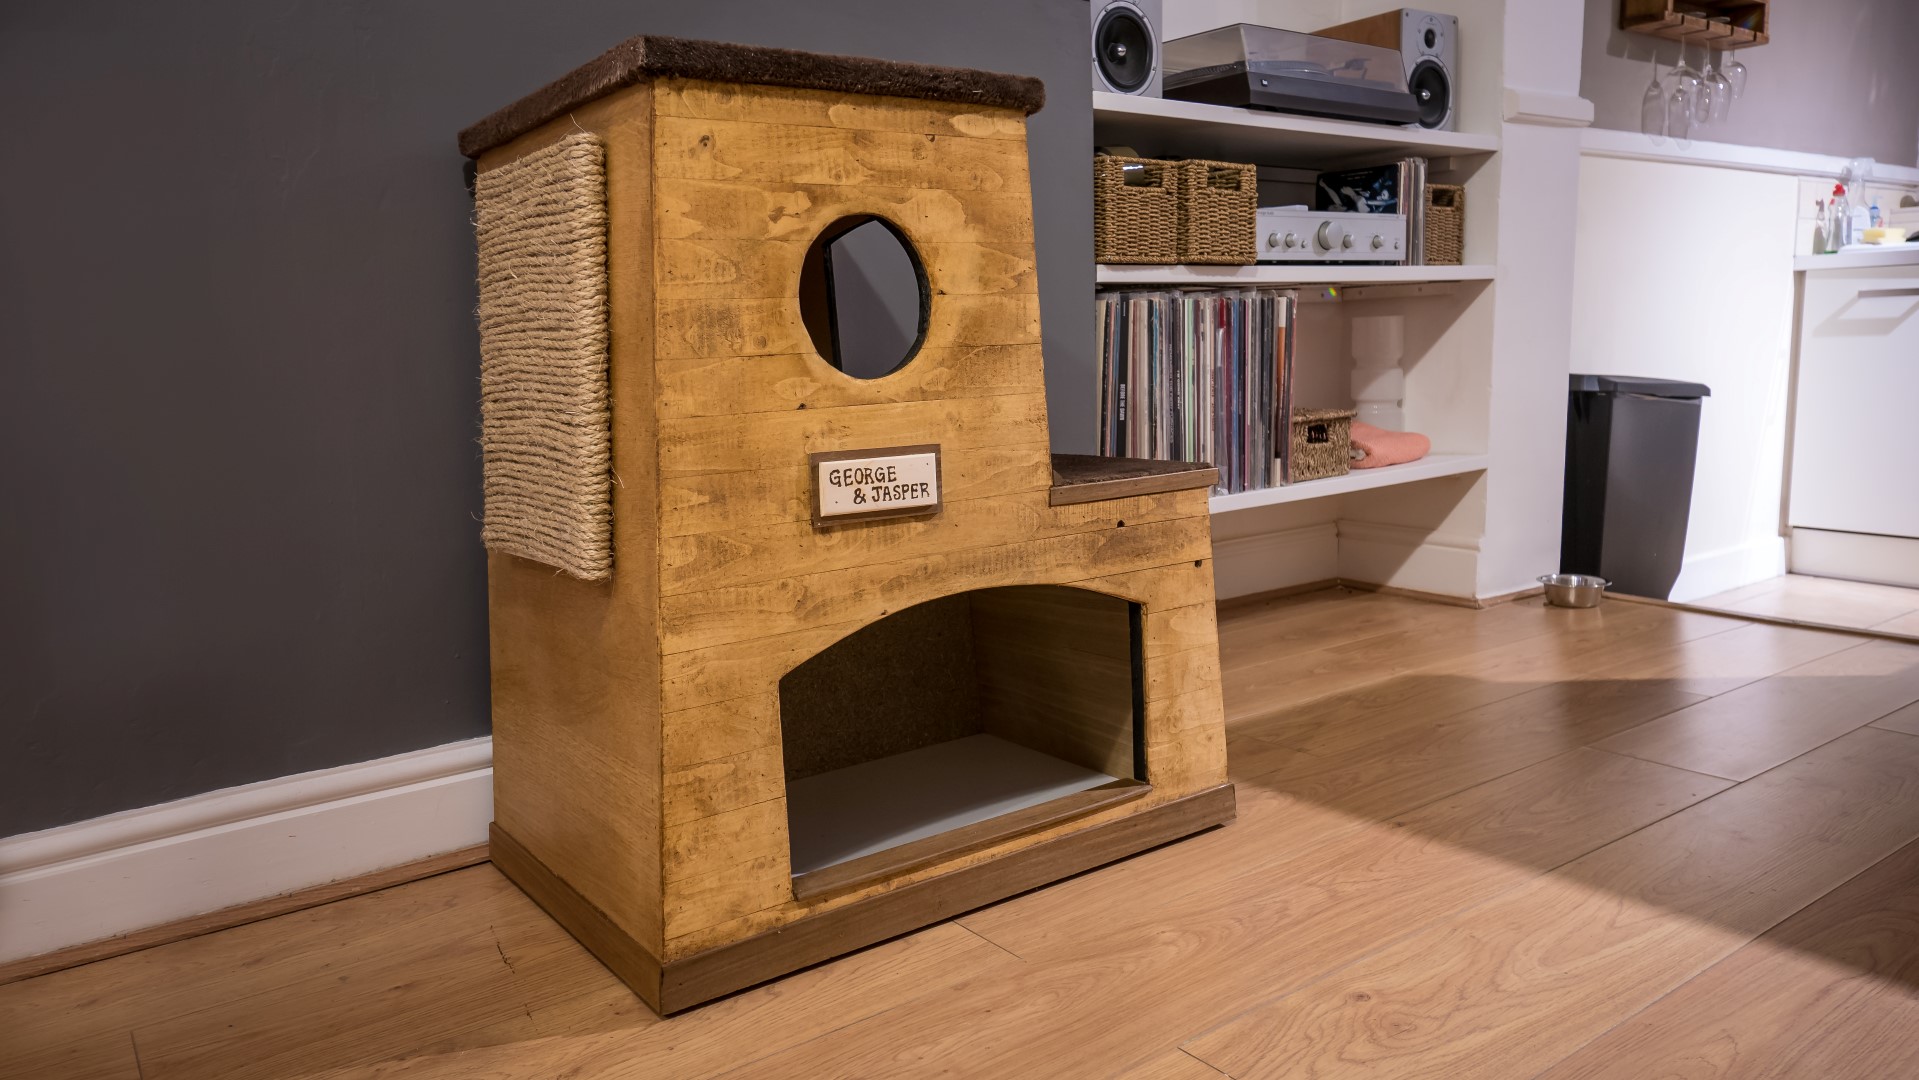
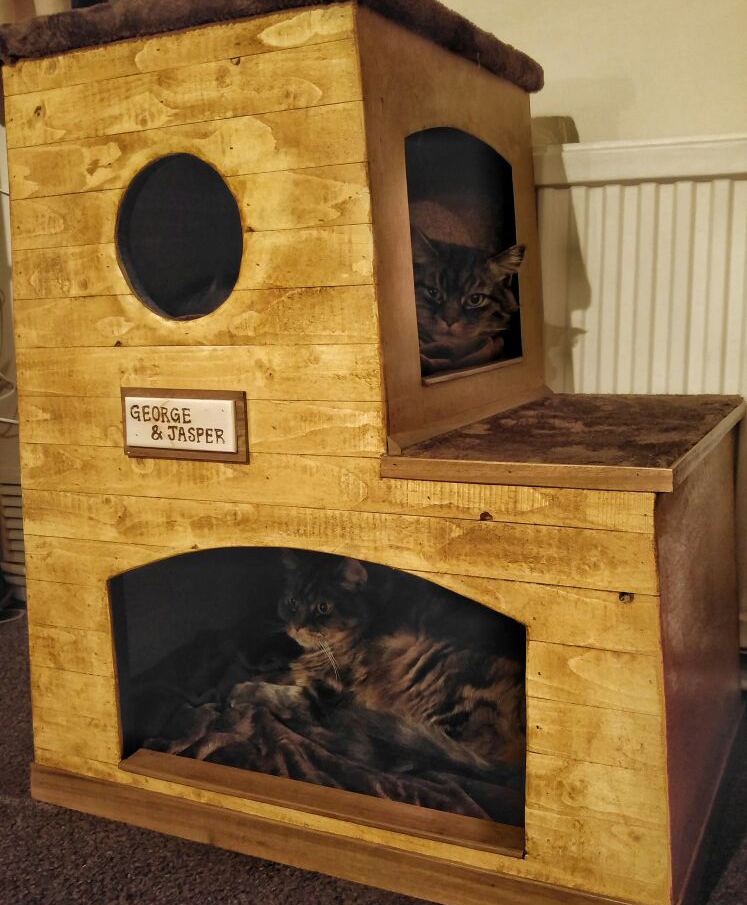
Alan wanted a cat house for his two cats George & Jasper, and he already had an idea for the design he wanted, so we first did a quick drawing in SketchUp to figure out how to make best use of the materials that we had to create that design.
The biggest piece we had was a piece of 18mm chipboard, so we cut that in half and used the two pieces to create the front and back panels of the house. We added a taper to each side of the panels. This wasn't in Alan's original design but I thought it would make for a more interesting look. We marked up where the step would be too, and made all the cuts with the circular saw, using a jigsaw to finish off the cuts where the circular blade would not reach.
Next we needed to cut the side panels to size, and we needed to cut an angle on the ends of each panel to match the angle of the taper on the front and back panels. We did that by measuring the angle with a bevel guage and tilting the tablesaw blade to match the angle.
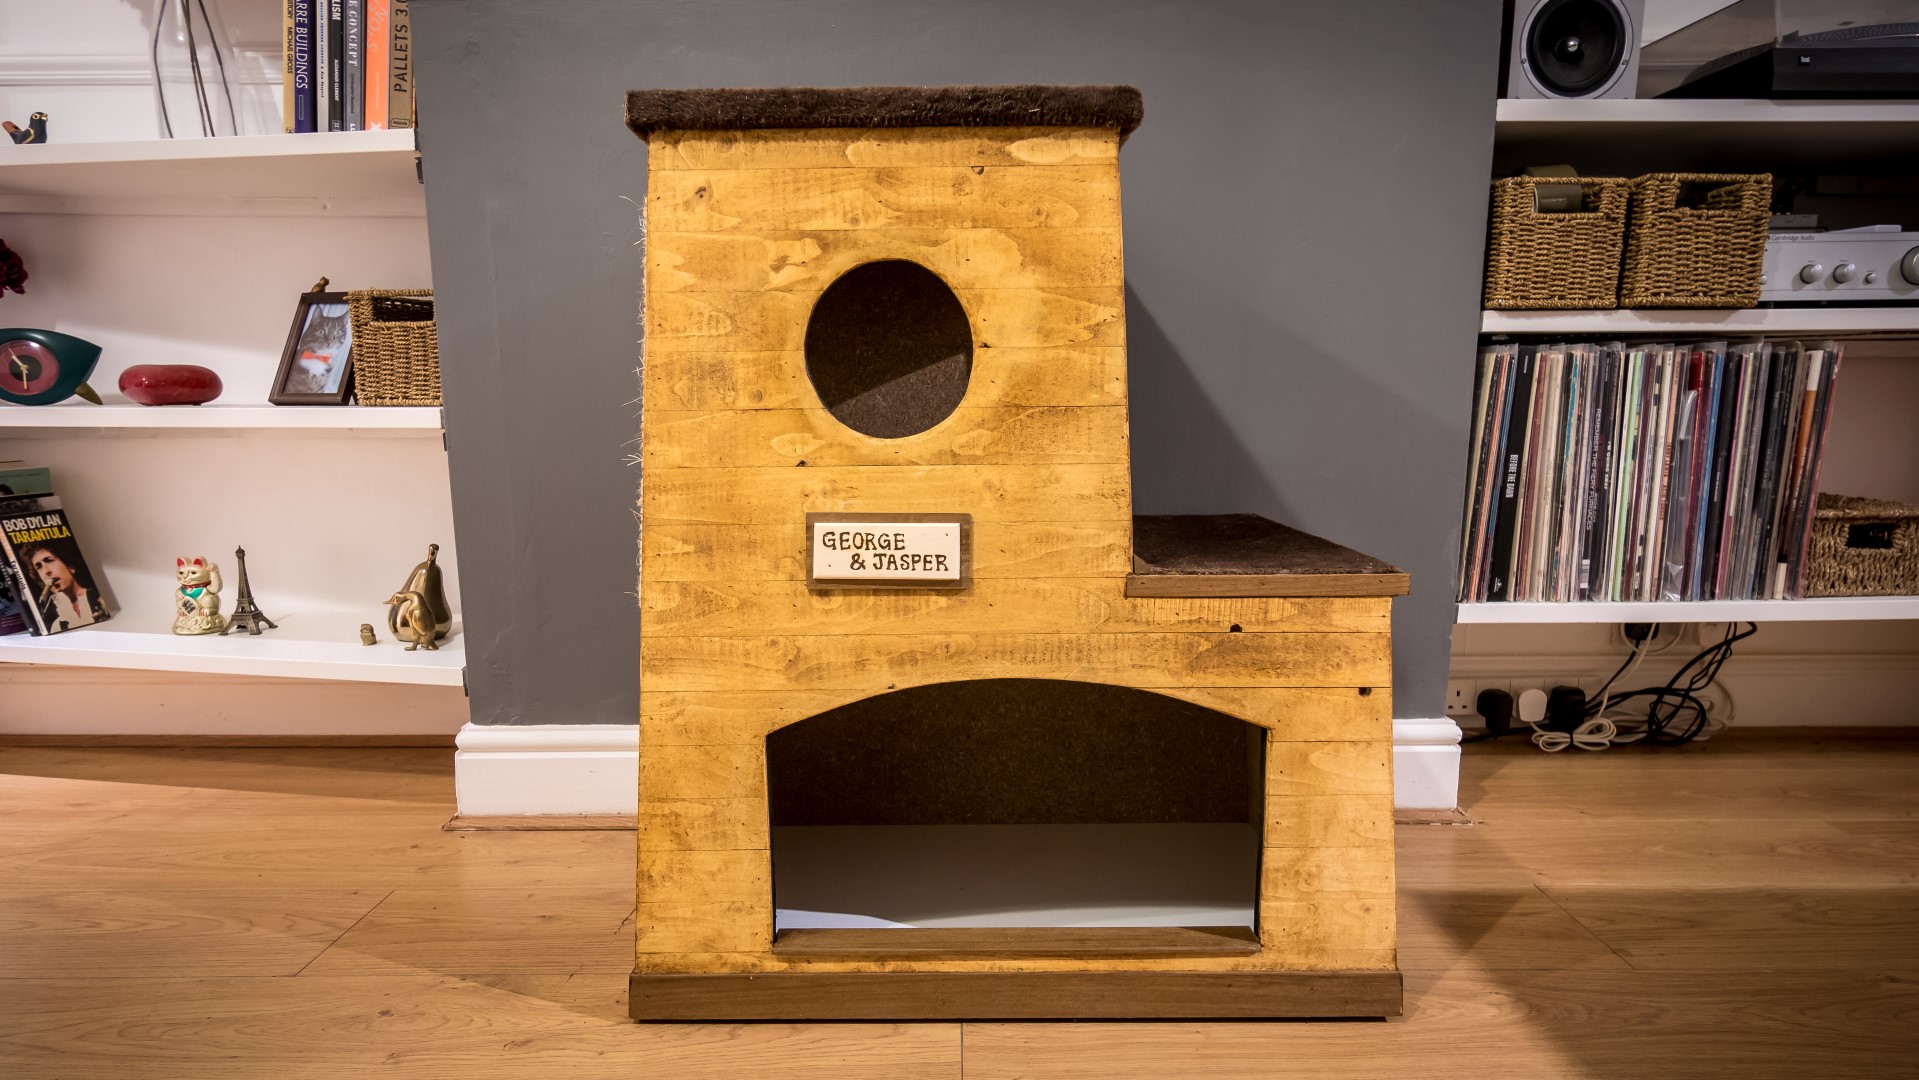
Next we cut the central shelf out of a piece of MDF. The shelf was supported by the top and back panels on one side, but not on the other, so we marked up where the shelf would be with a pencil, and added cleats to the inside to support it using glue and screws.
Then all of the panels were assembled using glue and brad nails.
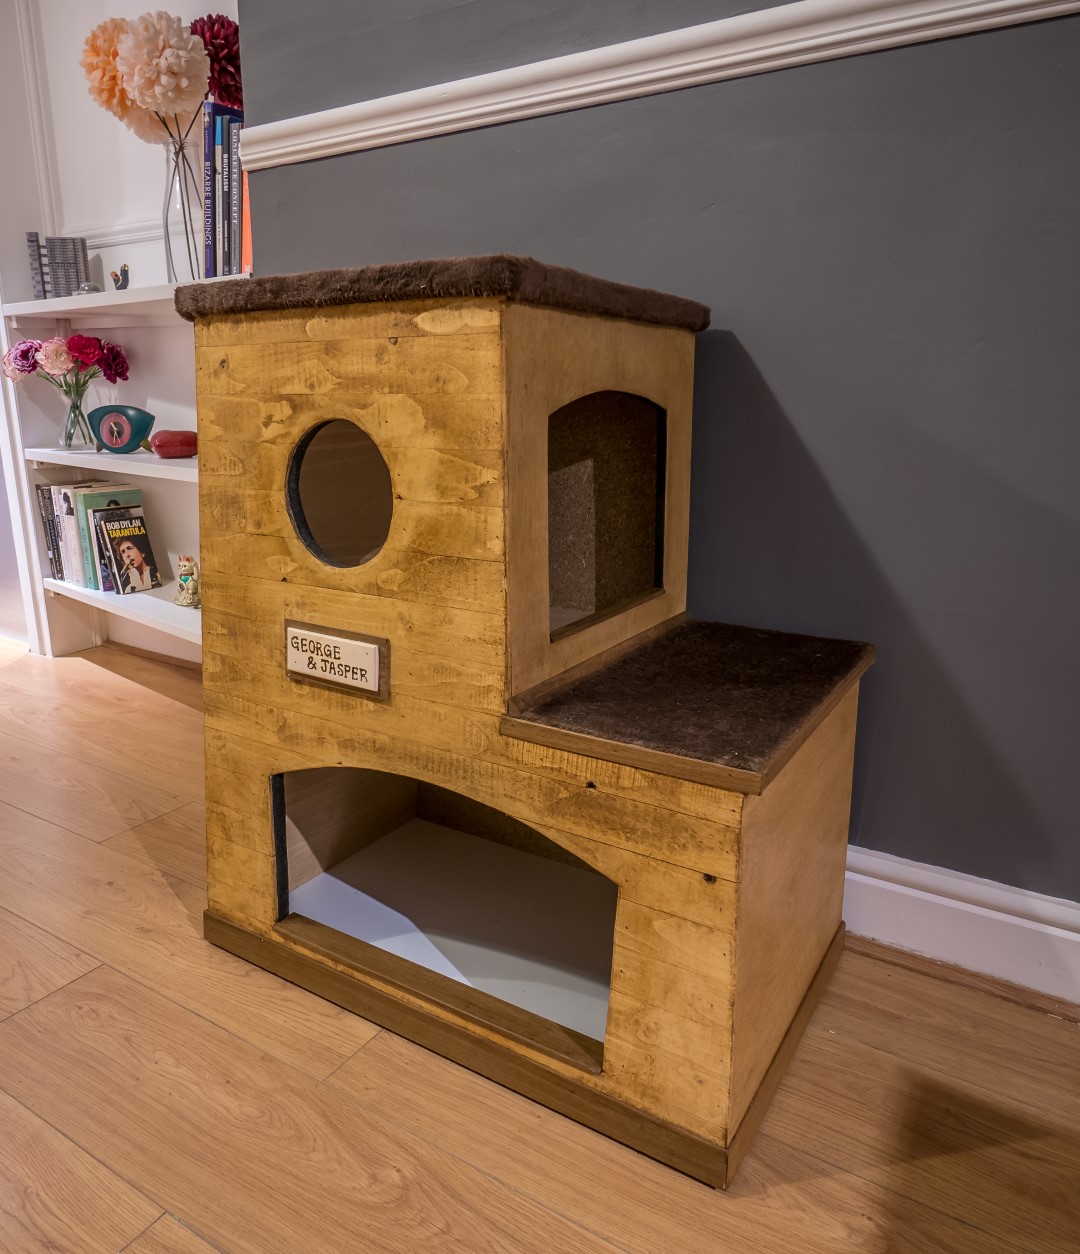
Alan wanted a scratching pad on the largest side panel, so we wrapped sisal rope around a piece of plywood and used hot glue to secure it. This would later be attached to the side panel with screws from the inside of the house.
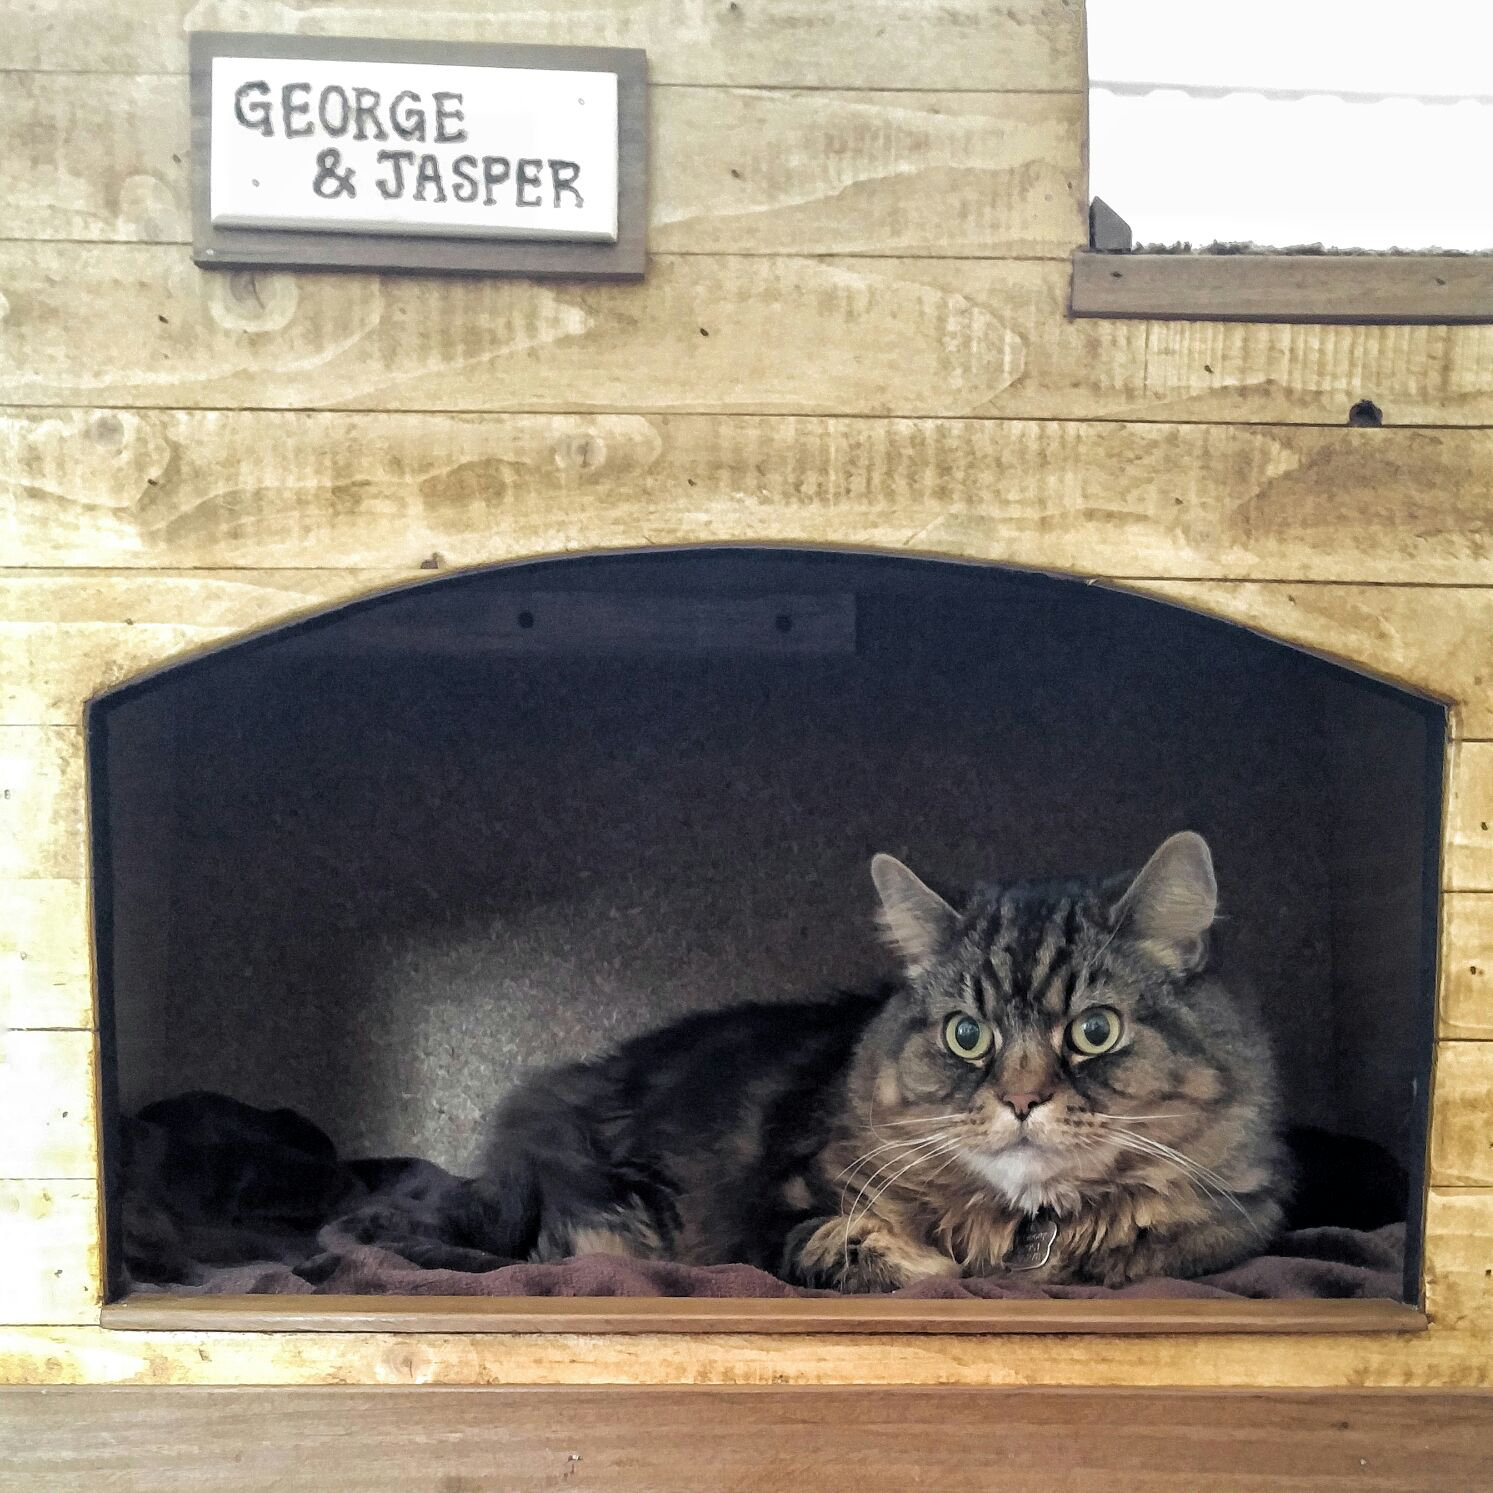
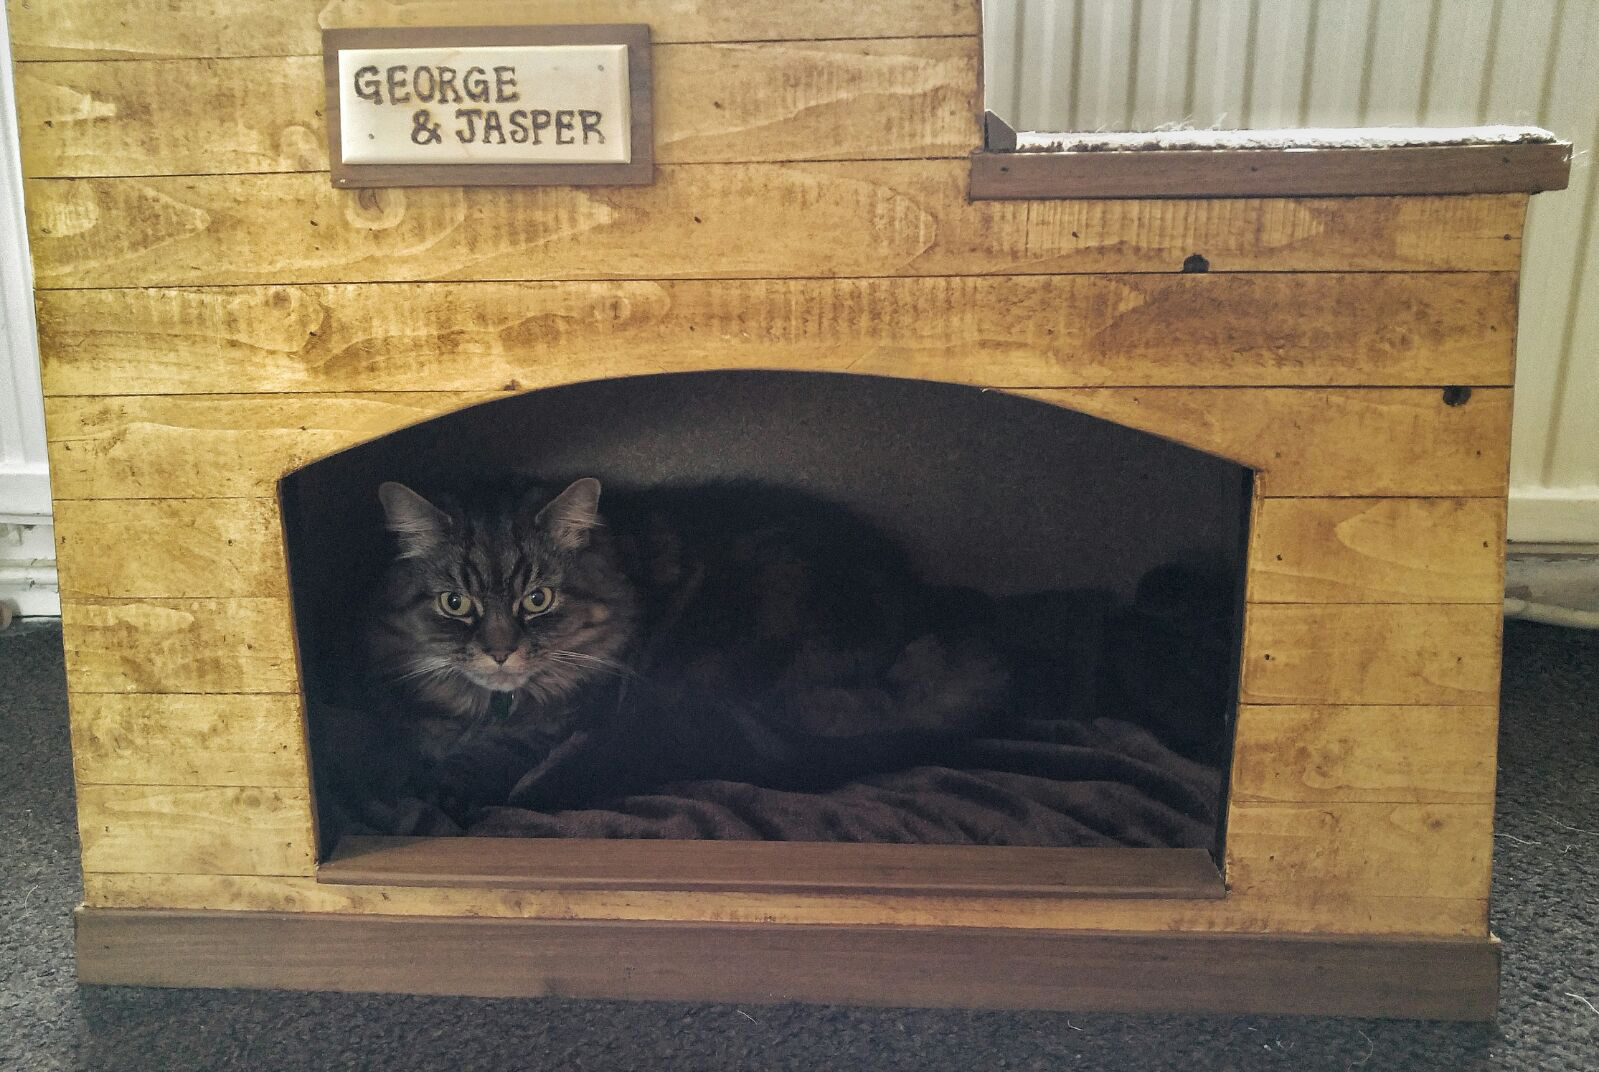
Next we cut entrance holes/windows in to the front and side panels using a jigsaw.
To hide the chipboard appearance of the front panel, I re-sawed some strips of spruce to about 5mm thick on the bandsaw, and then used these pieces as cladding - glued and brad nails attached them to the front panel. It would have made much more sense to cut the entrance holes after the cladding had been added - but nevermind!
Next we cut the edges of the cladding pieces to the shape of the front panel using the circular saw and a straight edge.
Alan mounted some fur (from a fur throw that he'd purchased) to the step and the top panel with spray glue. The glue wasn't particularly effective on the material, so I ended up adding trim pieces to secure it using some scraps of sapele. The top panel didn't need any trim pieces to secure it, as it was nailed directly to the top with the material overhanging the panel and "tucked in".
Next I sanded the whole house with the orbital sander and did some hand sanding around the entrance holes to soften the sharp edges.
I used a piece of melamine for the bottom panel, this was cut to size at the tablesaw and screwed on to the bottom.
I added some pieces of sapele trim to make doorsteps to the entrances, and a skirting board at the bottom just for aesthetics.
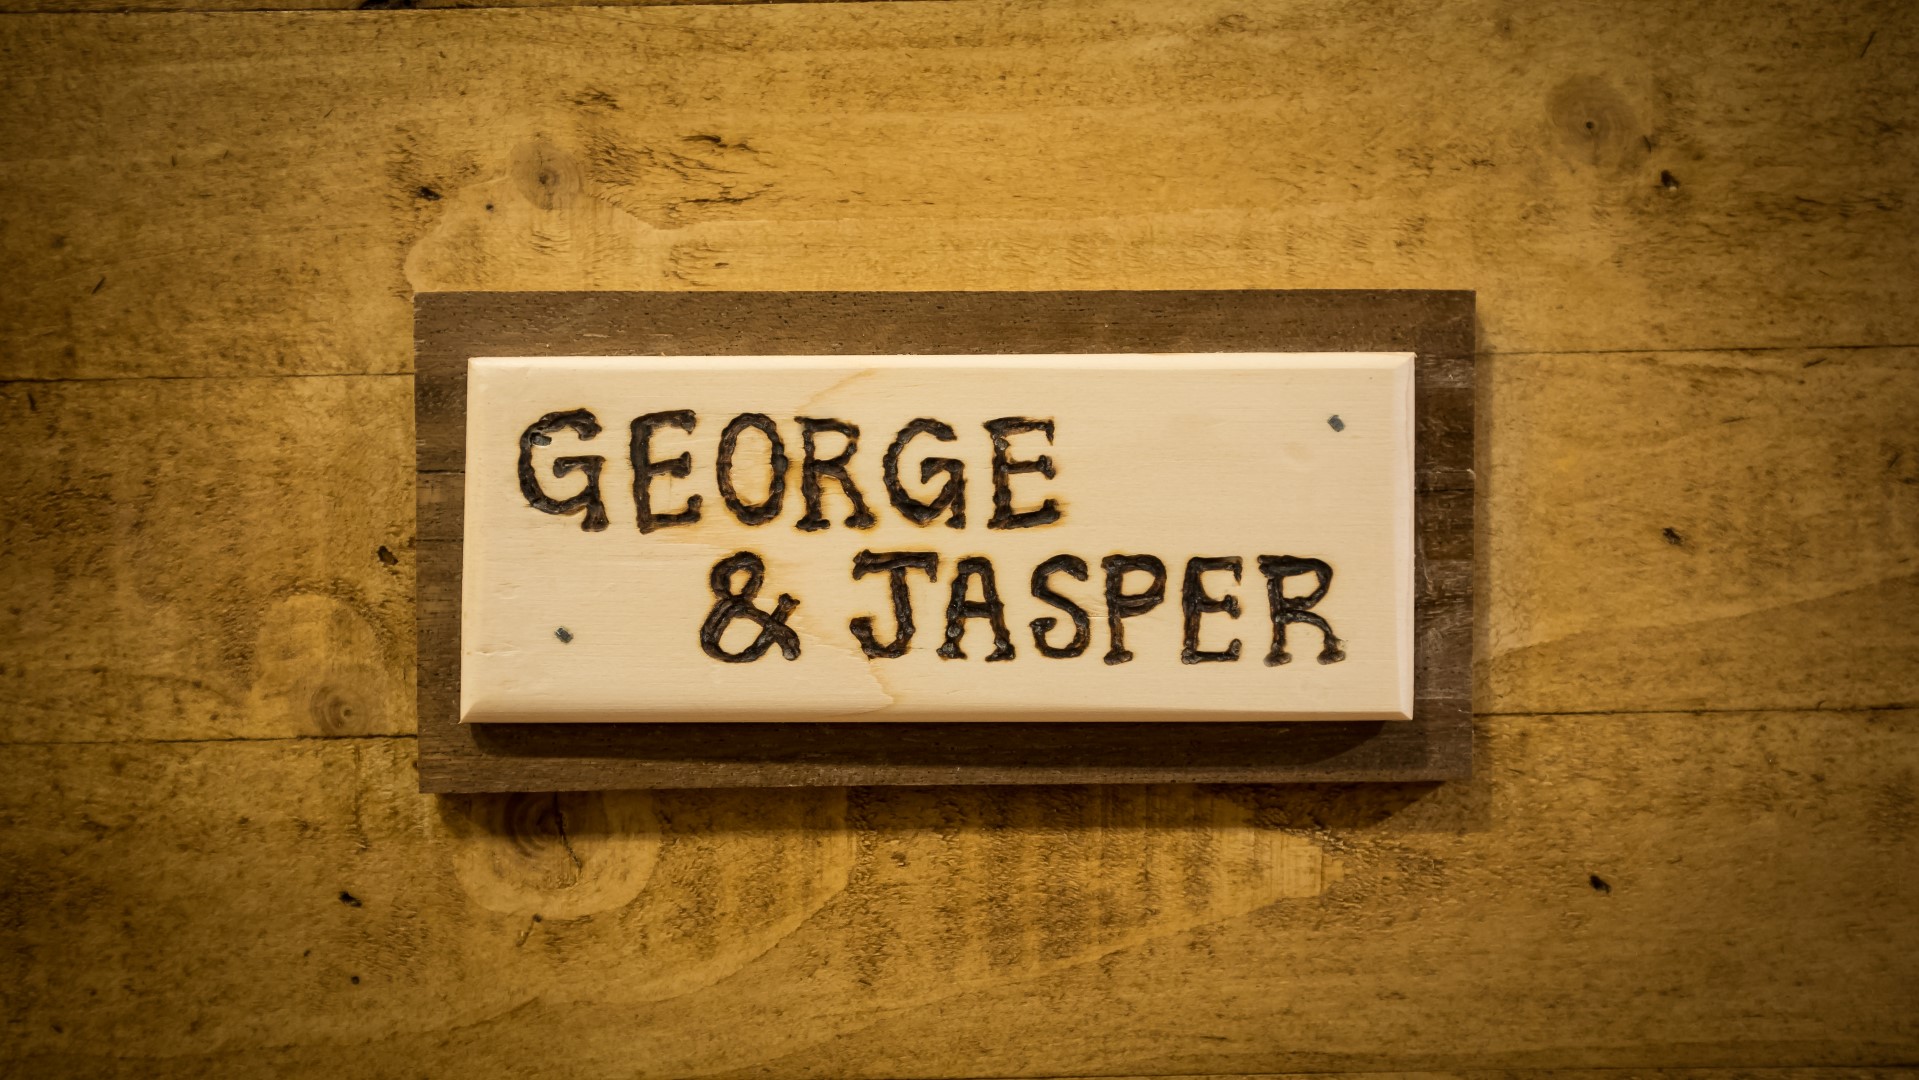
Finally, I made a sign saying "George & Jasper" using a wood burning iron on a piece of spruce. This was mounted to a piece of sapele to create a border.
The cat house was a really fun project, and it was very inexpensive to make as basically everything was scrap material (apart from the sisal rope and fur throw)..
George & Jasper love their new home as you can see in the photos!
Images: