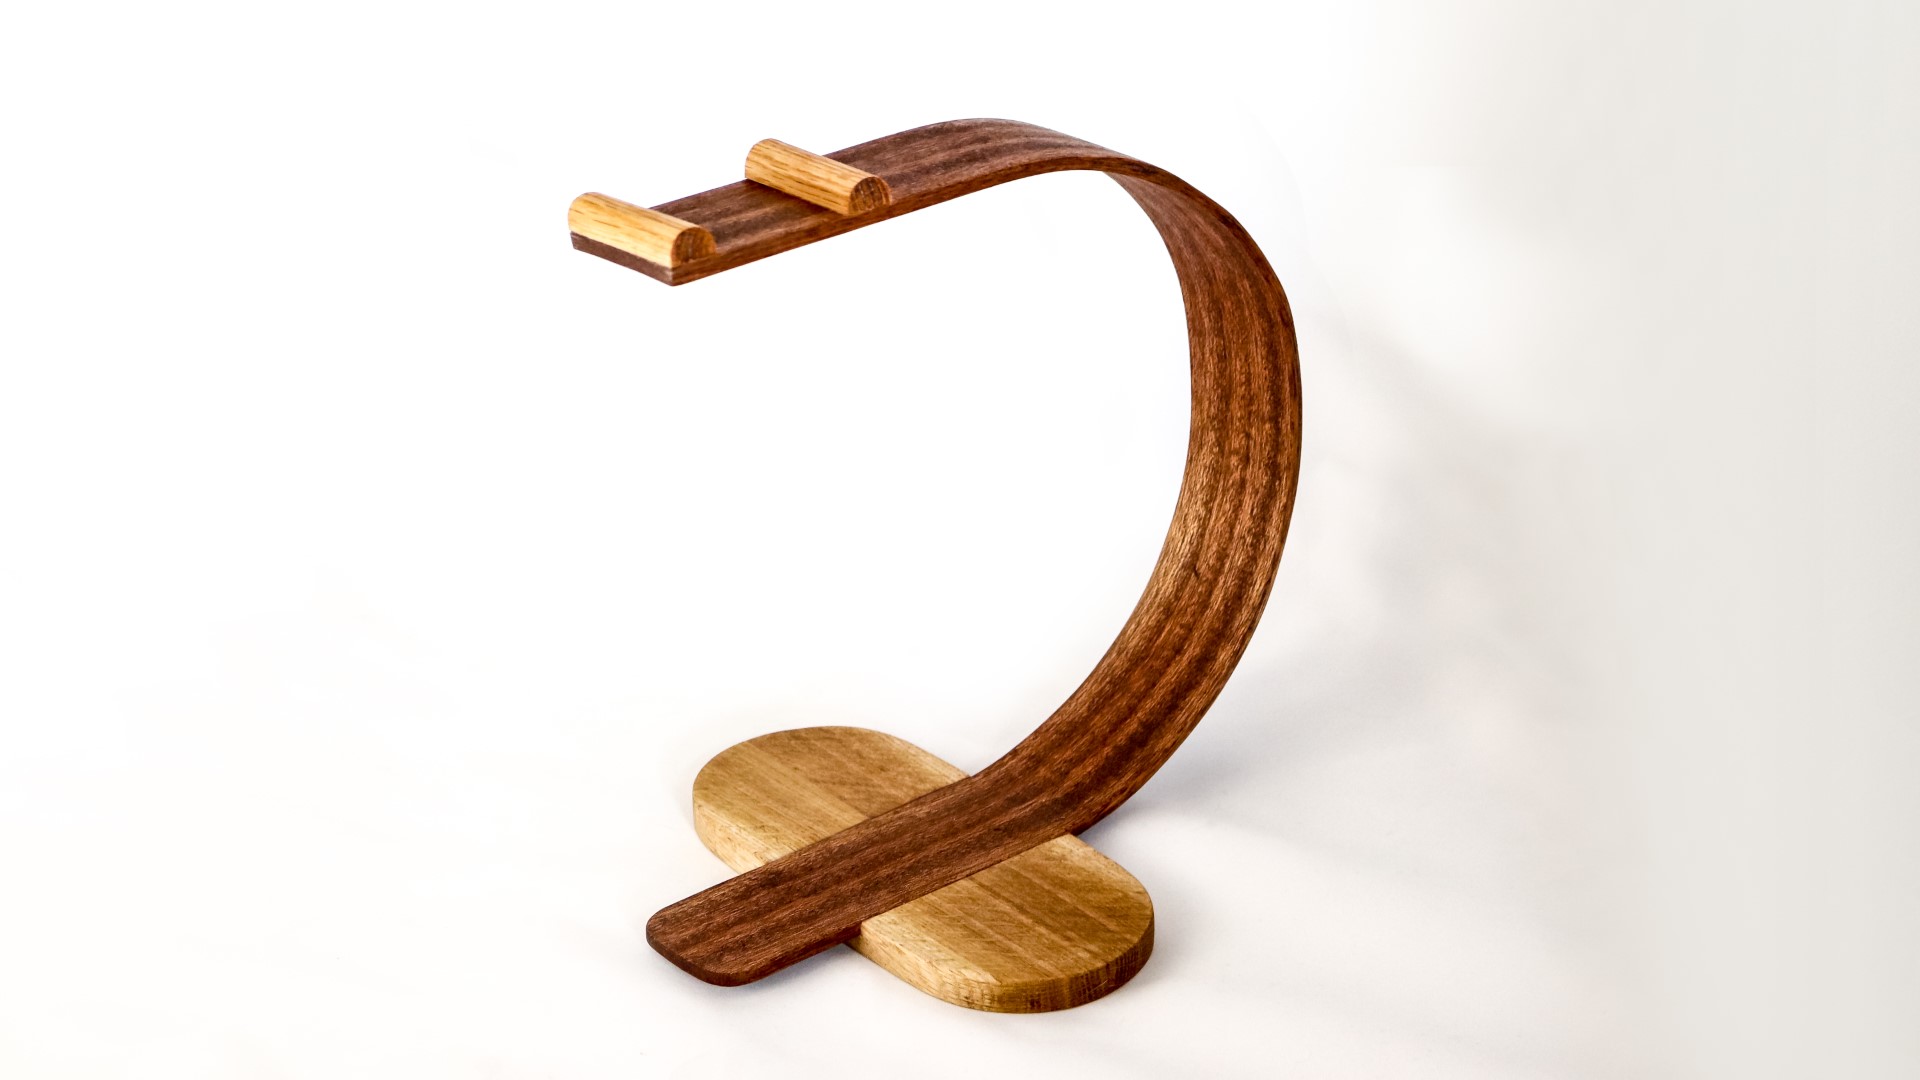
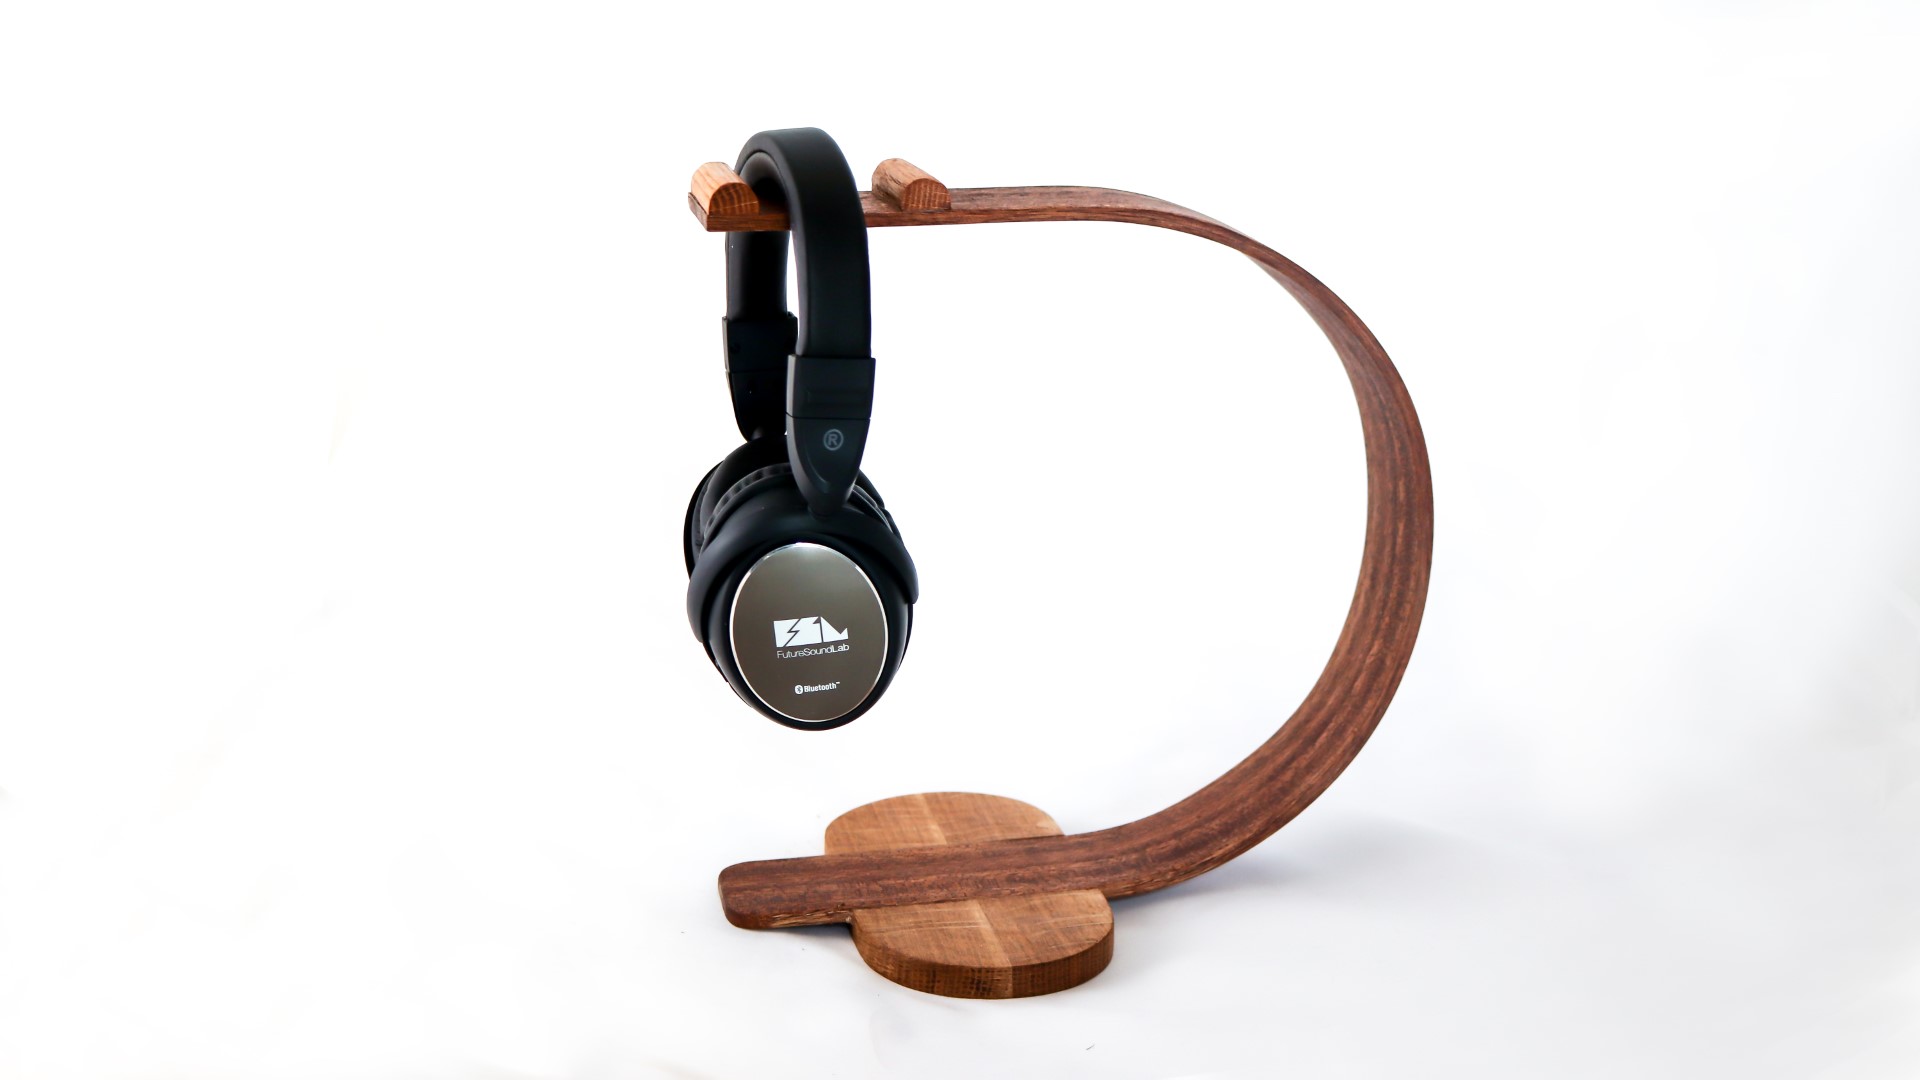
In this video I make a headphone stand using a bent lamination technique.
Video for the beam compass: http://bit.ly/2Ca8zl6
In this video I'm going to be making a headphone stand and this is going to be my first attempt at doing a bent lamination. This headphone stand is a commission for one of my viewers who asked me to make one.
I'd start by making a clamping template for the curved shape that I wanted to create.
I hot glued two scrap square pieces of 18mm plywood together to give me a thicker workpiece.
I found the centre of the board and then used my beam compass which I made in a previous project video - link to that in the description box below - to draw an arc shape
I then used the speed square to mark up straight lines from the arc to the end of the board to give me a U shape for the bent lamination.
Then I marked up some 45 degree angles to cut away at the corners and also on the inside of the U shape, these would give me places to add clamps which you'll see later on, and then I shaded all the waste material so I knew which areas would need to be cut away and I made those cuts at the bandsaw. These cuts didn't really need to be accurate.
Here's what I had so far, and the next step would be to cut the U shape and this cut did need to be accurate so I took my time making the cut as close to the line as possible.
Here's what I had so far.
I added a few screws just to add some extra re-enforcement to the clamping template to make sure that they were held together securely.
Then I went looking for some wood to use for the bent lamination and I decided to use some of this hardwood - this was the stuff I salvaged from a local church refurbishment which I talked about in my first vlog video. I thought this was mahogany at first, but now I'm not so sure.
I set the fence of my tablesaw so that I could cut very thin strips of the wood, I was aiming for between 1 and 2mm in thickness.
I then set up a sacrificial fence using a block of wood and some hot glue which would allow me to cut multiple consistent thickness pieces. This is a trick I've used a lot in the past and it works really well and is much safer than cutting thin pieces between the real tablesaw fence and the blade.
I made all the cuts in two passes, raising the blade in between each cut to take it easier on the saw because this wood is quite dense.
And here you can see the pieces I was left with.
I decided I would use 5 pieces stacked together to laminate the U shape, and using my calipers I found that those measured 5 and a half mm.
And I'd need to increase the kerf cut of my template in order to accommodate that thickness.
So first I trimmed off a couple of mm from each of the straight edges of the inside part of the template at the tablesaw.
I could then check that I could fit 5 pieces inside, on both sides, and they fitted nice and snugly which was perfect.
And then I needed to make the adjustment to the curved part of the template, so I set my compass to the width of the gap at the straight parts, and then I could scribe a new line for the curve with the point of the compass referencing the cut line. I could then cut that away at the bandsaw.
And then I had a nice equally spaced gap all the way around the U shape.
I made one final adjustment to the clamping template, and that was to add some small spacers to the bottom - and I did that just to make it easier to centre the lamination pieces in the template.
I could then test that the pieces would bend enough to sit inside the mould, and it looked like it would work fine.
So then I added glue to one side of each of the thin pieces, and I used a mini roller to apply it evenly. Whenever I use a roller for glue ups I make sure to wash the glue off as soon as I can after using it, so that I can then re-use it in again in future glue ups.
Then I could place all the pieces together, and push them inside the template.
I made sure it was properly seated and then used F clamps to tighten everything together, starting at the middle of the curve of the U shape and then working back on both sides.
I left it to dry overnight and then removed the clamps to find that the glue up had worked pretty well and the workpiece was holding it's shape nicely.
The only problem I could see was that there were some small gaps around the edges, so I mixed up some sawdust and epoxy to fill the gaps. In hindsight I probably would have used three layers of 18mm ply to make the template rather than two, and that would have resulted in less or possibly even no gaps.
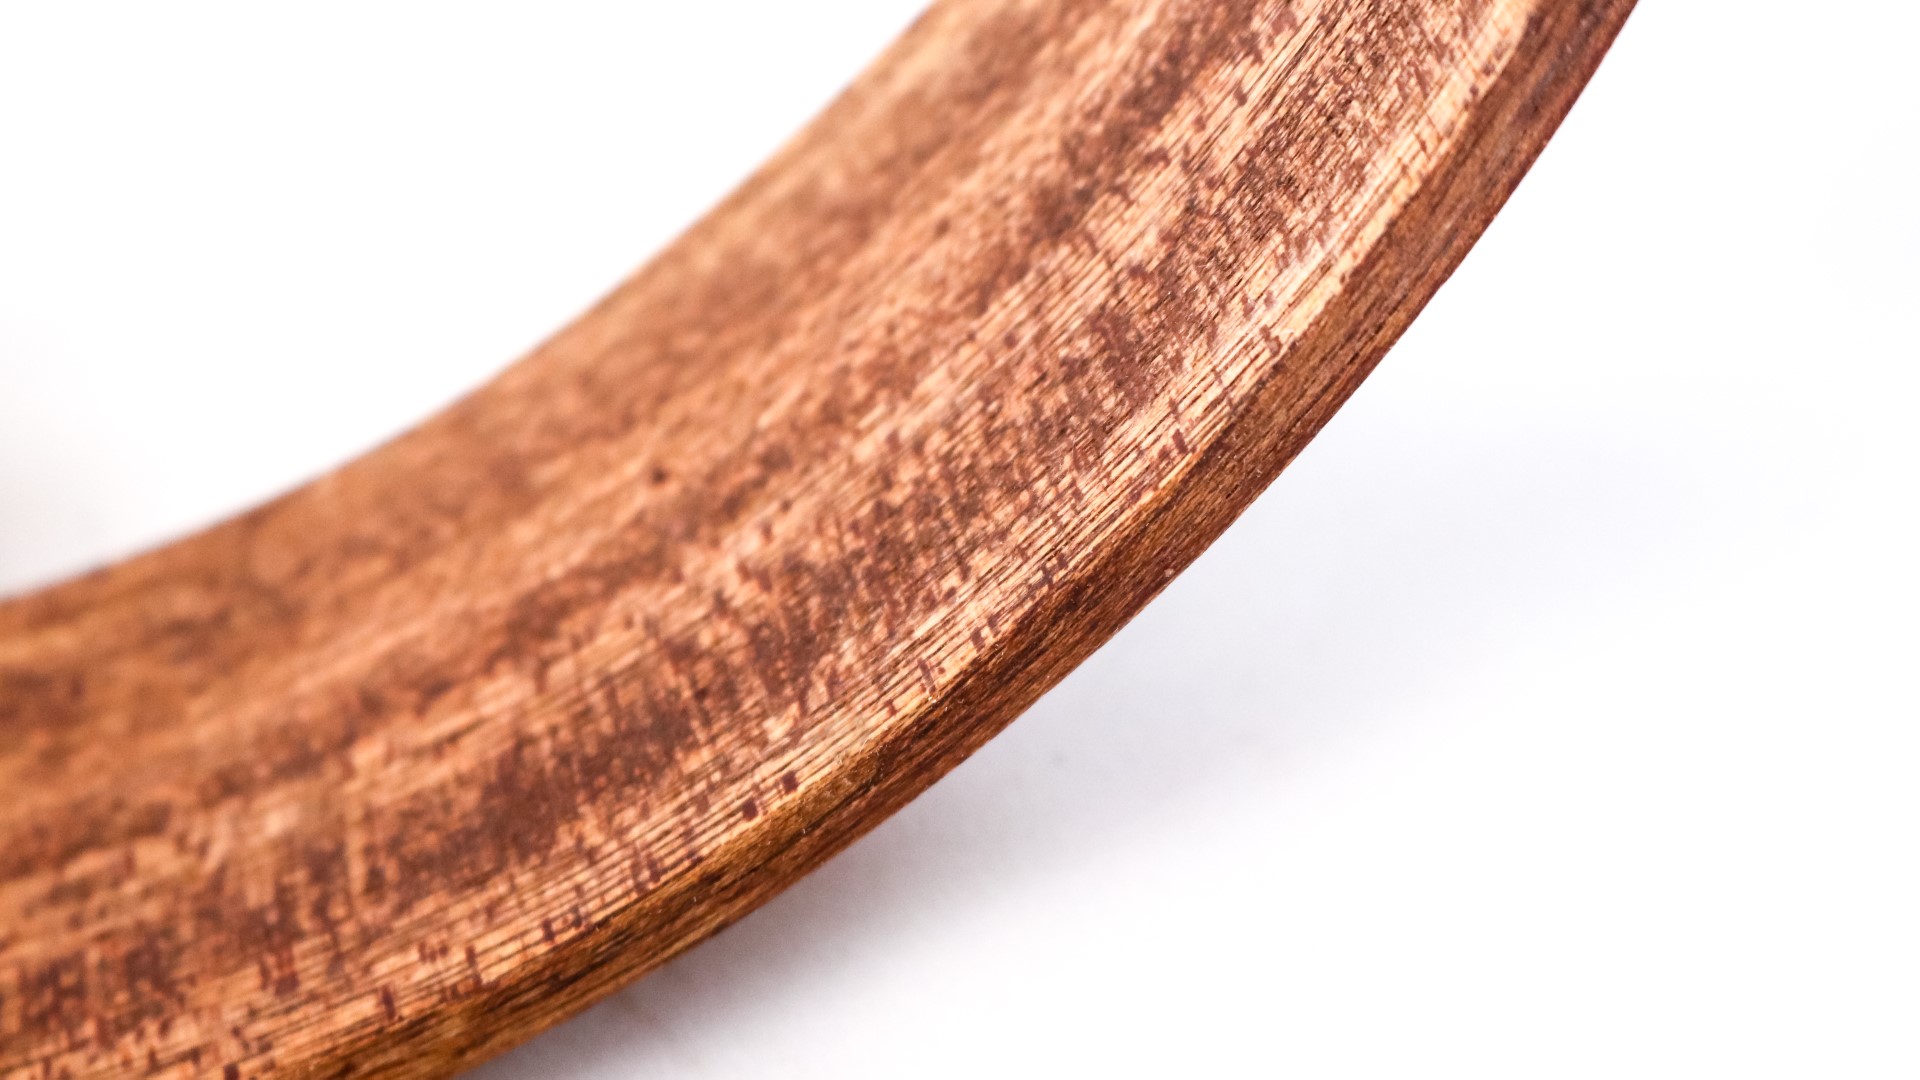
Next I could clean up the edges of the lamination and I used a spokeshave for that.
The edges looked great, they looked like one solid piece.
I could also scrape off any glue that had got on to the inside using a knife blade.
I used a speed square to mark up where I wanted to trim away the excess at the ends, and made the cut at the bandsaw.
I did some hand sanding to clean it up.
I also wiped on some white spirit to see how it might look with finish applied, and the colour was much lighter than I'd hoped so I decided to add a stain to it to darken it, so I mixed up some walnut stain with a bit of white spirit and applied it.
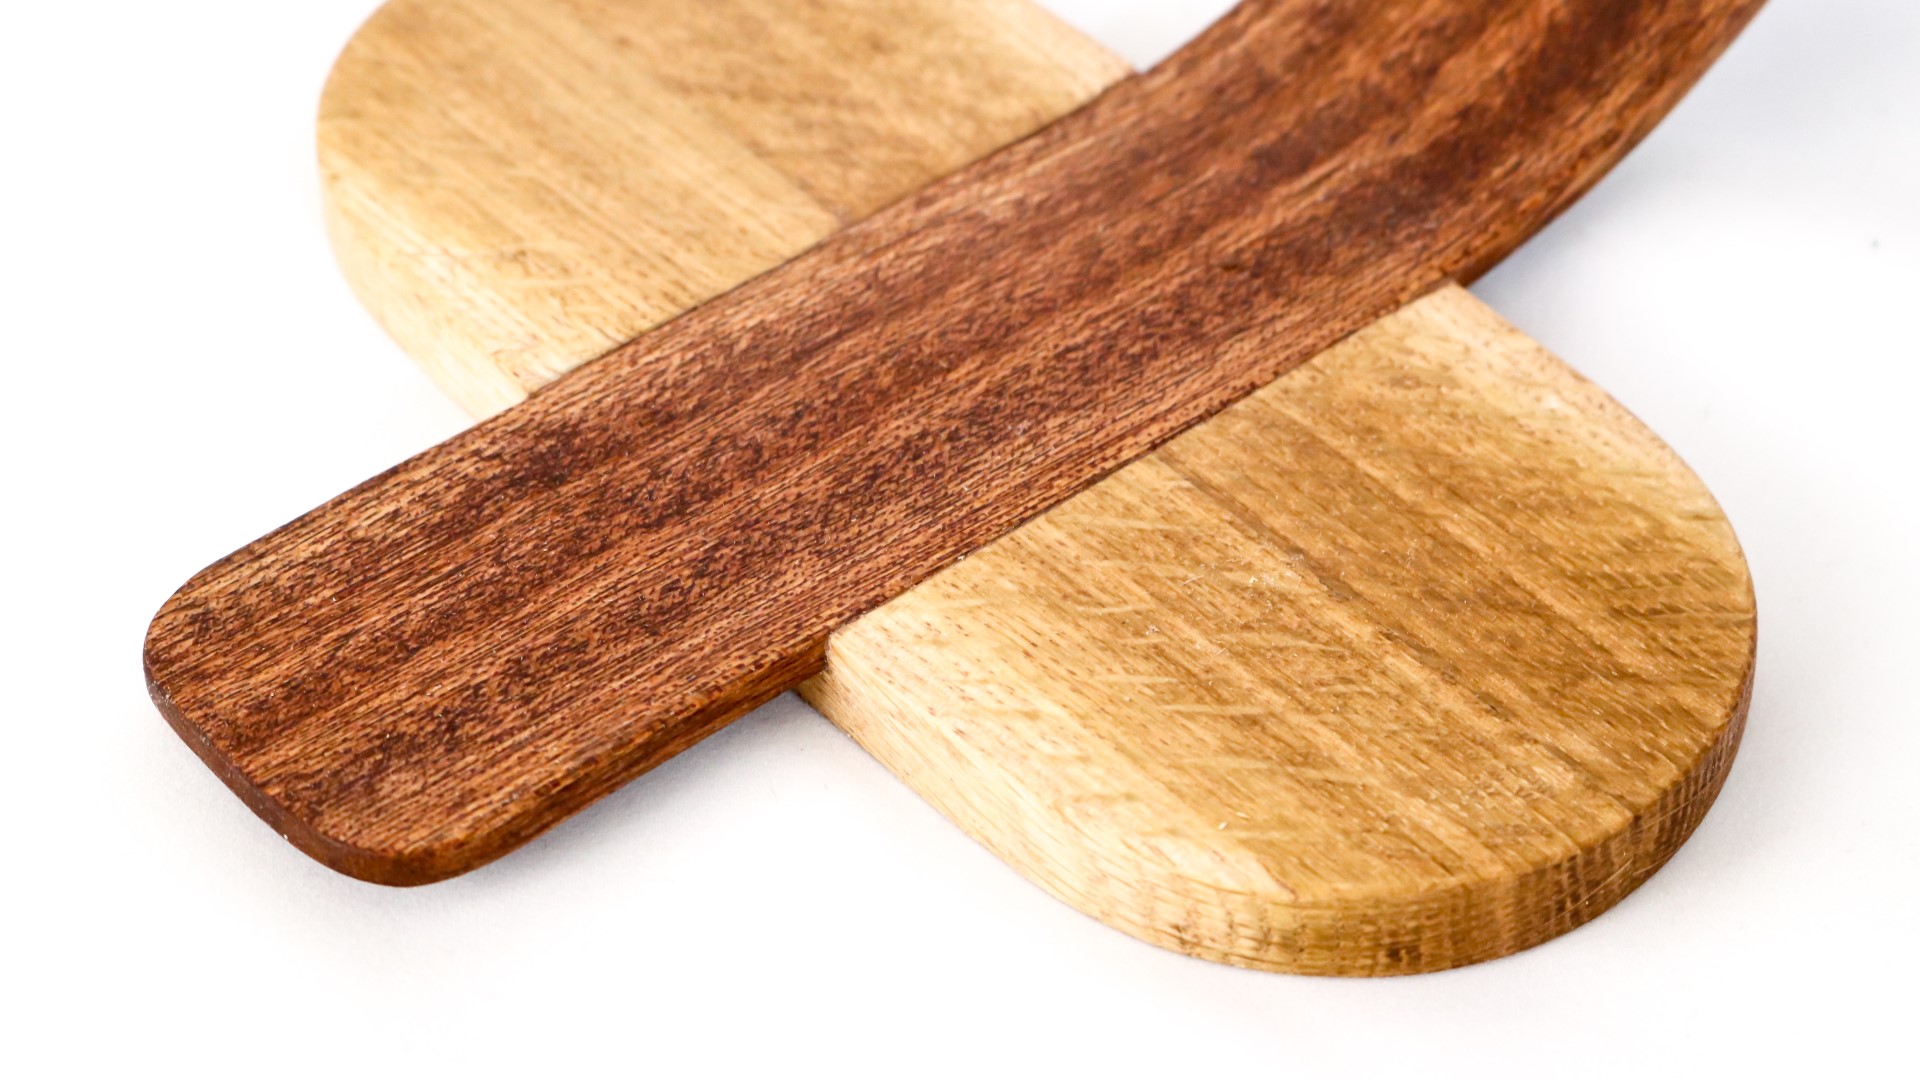
To make a base for the laminated part, I pulled out some offcuts of oak.
I glued the pieces together to give me more surface area.
I marked up an arc at each end as I thought the curves would look better alongside the curves of the laminated part.
I cut those at the bandsaw and then refined those curves at the disc sander before sanding the faces too.
I wanted to cut a housing joint in the base, so I set my tablesaw blade to the same thickness of the U shaped piece, and then marked up the width of it on to the oak base after centering them together, and then I made multiple passes at the tablesaw to form the joint.
I used a chisel to clean up the joint and then did a test fit and it was nice fit.
I mixed up some epoxy for this because I wanted a quick set time so that I could get the project finished quicker.
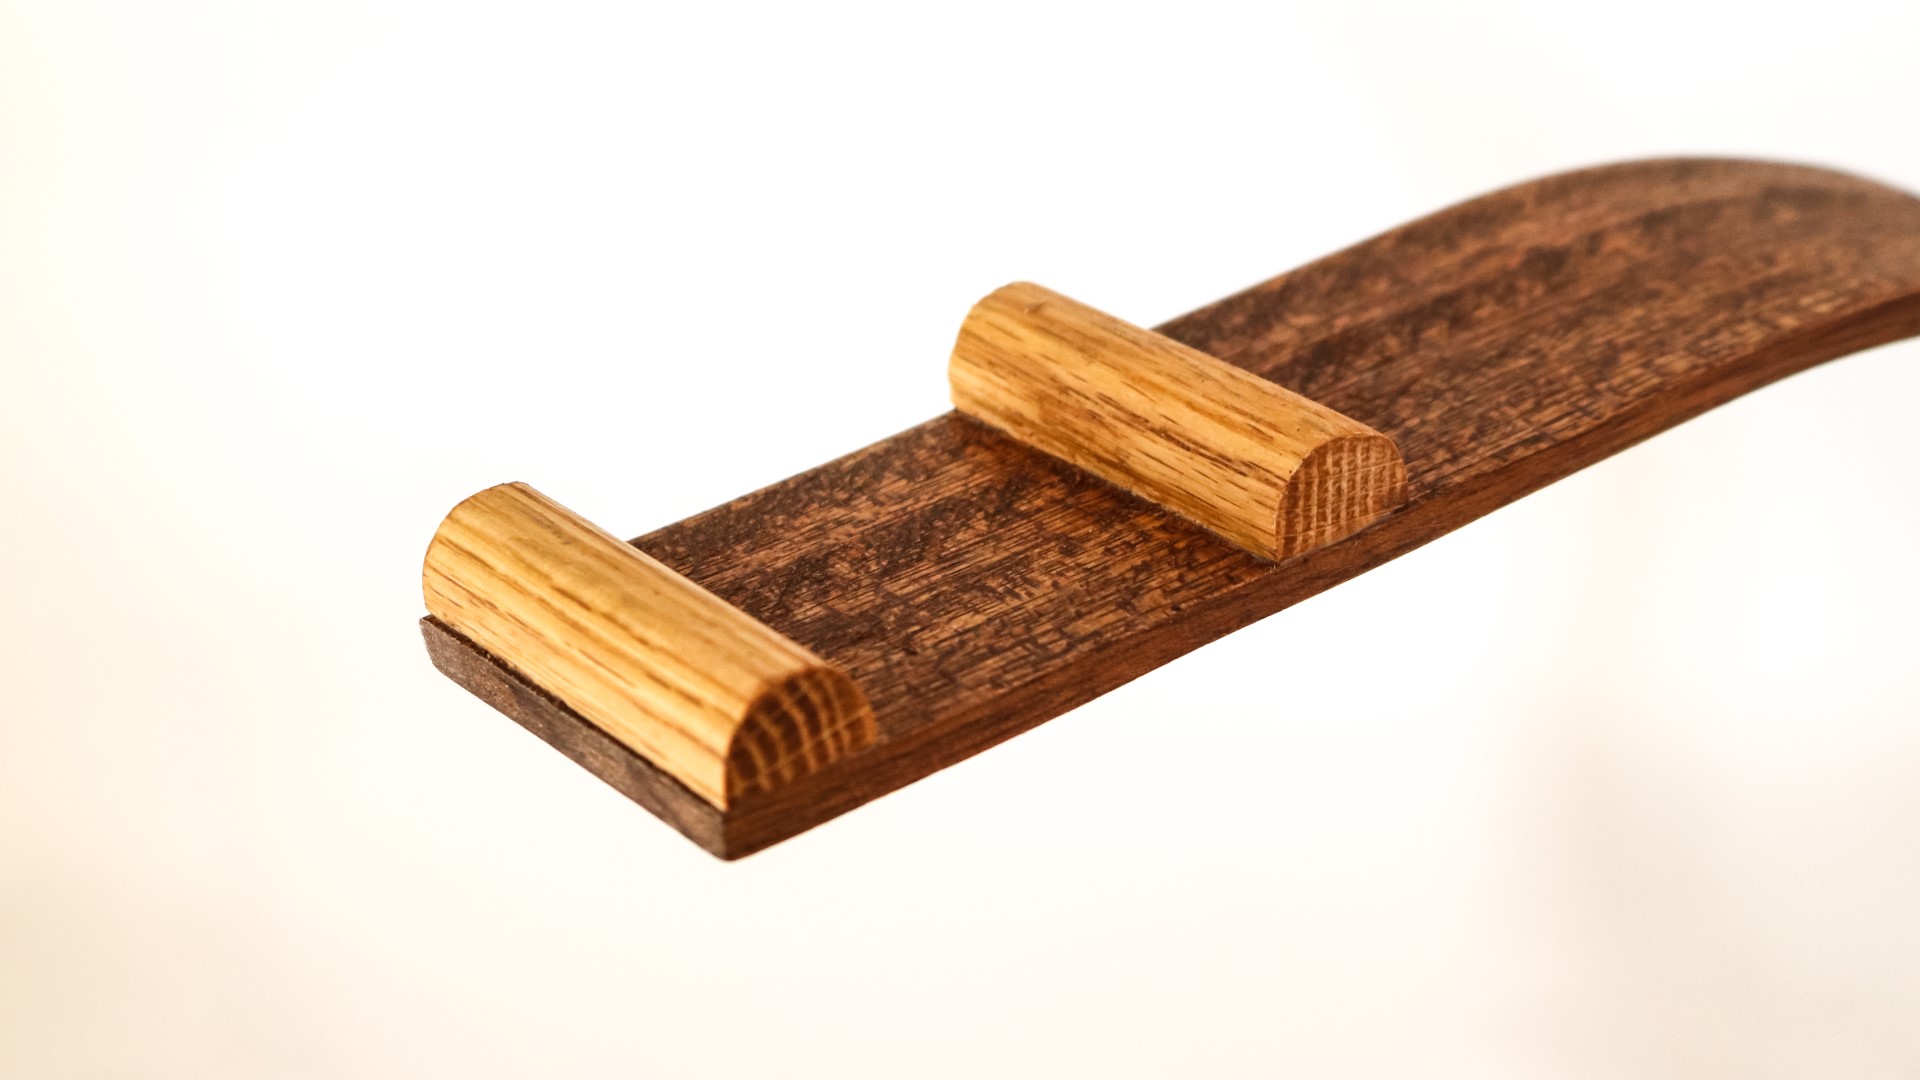
The final component for the headphones stands would be to hold the headband of the headphones and for that I made some 45 degree rip cuts to some small pieces of oak.
I then rounded them over at the belt sander. This sort of thing is more typically done at a router table but I manage to get good enough results at the sander.
I marked up and cut the pieces to length and then glued two pieces on to the top part of the U shape - these pieces would work to hold the headband of the headphones in place.
After doing some final sanding, I decided I should also round over the corners of the U shaped piece, so I did that at the disc sander. And then I re-applied stain to the areas I'd sanded.
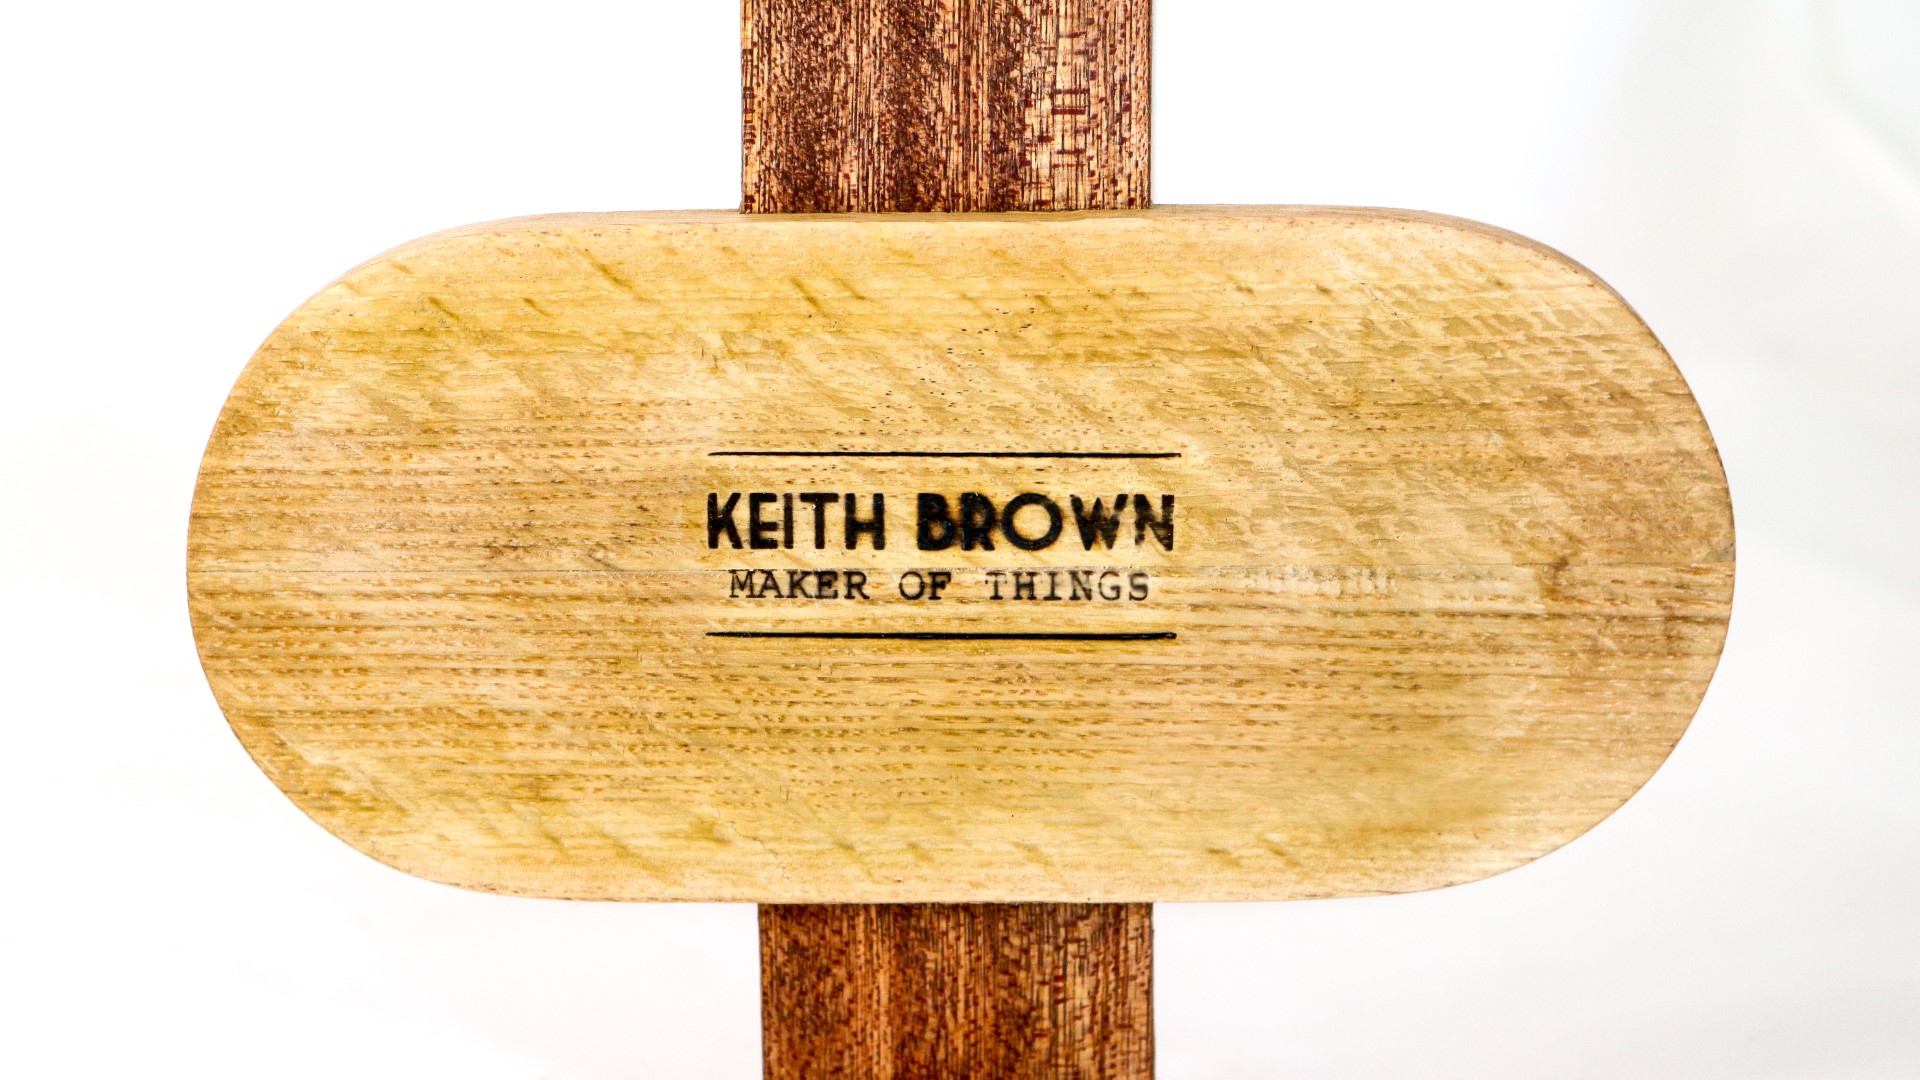
I added my makers mark to the base of the stands.
And for finish, I'd use some of my home made oil wax mixture, this is available to buy both as an original formula and a food safe version via my etsy store if you're interested in trying it out. It brought out the grain really nicely.
I made two of these headphones stands, one as a commission and the other I'll put up for sale on my Etsy store.
I'm pretty happy with how they turned out although there's a couple of things I'd do differently if I were to make them again. Firstly I'd have made my clamping template as thick as or thicker than the width of the strips I was laminating, and that should prevent any small gaps in the glue up which would have saved me some time re-gluing and clamping those areas up.
Secondly I'd make the bases either a little bit bigger or a a little thicker just to add a bit more weight, as they are a little bit tippy at the moment. They do stand up so it's not a problem but I think it'd be better if there was more weight in the base part.
This project took about 5 or 6 hours and that was to make both of the stands.
I really like the way that the stain popped the grain and added more contrast to the laminated part against the oak.
The bent lamination side of things was quite enjoyable to do, and I didn't really find it difficult, it's definitely something I'm going to experiment more with in future, I think it's a really good way of creating interesting shapes.
I hope you enjoyed this video, please subscribe if you haven't already for more weekly woodworking videos. If you'd like to support the channel and get early access to my videos as well as exclusive content, woodworking plans and a credit at the end of my videos you can do so by joining my Patreon page, link to that in the description box below. Thank you for watching!
Images: