In this video I help a friend lay some spruce tongue and groove wooden flooring in his kitchen over a tiled floor.
The tiles in his kitchen extended in to his dining room where the tiles were laid over a wooden floor. Over time, the tiles cracked as wood isn't a stable enough foundation for tiles, so he wanted a wooden floor laid on top to match the floorboards in his living room.
I needed to raise the floor in the dining room where the tiles had been removed to the same level as the tiles, so work began in the workshop where I planed some scrap pieces of wood down to 10mm using my thickness planer.
The first thing I did at Alex's was to check how level the floor was. It was perfectly level in the direction the floorboards were running, but there was a slight drop off in the other direction from the kitchen in to the dining room, however we were confident that there would be enough give in the floorboards for it not to matter.
Next we unplugged and unplumbed the washing machine and removed the kickboards from the kitchen. The washing machine was placed outside and it became a temporary workbench for the day.
After a quick clean up I could begin putting down the battens to raise the floor to the height of the tiles. We used drywall screws for this as they were the right length and it's just what we had available.
I used a handsaw to cut the angles and cut the battens to length.
In one corner there was a concrete area that was slightly higher than the floorboards so I marked up where it was on to the batten and used the hand plane to slightly taper the board so that it would sit flush with the kitchen tiles.
I tried to space out the battens evenly as the areas in between would later be filled with underlay and we wanted to reduce the amount of awkward angled cuts we'd need to make.
Then we laid a floorboard and walked over it to check that it felt level and it seemed ok.
The next job was to go and get some underlay. The stuff we chose was 5mm thick and it would help to even out any height inconsistencies before laying the floorboards.
Like a lot of old houses, none of the walls were square or straight so this meant the underlay and later the floorboards would all need to be cut to fit the shape of the room as best we could. This ultimately made the whole job take much longer than we had expected it to.
As the battens in the dining room were 10mm, we put two pieces of the 5mm underlay in between them to bring it up to the same height, and then a third layer over the top of everything.
The underlay was easy to cut to size, you could just score it and snap it.
We later taped down the underlay with some masking tape to stop it moving around
Next I started cutting the floorboards. They were 3m long so I cut about 1m off some of them to give us some different lengths so we could stagger the joints. I made all the cuts with my cordless circular saw.
Before we started laying the floorboards, we were unsure which way up they were supposed to go down, and there were no instructions included. On the groove side of the tongue and groove boards, there's a thick piece on one side and a thin piece on the other. We checked on the internet and found that the thicker side should go at the top. I had guessed that the thicker side should at the bottom, so it's a good job we double checked before laying them.
I used a bevel guage to set the angle so I could repeat this on to the floorboards at the dining room end.
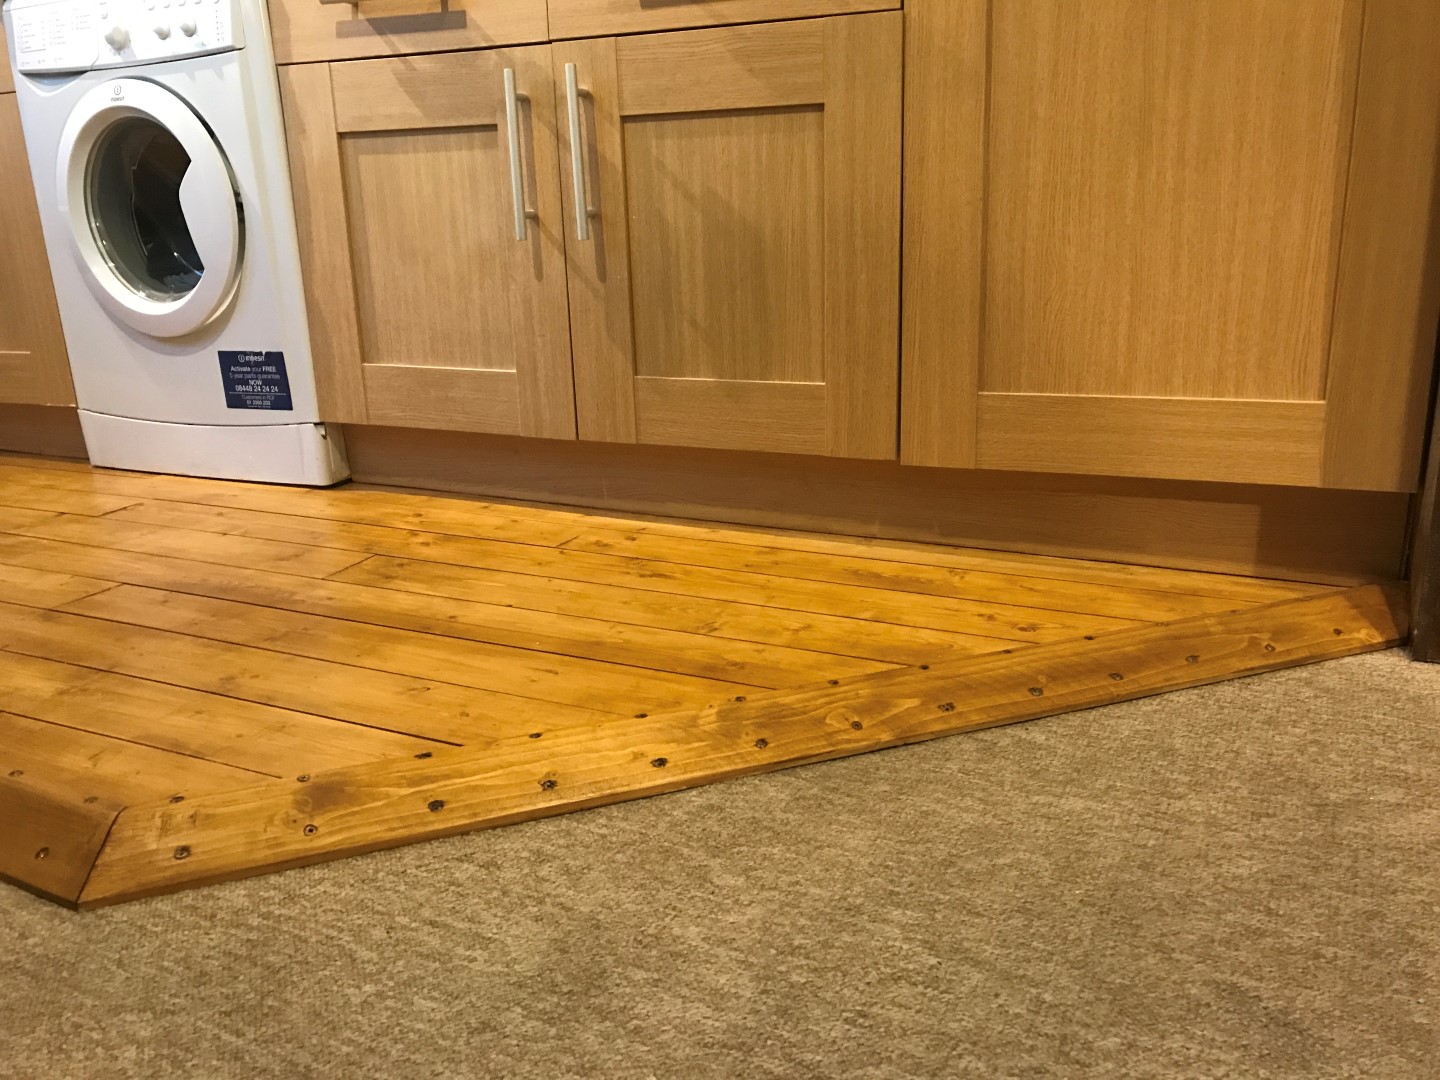
Next we laid the floorboards in the space between the cabinets where the washing machine would go. There was a gap left over which was 50mm on one side and 30mm on the other, so we marked up another board and ripped it on the circular saw. This was the first of many angled cuts we'd need to make. Alex slotted it in and pushed the boards back in place and it was a nice fit.
We closed any the gaps between the boards as the project went along using some gentle taps with a hammer.
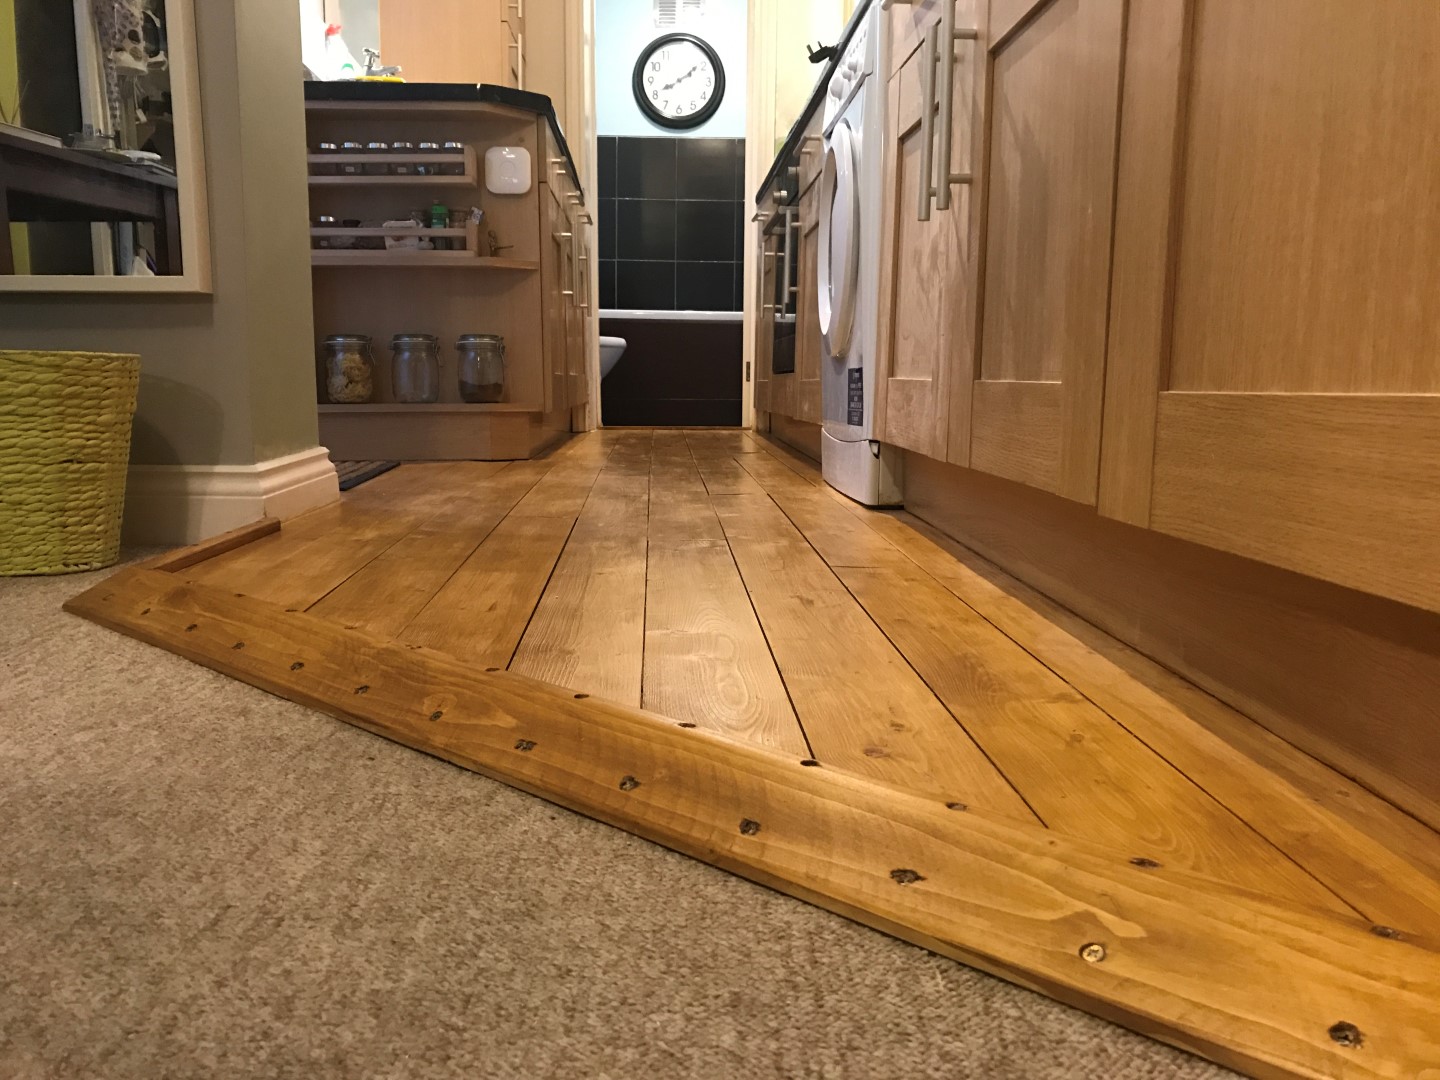
One of the boards met a door frame too, so I offered it up and marked it up by hand and cut it out with the jigsaw. I wasn't going for perfection here, really I was just looking to close the gap tight enough so that after a bit of sealant had been applied, it'd look nice and tidy and it turned out OK.
At this point I realised that in one area of the floor the end joints between three of the boards were close together and it didn't look right aesthetically, so I removed the middle one and later replaced it with a longer board
On day two, we started fitting the final boards, this one needed some cut outs in order for it to fit around the kitchen cabinet legs so I marked them up and cut them with the jigsaw.
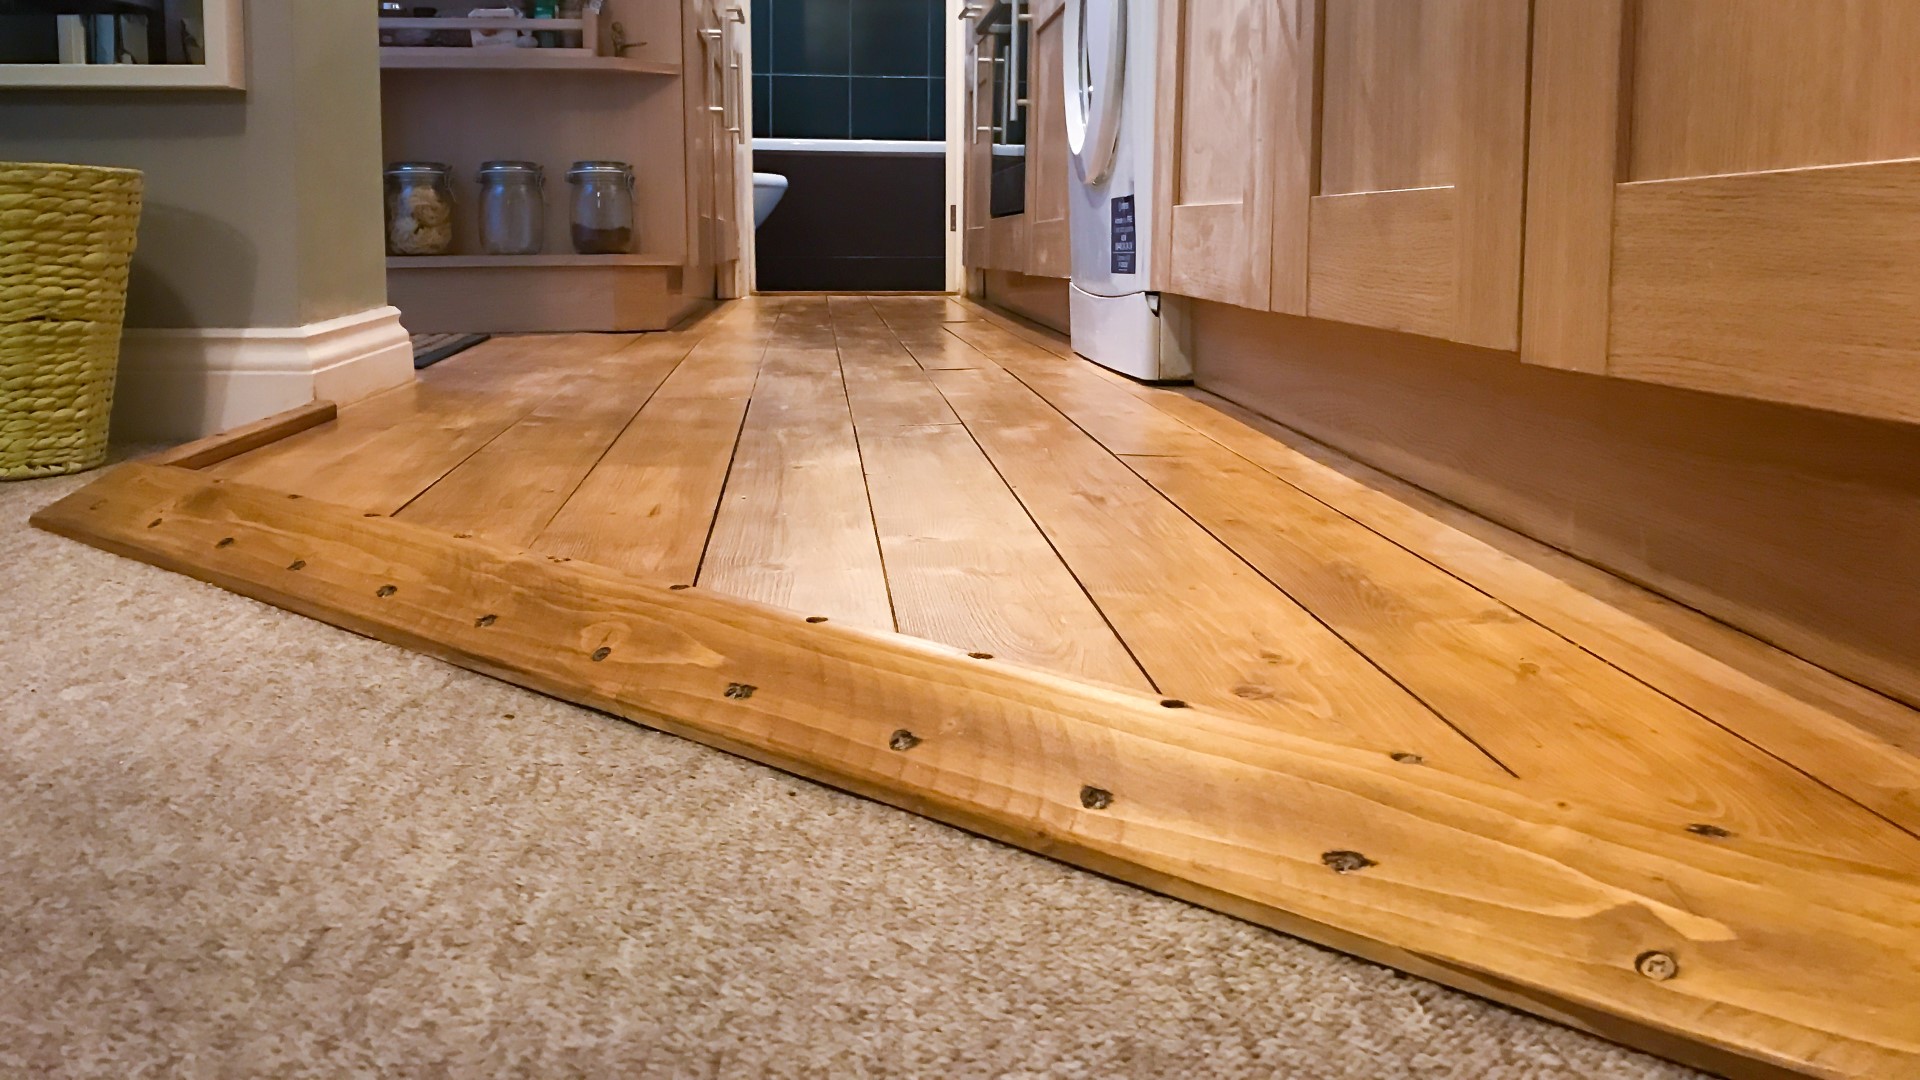
The next job was to make some edging trim pieces for the ends of the floor boards.
We took down measurements and also measured the angle in the dining room with a bevel guage and protractor and it was exactly 45 degrees which meant we'd need to cut an angle of half that - 22.5 degrees to the trim pieces for them to join nicely together.
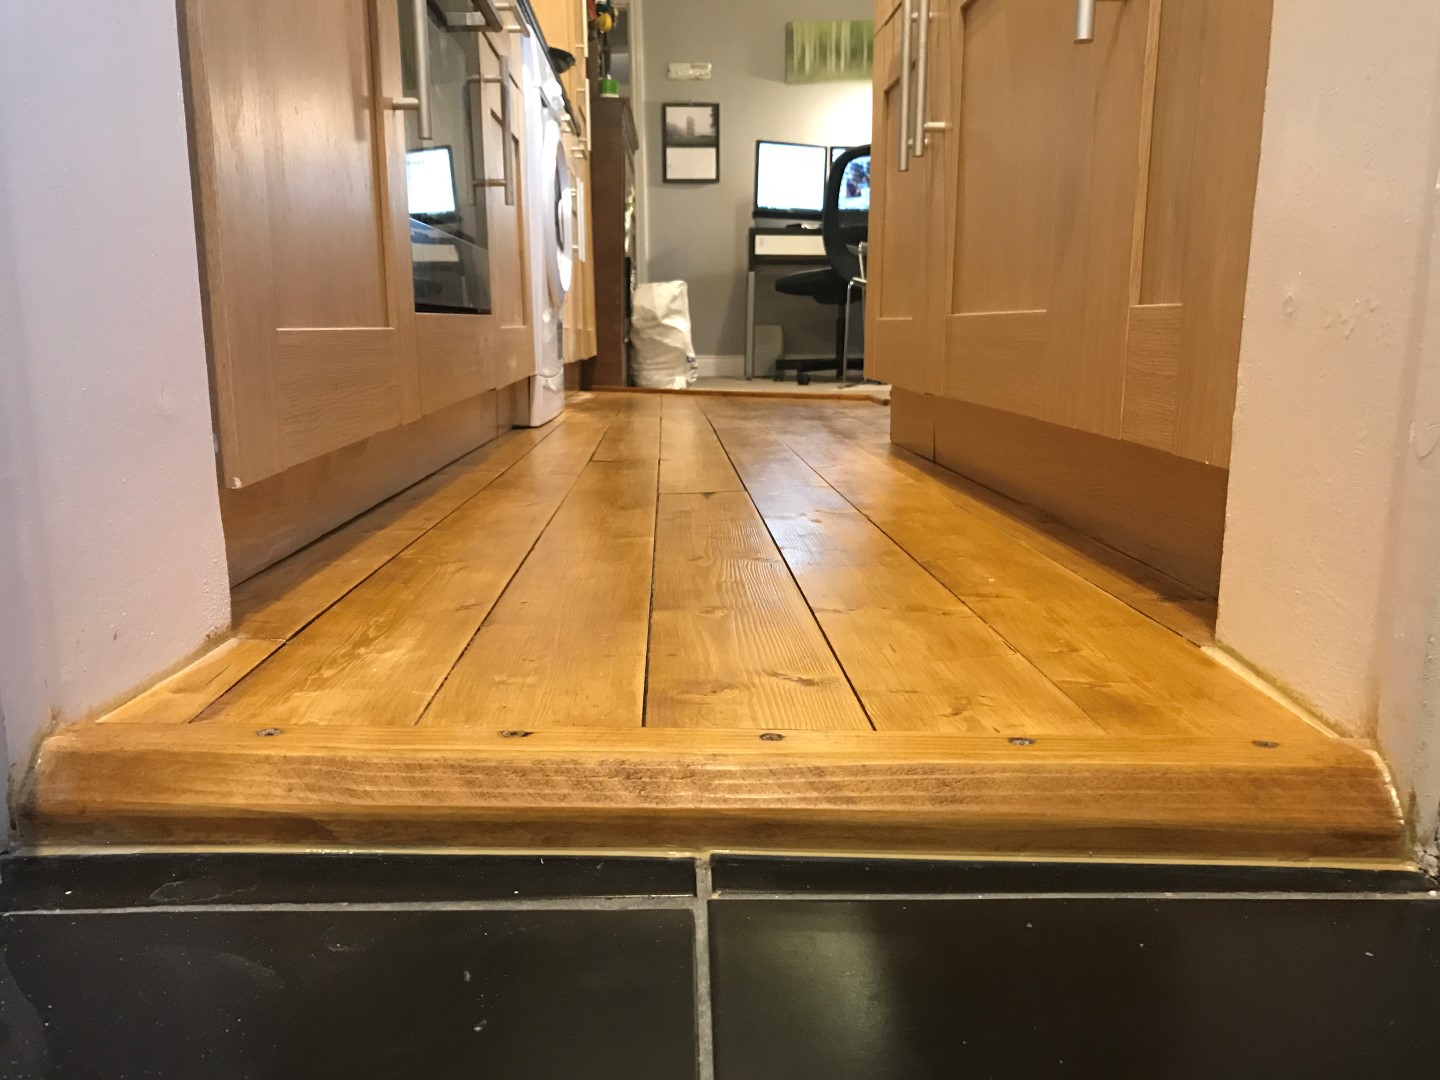
And at the other end we would need a piece of trim between the edge of the boards and the bathroom door.
So we went over to my workshop. I had a piece of spruce I'd been storing behind my sofa, it was pretty long so we took it out through the window then we cut it to a more manageable size with a handsaw.
We started making the trim for the dining room end. I ripped two pieces to 80mm wide, and then we used our reference drawing to mark up a shape on to the end of the workpiece.
I cut the rebate joints on each piece at the tablesaw with two passes. And then I cut a sloped angle, and did a bit more shaping with a block plane to round it over.
Then we cut the 22.5 degree angle at the mitresaw. We had to use a sacrificial fence here because the workpiece was now a bit of an awkward shape to put up against the main fence.
To fit this piece I marked up some screw locations I think they were 15cm apart, and drilled, countersunk with a 10mm drill bit as we didn't have a countersink with us, and then added the screws - I think we used70mm ones at the top and 50mm at the bottom
Then I offered up the longest piece and needed to make some more adjustments with the block plane to get the two pieces flush with each other.
For the second piece of trim we used an offcut from the slope that we cut on the previous piece of trim and this would be used for where the flooring met the exterior door.
Again I marked up screw locations and secured it in place just screwing it to the floorboard.
And this is the final trim piece for where the kitchen meets the bathroom door.
This piece needed cutting to fit around a door frame which I did with a handsaw. It also needed to be secured to the tiles so Alex drilled the holes with a tile cutting bit, added some wall plugs seated in to the tile and then secured the trim down with screws. And after a bit of sanding the boards were stained with this oak tinted polyurethane varnish.
The final job was to rip down the kitchen kickboards to account for the difference in height. Some of these were in pretty bad shape as you can see. We made some cuts with the jigsaw, some with the circular saw and we also used the handplane to make gradual adjustments and get a nice snug fit on each piece.
The washing machine could be squeezed back in, and it was a really tight fit but eventually we got it back in there. Not sure if he'll ever be able to get it out again though.
Images: