In this video I'm going to be making some dog beds using some oak veneered MDF left over from the radio studio desks commission I did recently.
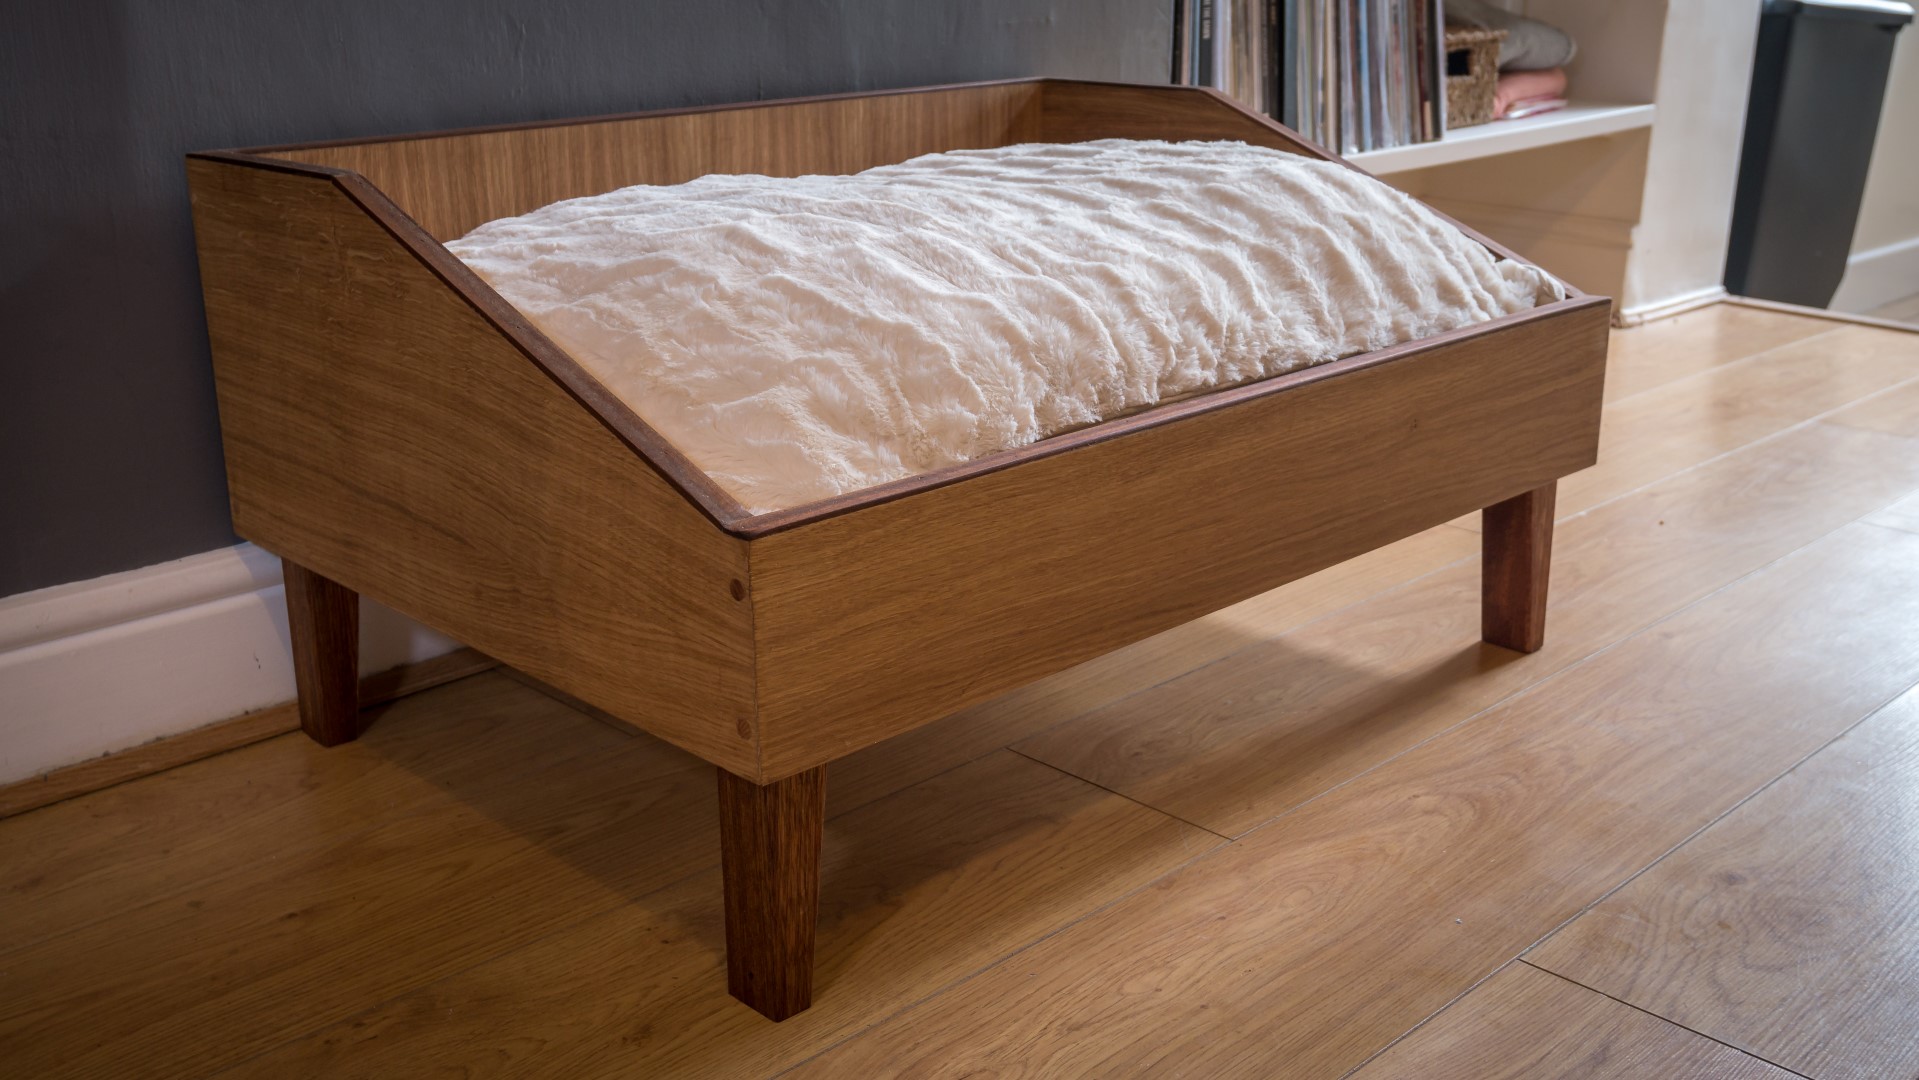
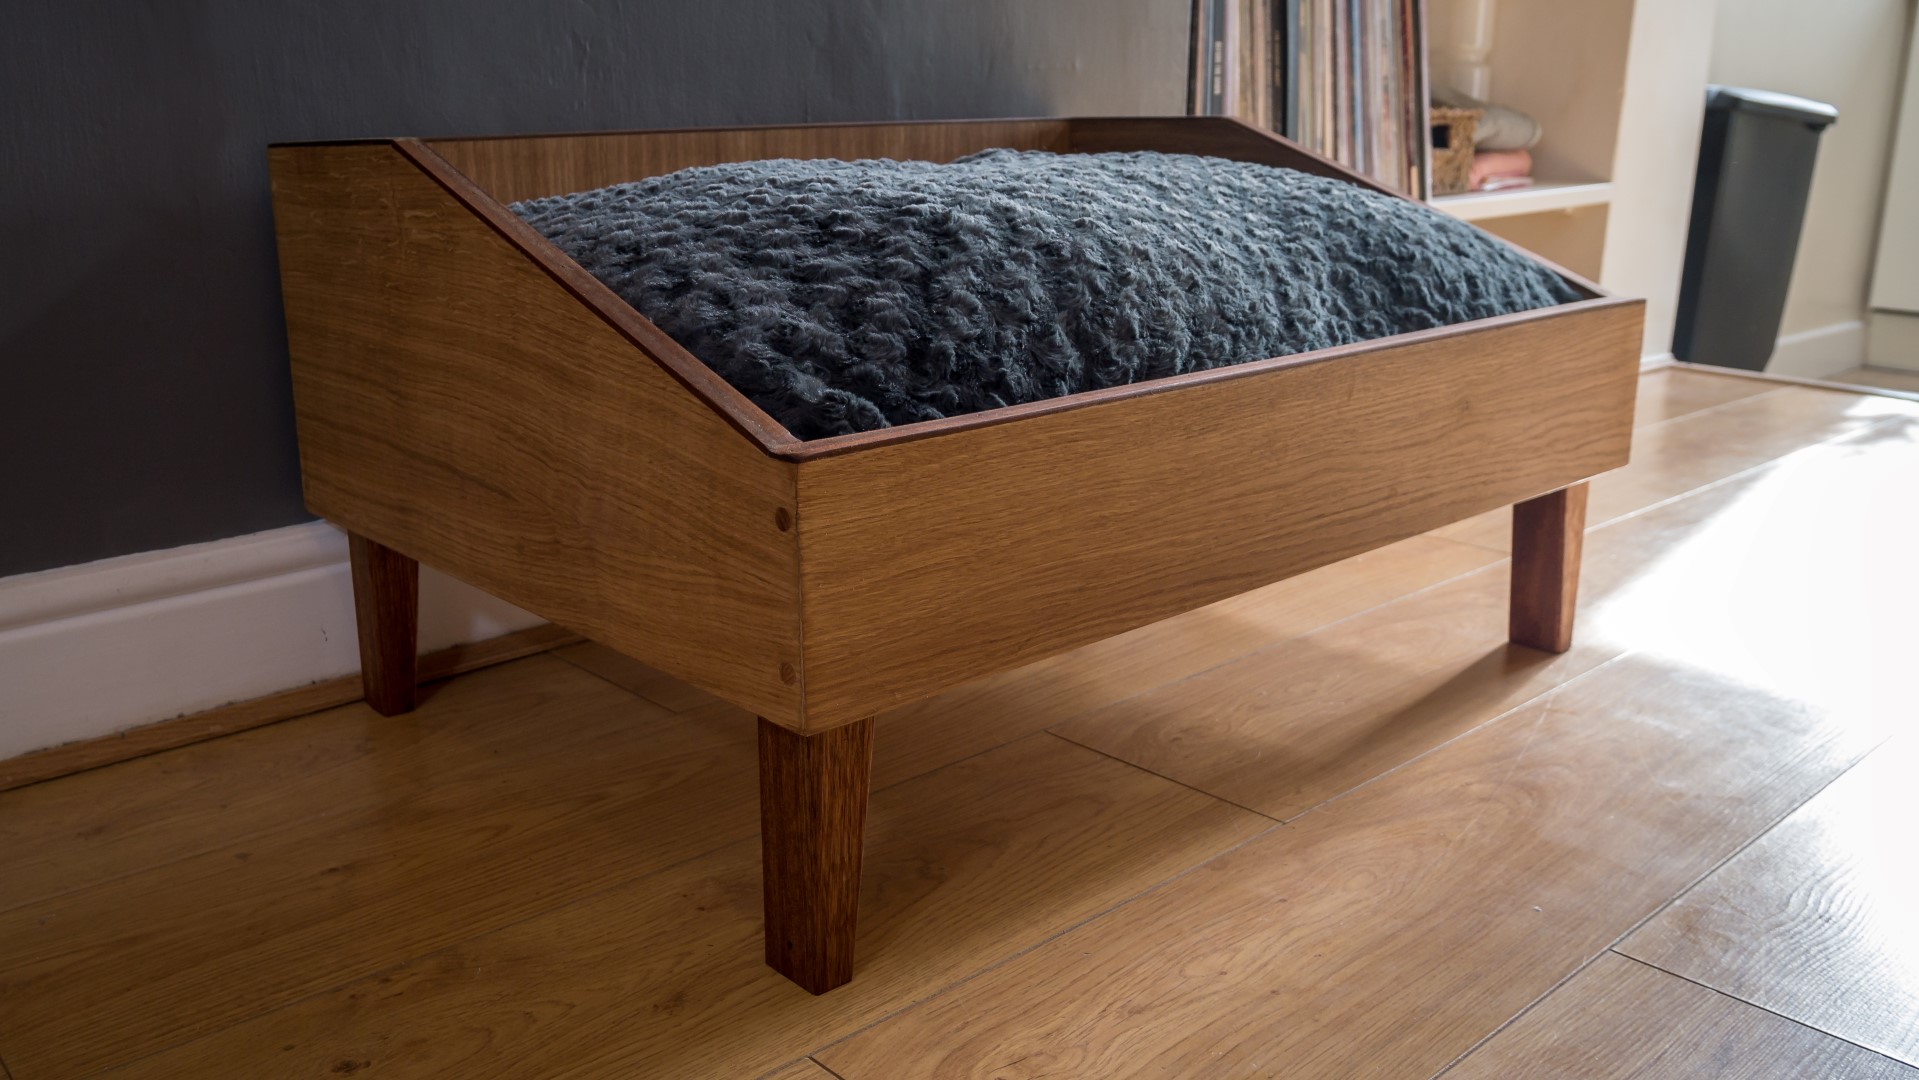
A lot of the dog beds you can buy tend to look a bit cheap and nasty, so the idea I had was to make something that looked more like a piece of furniture that will look good in someone's home.
I wanted to design something with a mid century modern feel mainly because that'd the style of furniture that I like.
Before I got started I first did some 3D drawings in SketchUp - that allowed me to not only help me visualise what the beds would look like, but also to help figure out how many of the beds I could make from the MDF pieces that I had to work with.
I began by ripping the panels to the right width using the tablesaw.
And I made a few crosscuts with my circular saw using a straight edge as a fence. I'm not cutting them to their final length here, I'm just dividing up the pieces to be more manageable in size.
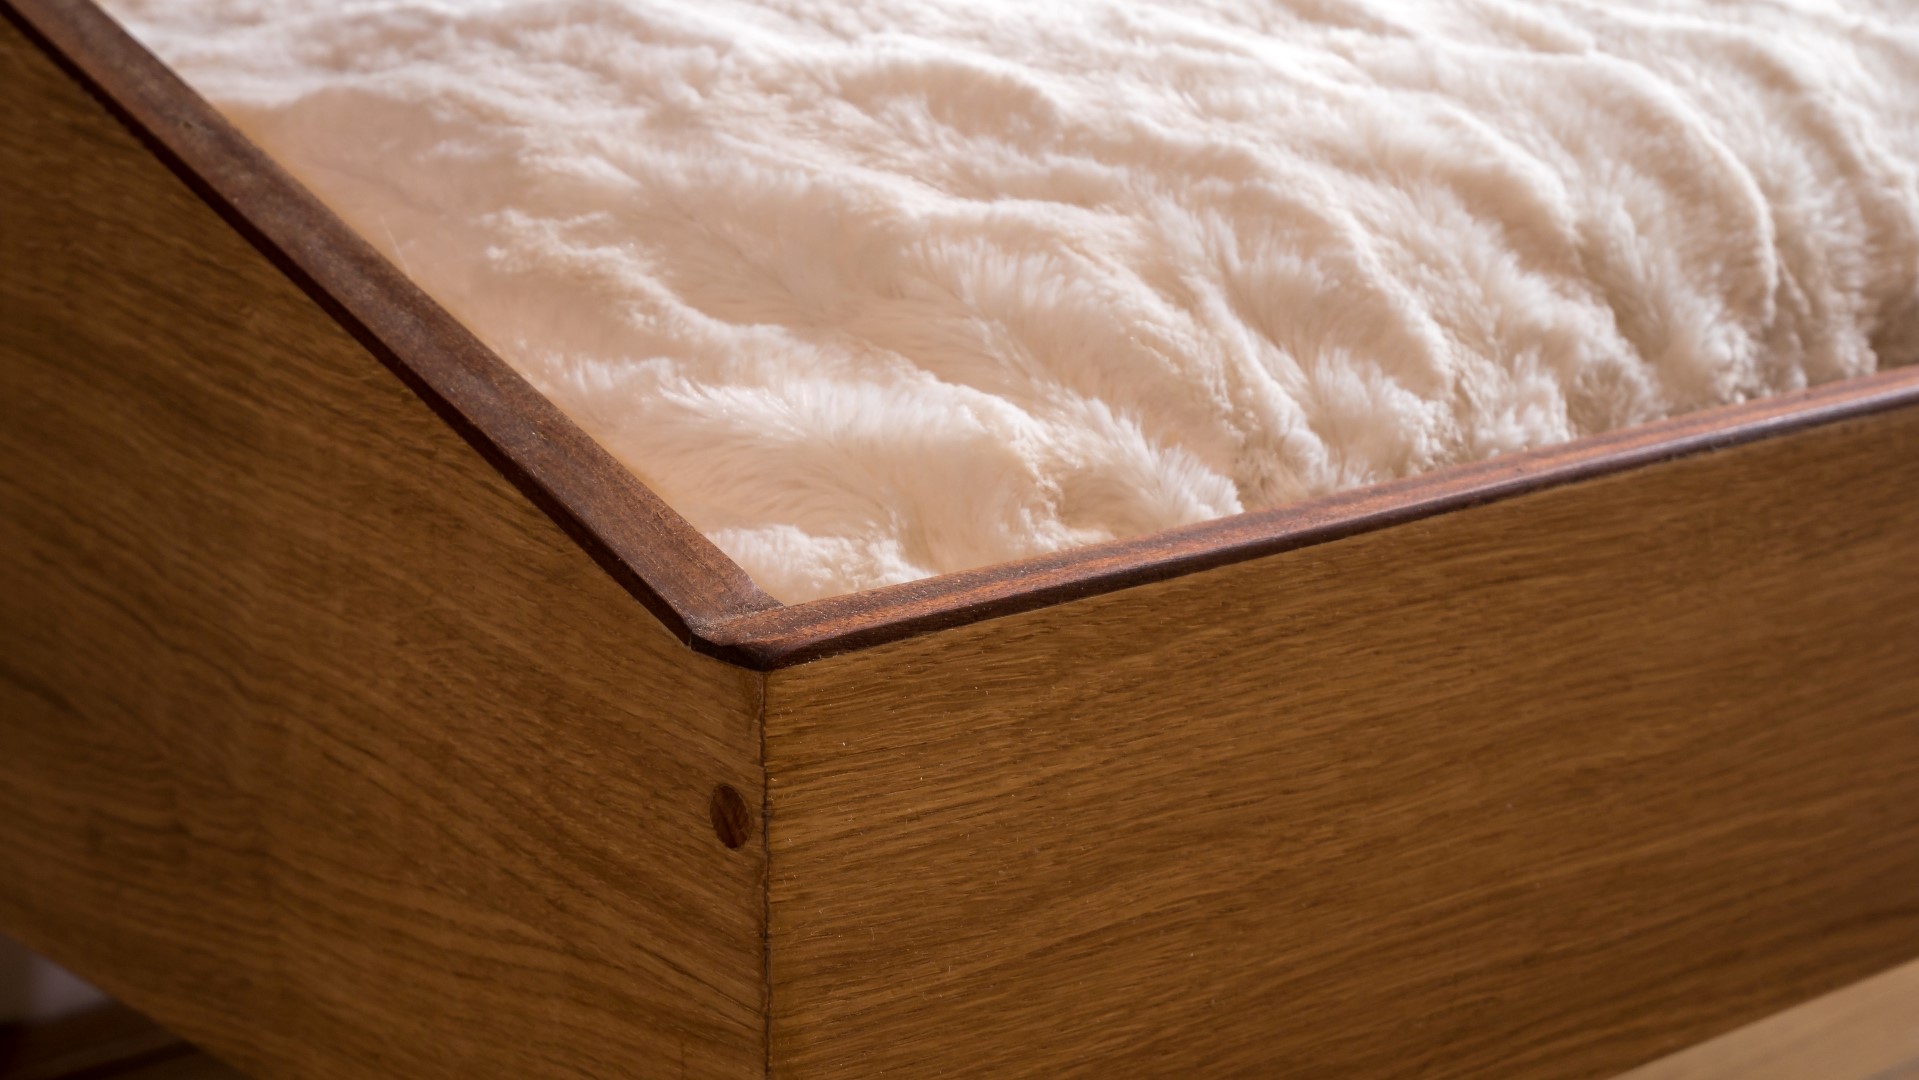
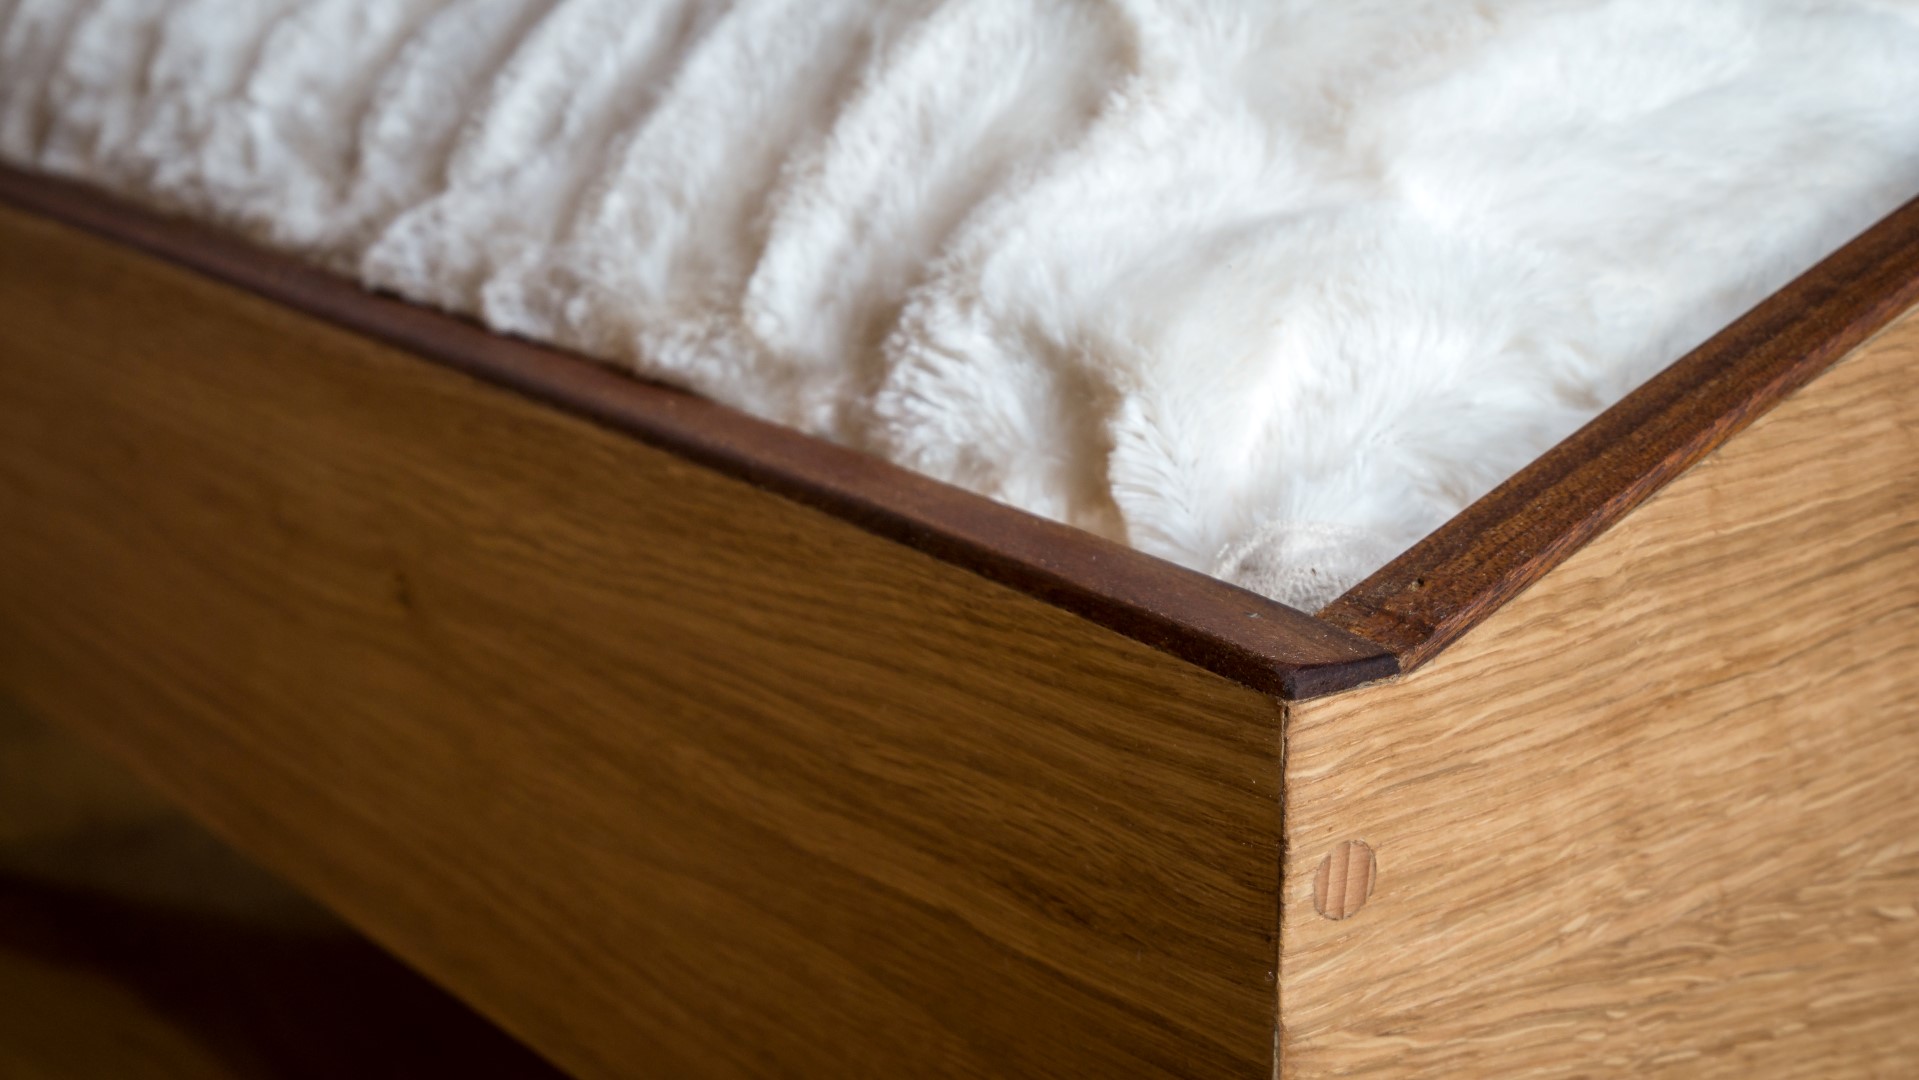
I decided to use mitre joints for the bed, mainly because the 45 degree cuts would hide the MDF inards of the sheet material
I tilted my blade to 45 degrees and used my panel sled on the tablesaw to cut one end of each of the panels.
I then realised that these panels were narrow enough to cut on the mitre saw, so after measuring and marking up each panel based on the dimensions from my drawing, I made the rest of the cuts at the mitre saw. That way I could set up a stopp block so that all of the cuts of the same length would be consistent.
After cutting the short sides of the box, I then marked up, set up a stop block and made the cuts for the longer side of the box.
Unfortunately I lost quite a bit of video footage at this point in the project, so I'll try to reconstruct what I did next in the project as convincingly as I can without actually re-doing it!
Lucily I've got a panel here that I decided not to use because it got damaged when it fell off the workbench so I'll use that to demonstrate. First I needed to cut these housing joints to accommodate a bottom panel on all four sides of the box. I made those cuts at the tablesaw just by making a series of cuts moving the fence each time to form the joint. I could then check that I got the sizing right by offering up another panel.
Next I positioned all four panels of the box together, and measured the distance between the housing joints on the opposing panels and that gave me the dimensions for the bottom panel.
Before cutting the bottom panels though, I took 3mm off each of those dimensions, again just to make the glue up assembly easier.
Then I cut the bottom panels at the tablesaw.
And after that I could mark up the diagonal angle on the side panels. I did this by offering up the back and front panels to the side panel, and then I marked up the shape I wanted on to the outside of the side panels, making sure that it started at the height of the front panel, and ended at the height of the back panel.
I also needed to make sure that the diagonal cut on the side panels started after where the mitre joint was - and that's because I'll be adding a trim piece to the this piece later on from one end to the other.
I cut out those shapes at the bandsaw.
And then it was time to assemble, which fortunately I have the footage for, so back to the video!
I added some wood glue and then fitted the bottom panel in to the housing joint on one of the side panels, making sure that the bottom panel was centred to the side panel so that it would fit inside where the housing joint meets the mitre joint - if that makes sense.
And then I could add the opposite panel in the same way.
Then I applied glue to the mitre joints and the housing joint of the back panel and added that. I made sure it was seated with a mallet. And then I added the front panel in the same way.
I used some ratchet straps to clamp up the four panels to get nice tight glue joints.
And I wiped away any excess glue with a damp cloth.
These mitre joints would not be very strong so I'd use dowels to re-enforce them. I drilled some 10mm holes using a brad point bit using a piece of tape to get the right depth of the hole.
Then I added glue and knocked the dowels in place.
I cut the dowels off flush using my japanese pull saw.
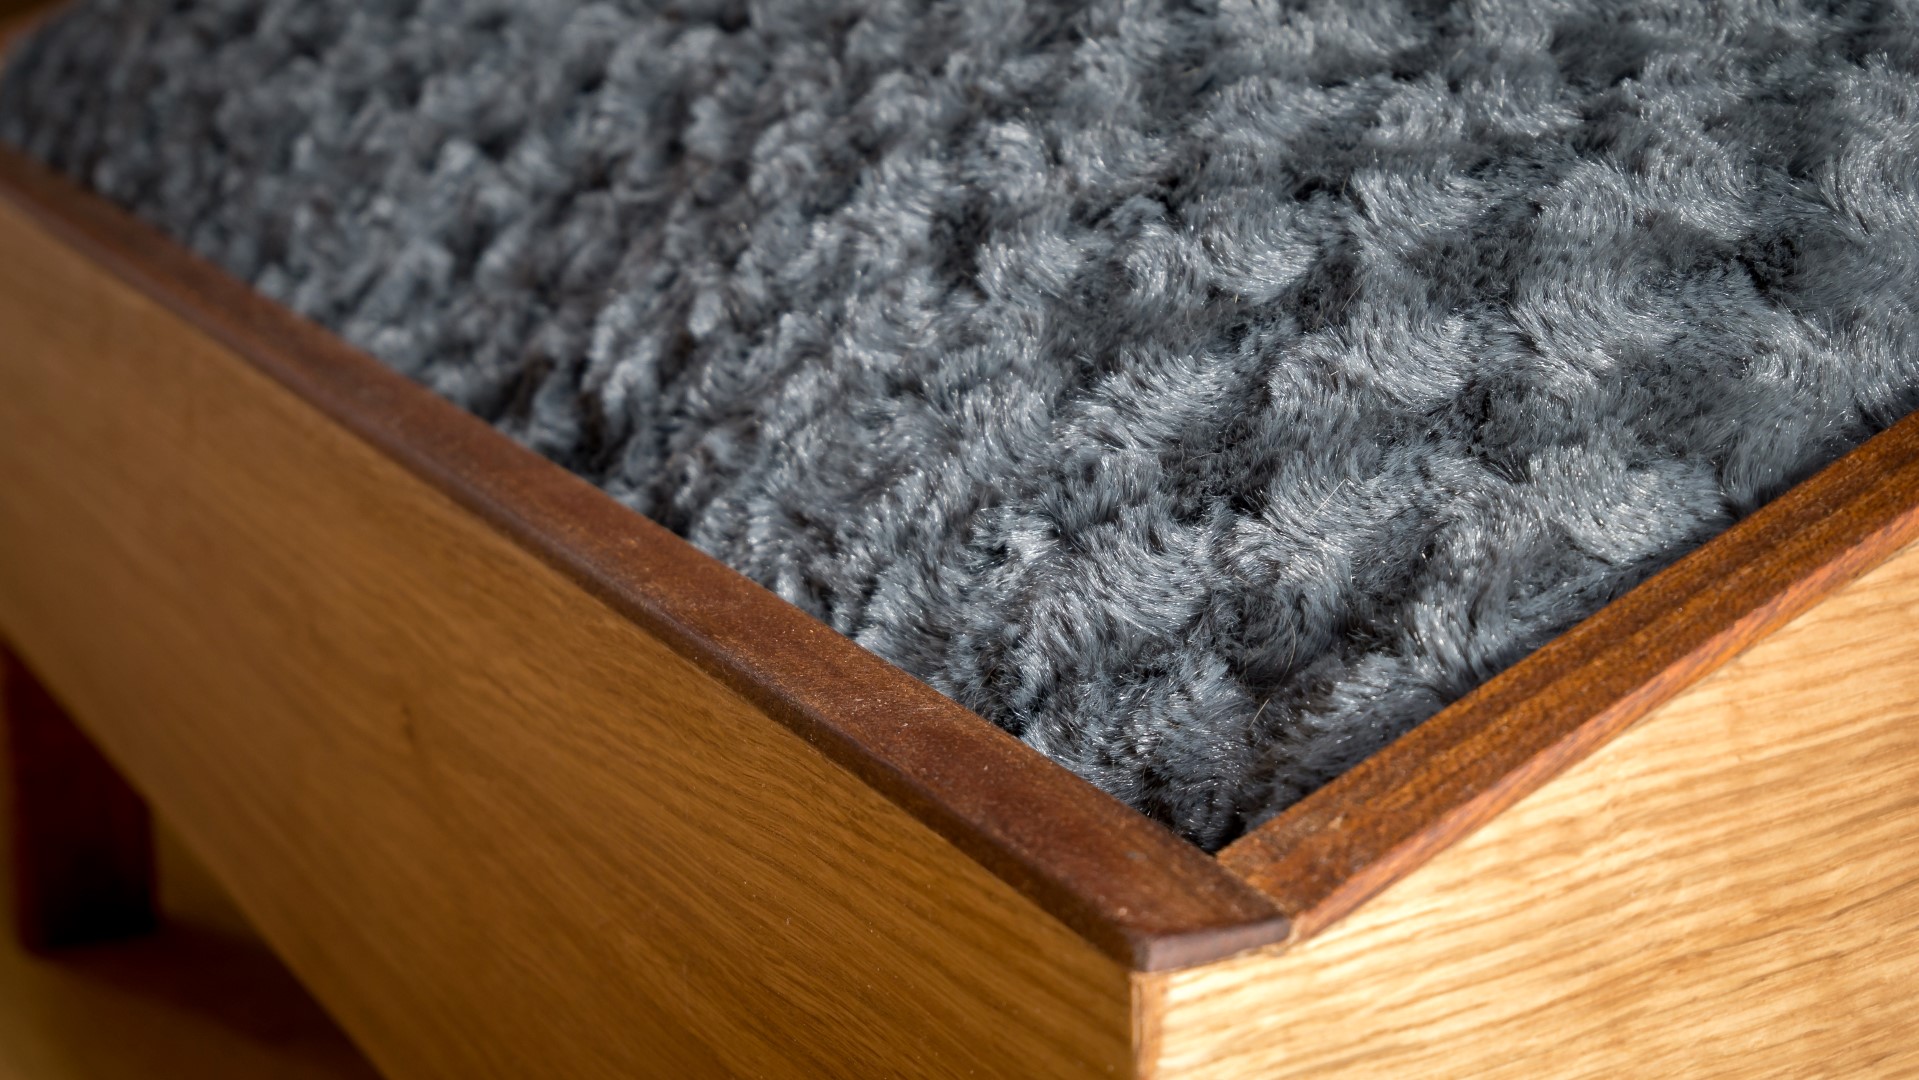
I had some offcuts of sapele, and I'd use these to make some trim pieces to hide the MDF edges.
Then I applied glue and added the trim using some brad nails before cutting it to length
The trim pieces for the diagonal part of the side panel needed to be cut at the right angle so I marked it up, and then cut that angle. Before adding these pieces I just did a little clean up work with a block plane to make sure that my bandsaw cuts were good and straight.
I did a bit of hand sanding just to soften any sharp edges. And I used some oak fillter to fill any small gaps between the trim and the panels.
And then I did the rest of the sanding with my random orbit sander. And for those who are wondering why I'm using the Bosch sander here, it's because this was filmed a couple of weeks ago while I still had it. It went back to Amazon so I no longer have it.
I removed the rubber feet from the bottom which were screwed on,
Then I set up a stop block at the mitre saw to cut all the legs to a consistent length.
I cleaned off the old finish using a hand plane.
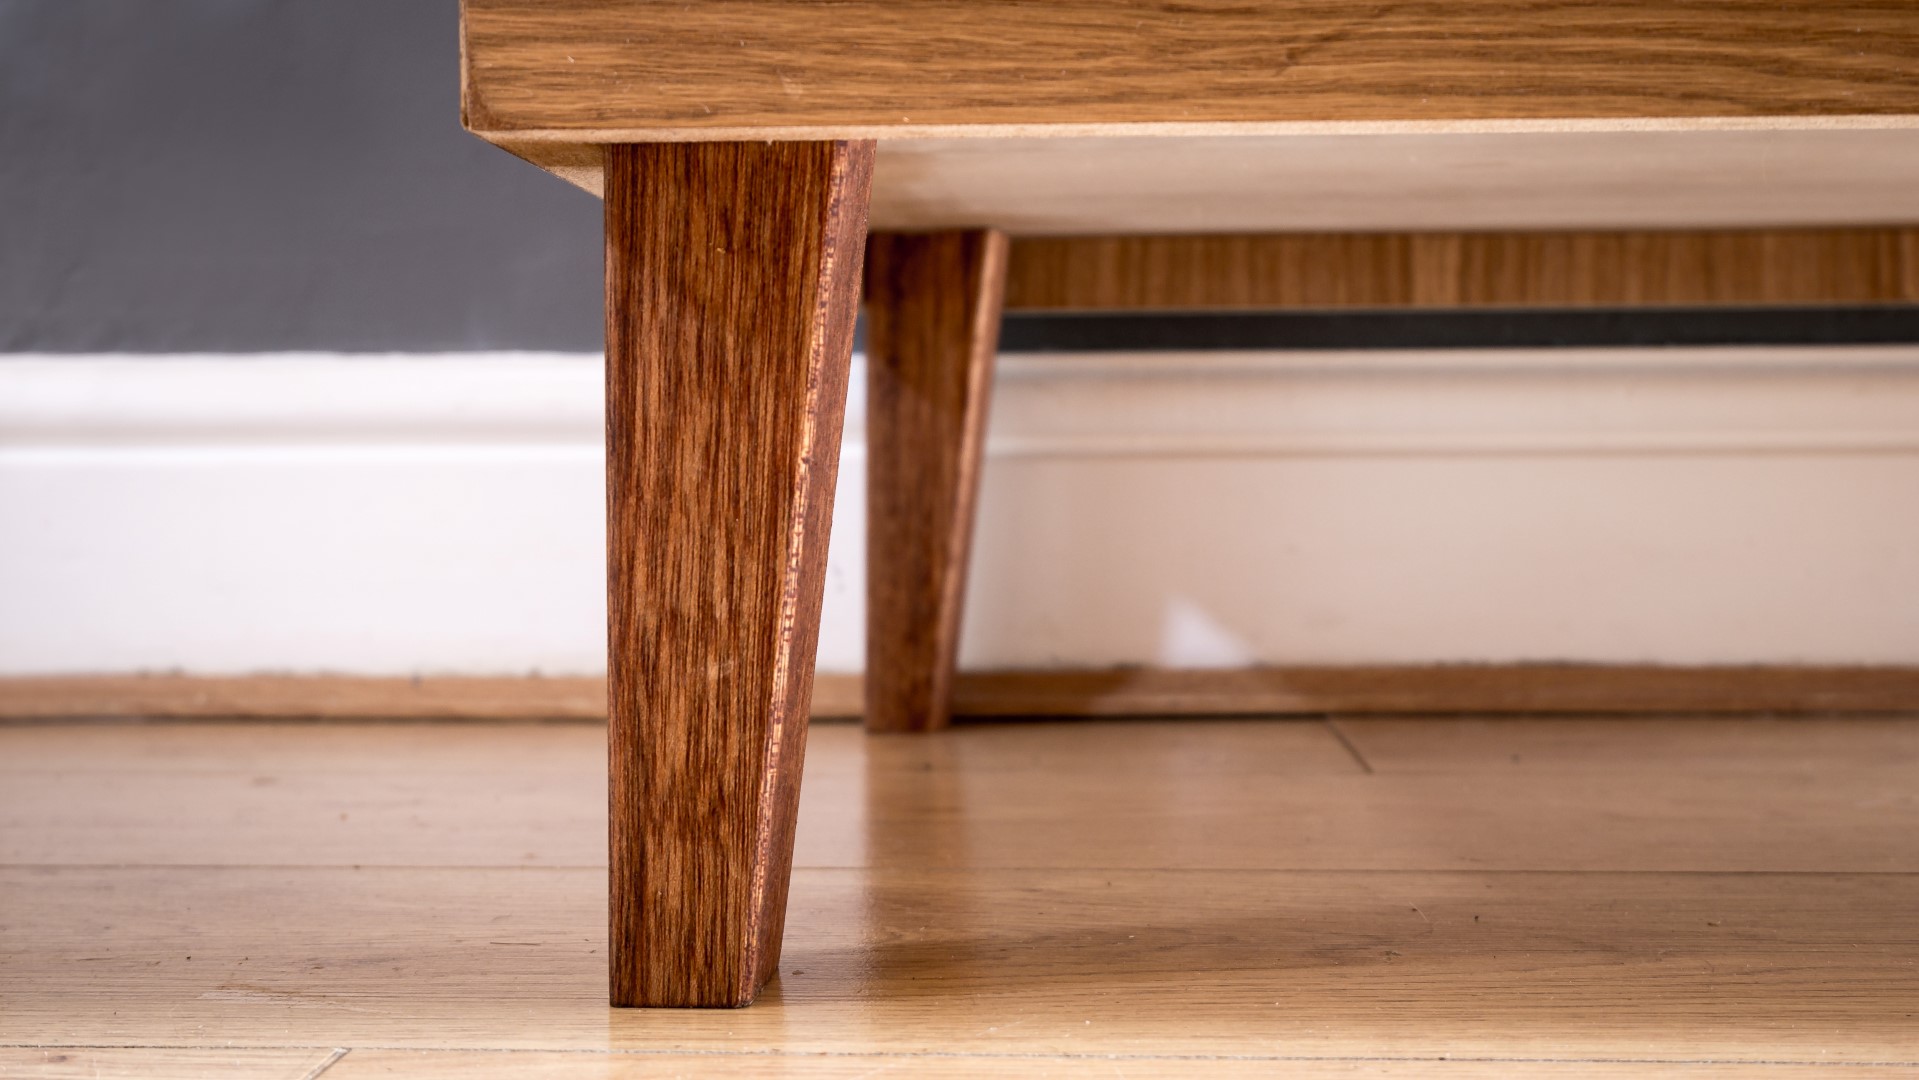
Some of the legs were a different type of wood an didn't plane too well, so I used a scraper on those instead. And this wood is going to cause me some issues which you'll see later on in this video.... It's some sort of extremely dense hard wood.
I decided to cut a new taper to each leg so that they'd all be a consistent shape, and I first thought to use my tablesaw with my tapering jig
However as I was making the first cut, it really didn't feel safe enough because these pieces were short and as I was cutting, the force of the blade was pulling the tapering jig away from the fence. If something doesn't feel right, it usually means it isn't right, so I abandoned that idea, and instead measured and marked up a taper on to each leg, and made the cuts on the bandsaw insread which worked fine.
I then needed to clean up the bandsaw cuts so I did that using a hand plane
I also put a slight bevel on the edges of the legs using my block plane.
Then I coule glue the legs in place on to the bottom of the bed. I held them in position with clamps so that I could flip the bed over. And then I could drill some pilot holes through the bottom of the beds in to the legs, and add some screws.
So I mentioned earlier that one set of the legs was a very dense hardwood, and this is where I had issues.
I think what was happening is that the screws were getting so hot when being driven in to this type of wood, and that caused a couple of them break. And these are really expensive, good quality screws too, I got bunch of these given to me a while back by my uncle. So I was quite surprised.
To fix this, I first needed to cut off the protruding screw using my angle grinder. And the corner was a bit too tight to get in there properly, so I came back with my powe belt file to grind the top of the screw flush with the panel. And then I drilled a wider pilot hole right next to the first, and drove another screw in to the wood as gently as I could. But unfortunately I still had a couple of them break on me!
It was only one of three beds that I had this issue with, the legs on the other two beds went on just fine. So for this one I instead used a couple of metal angle plates to re-enforce the legs from underneath. And then just for a bit of re-assurance, I also mixed up some epoxy and added that to fill any gaps between the legs and the bed frame. And then I was confident that the legs were good and strong.
I used some sandpaper to break the hard edges on the bottom of the legs, to avoid any possibility of when the beds get dragged around.
To finish the beds I decided to use some mineral oil. I mainly chose this because it seemed like the most pet friendly finish that I had.
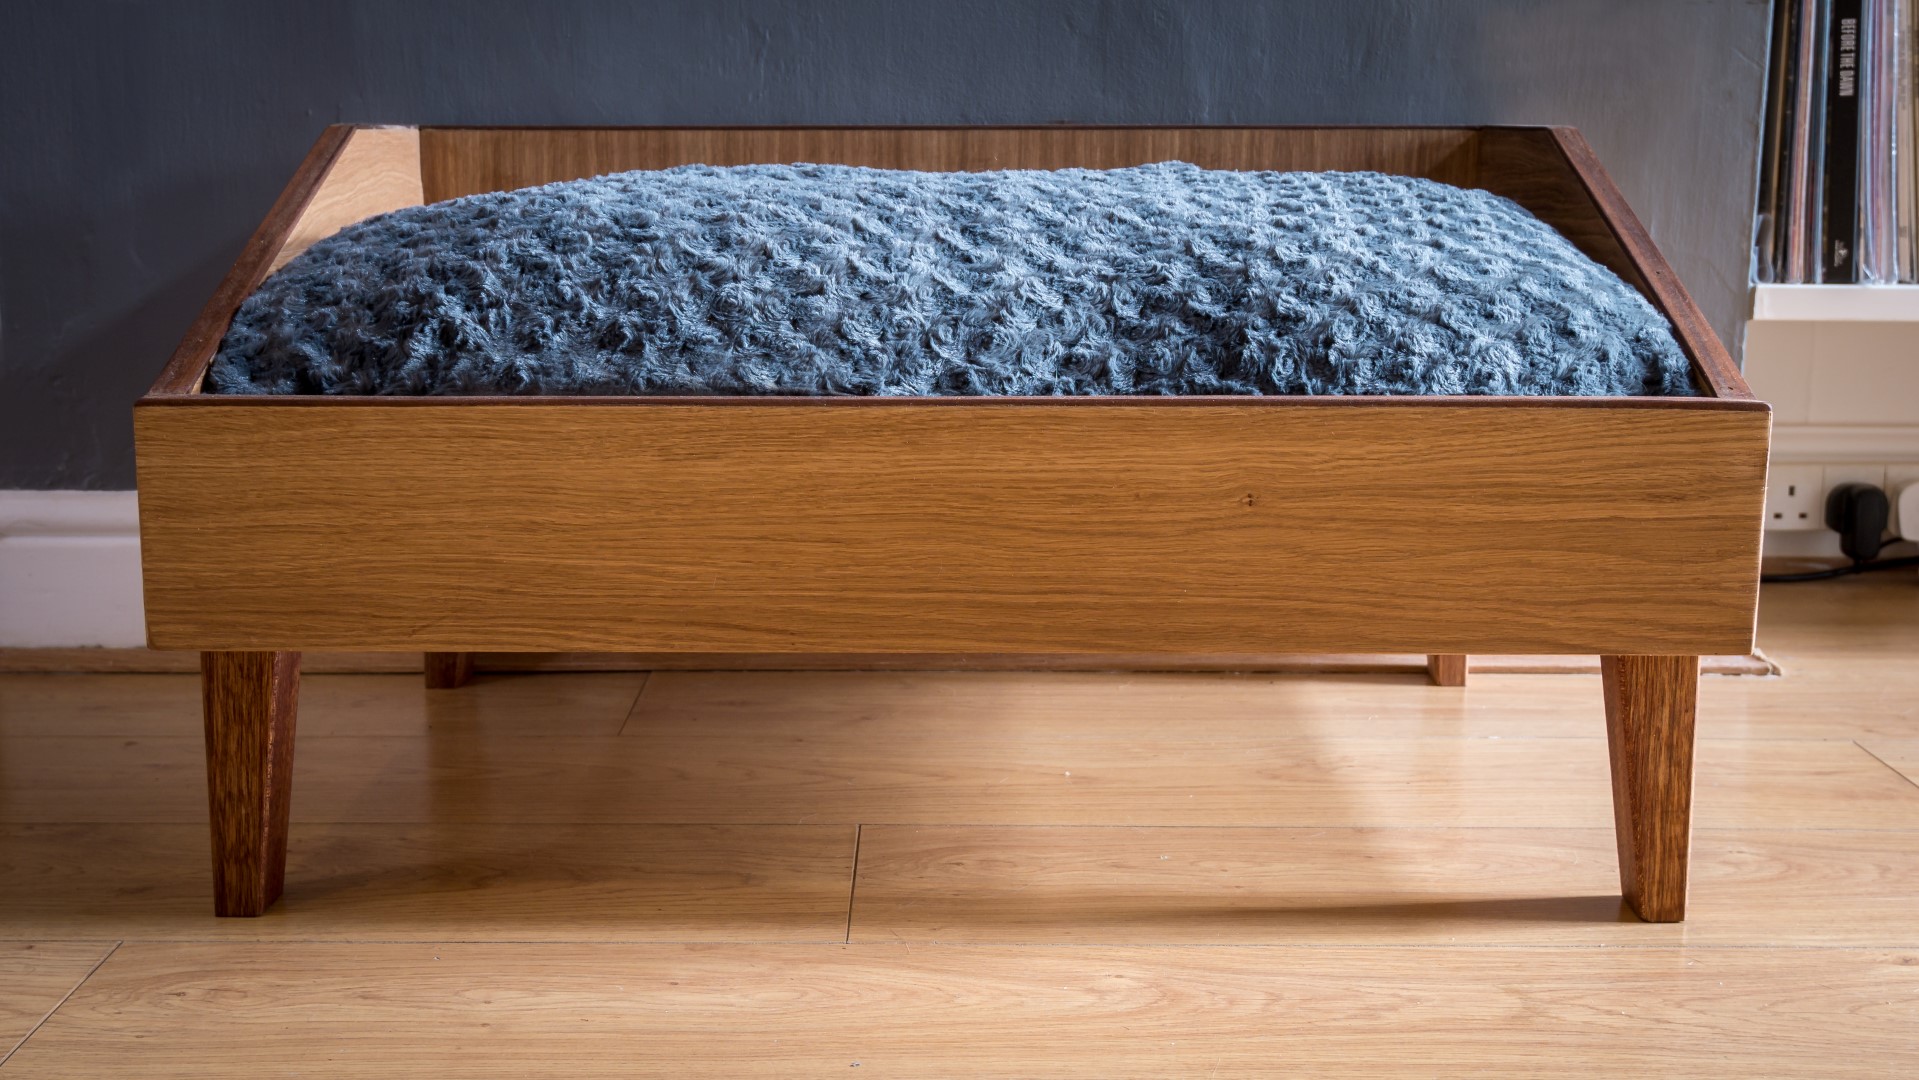
For the cushions I'd use these, I bought these from Amazon for around £11 and when I did the 3d drawings I sized the beds so that these cushions would fit snugly inside. I did think about making cushions for the bed, but it would have cost me far more in materials and time, and plus these cushions have the added bonus of a zip which makes the ccovers easy to remove and wash. And they're super soft too. The only downside of these is that they have a bit of branding in one corner, and I would have preferred them not to have that, but that's not really a big deal.
Before I could even finish all three of the beds I walked in to find one of them had already attracted a rogue squatter.
I'm pleased with how these beds turned out, I think they look nice, but there are a couple of things
Images: