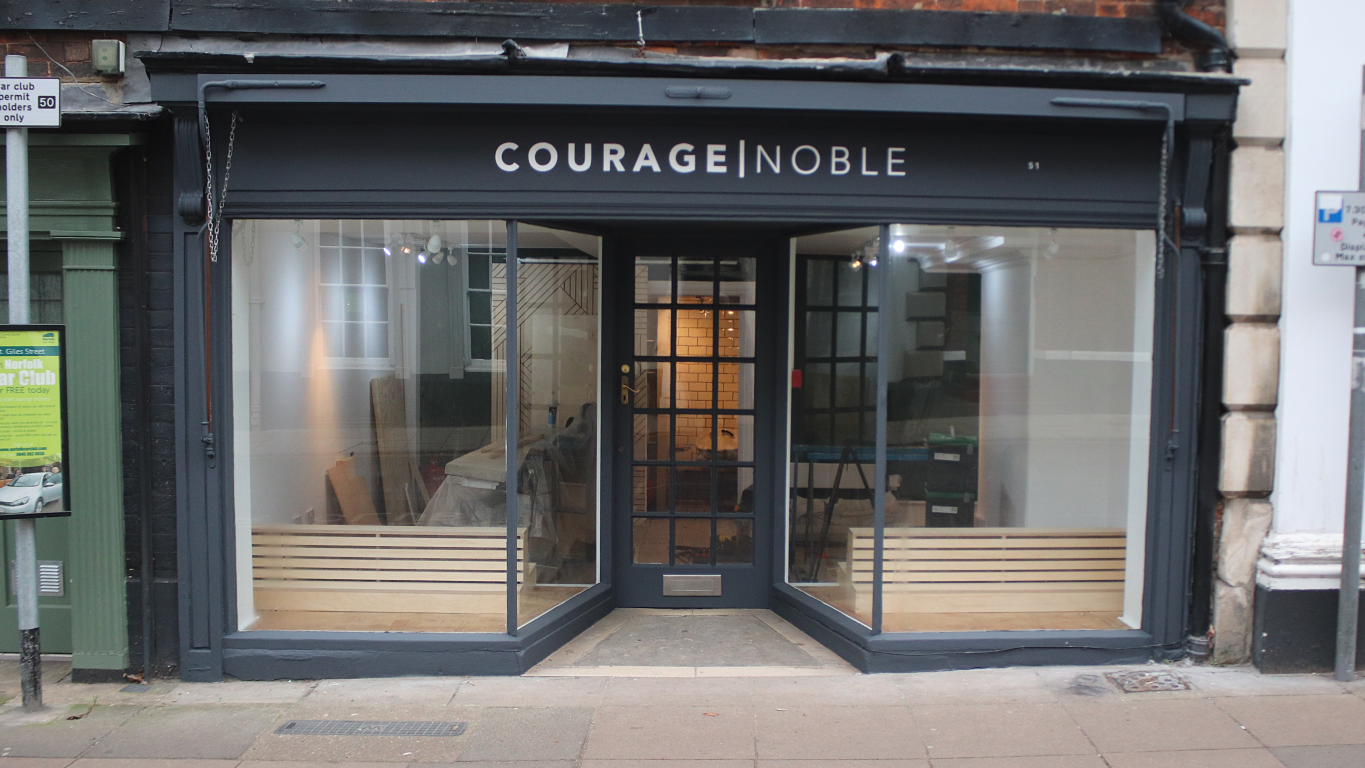
In this video I finish making and install the bench seat/window display units as a commission for a local independent barber shop Courage Noble which is here in Norwich.
Part 1: https://bit.ly/2Umo2pK
Denibbing video: https://bit.ly/2EyVEKL
Teccpo HVLP Sprayer: https://amzn.to/2BTzd2f (Amazon UK) https://amzn.to/2HbLjXJ (Amazon US)
As an Amazon Associate I earn from qualifying purchases
With the frame glued up, I used my block plane to make sure that all the edges were flush.
And then I sanded the edges where the slats would be applied, and that's because I don't want any unslightly edges visible through the gaps in between the slats.
I measured the distance between the bottom shelf and the underside of the top shelf, and then I could calculate the gap that would be needed in between the slats. The measurement was 233mm. I subtracted the space that the 4x 40mm slats would take up. And then I divided that number by 5 which would be the number of gaps between the slats. 14.6mm was the spacing needed so I cut a couple of small spacers to 14.6mm at the tablesaw and I could use these to position each of the slats. I glued and clamped the ends, and used a brad nail to secure the centre because clamping it there would have interfered with fitting the next slat. I could repeat that process until all the slats were added and it looked pretty good.
I could then add the slats for the backrest of the seat and because this was cut at an angle, the distance between the seat and the top shelf was slightly bigger, so measured that and did the same calculation as I did before and cut some new spacers, this time to 16.6mm.
Those got secured in the same way.
It wasn't until I was doing the second of these units that I realised I could clamp both the slats at the front and at the back at the same time, which for some reason hadn't occurred to me before. Sometimes I do things without properly thinking them through, but at least I'd save a bit of time waiting for the glue to dry on this one.
I used some light oak wood filler to fill the nail holes and later this will get sanded back and be difficult to spot.
The next job was to add brass dowels. I bought this 8mm dowel from eBay, cost was about £13 for 1m. I ordered more than I needed because I wasn't sure whether to add it to the slats of the backrest too, but after speaking to the client we decided to keep things subtle and just add them to the base at the front and back. After marking up where I wanted them I drilled the holes using an 8mm brad point bit and I took it nice and slow while I was establishing the hole to keep it neat and tidy, I didn't want to risk tearing out the face veneer. Once I was in far enough I could speed it up and they came out really clean. I cut the dowels shorter than the holes were deep so that I could knock them in flush with the face of the plywood.
I used super glue to glue in the dowels. These dowels aren't needed for strength at all, as the wood glue is more than strong enough without them, so they're really just there as a design feature.
Once I was confident that the super glue had set, I came back with my oscillating tool with the detail sander attachment at 80 grit to make sure it was flush to the plywood. I didn't want to use my random orbit sander here because I was worried about the possibility of sanding through the veneer, and the detail sander gives you much more control over which area you're sanding.
Then I swapped to a 180 grit and polished up the brass to get it nice and shiny, although later on in the video, I'll come back to this again because I wasn't happy enough with the results.
I did some final sanding at 120 grit. The face veneer was already pretty smooth so it didn't take much sanding. I also made sure to sand all the plywood edges. And then I did some handsanding just to soften the corners and it'll also prevent any chance of the veneer splintering.
I then brushed away all the dust.
And I'm going to use water based varnish for the finish because the client wanted the wood to be as light in colour as possible. I'm going to use my new electric sprayer to apply it. I first watered the finish down by maybe 5-10% and then I applied it in the direction of the grain. A lot of people have asked me about this sprayer, and this is the first time I've used it properly on an actual project so I'll make a video about it very soon.
The first coat of finish raised the grain on the ply, so I used some 400 grit wet and dry to denib and get everything nice and smooth again. I have a video abou t denibbing by the way, link to that in the description box below.
And then I could brush away the dust and apply the next coat of finish.
I applied three coats in total, denibbing in between each coat with 400 grit.
The finish is looking really nice now, you can see it has a really nice sheen and it's super smooth, however, I'm not particularly happy with how the brass dowels look at the moment - and now I wish that I had sanded them to a higher grit. I've been thinking about how I can polish the brass some more without having to re-do the finish, and I have an idea which I want to try- let's see if it works!
My idea was to use an 8mm dowel and some 400 grit wet and dry paper stuck to the end of the dowel with double sided tape to polish up the brass to a higher grit and make it more shiny. After sticking it to the end, I trimmed away the excess with a knife and then secured the other end of the dowel in the chuck of my drill. I could then use the drill while guiding the dowel with my hands to polish up the brass, and this worked surprisingly well, although I did have to change the wet and dry paper a couple of times. Then, to polish the brass even more, I rubbed a piece of cloth on to some green polishing compound. this is a really fine abrasive and by rubbing it on to the brass it gave it a really nice reflective shine.
The fine metal oarticles did make a bit of a mess on to the wood though but because it was already coated in varnish, that cleaned off easily with a bit of furniture polish.
I was then much happier with how the dowels looked.
I gave them a light coating of acrylic spray varnish just to make sure everything was nicely sealed.
Finally I added my makers mark to the underside of the benches.
And then they were ready to install so I loaded them in to my van, and took them to the shop.
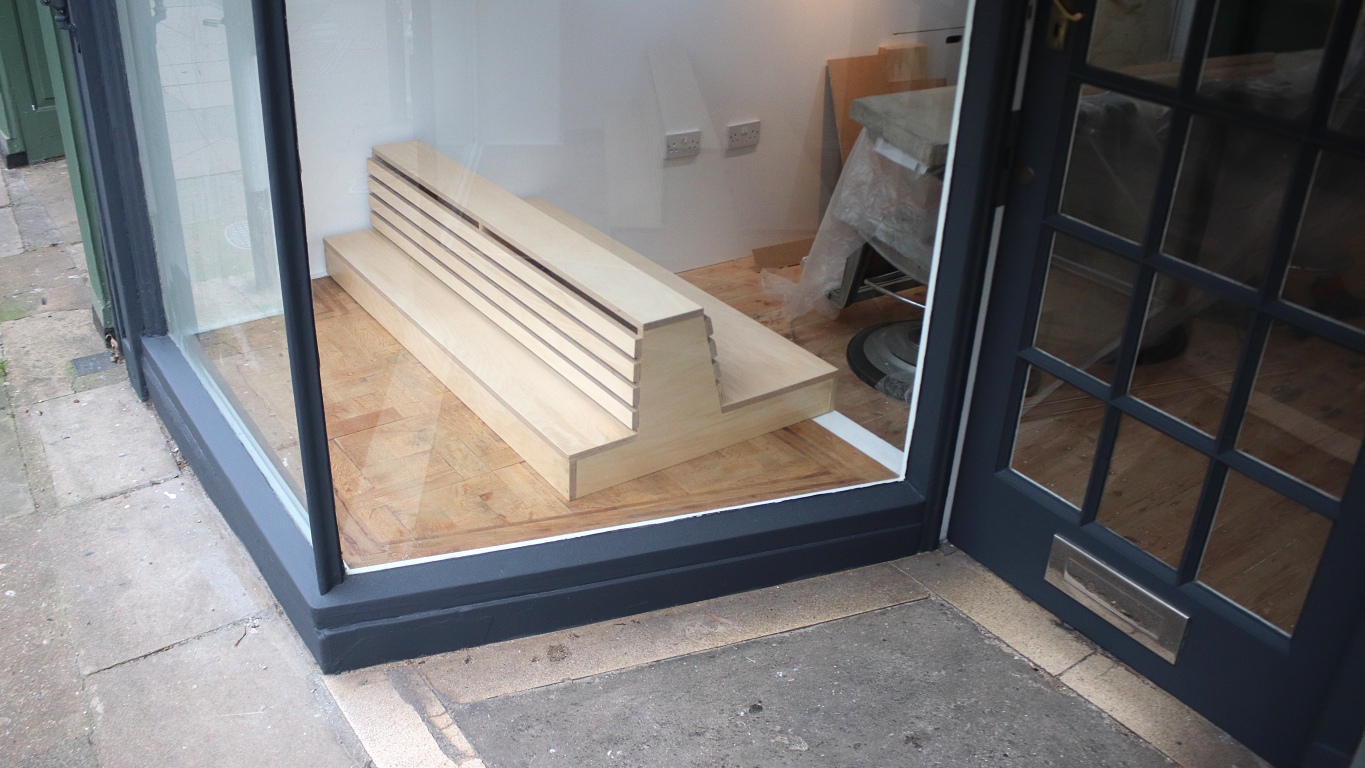
Originally the plan was to fit the units to the wall and the stepped floor, but they're so heavy that I've decided it's not necessary, and I don't really want to add any fixings to this parquet flooring if I can avoid it, so what I am going to do instead is add some adhesive rubber feet to the bottom just so that it can't slide around.
These bench seats took about 16 hours to build in total, and I'm pleased with how they turned out, I think they should work well.
I have since been asked to do a couple of other projects for the shop too, they need an alcove shelf and some tapered legs for some concrete table tops, so there's likely to be another 1 or possibly 2 videos about those, please hit subscribe if you haven't already to check those out, and hit the bell icon to make sure you don't miss them. I hope you enjoyed the video. You can also support my channel on Patreon if you'd like to receive early access to my videos, exclusive content, free plans and cut lists and a name credit at the end of my videos. Thank you for watching.
Images: