I made the mistake of buying a cat scratching post that was too small for my cat to use comfortably... So I gave it away (to someone with a kitten) and thought I'd make one for my cat, Dylan.
For materials, I used a pallet that I found in my recent "how to get wood for free" video. I'd use the stringers to make the post, and the slats to make the base. I dismantled and de-nailed the pallet using a crowbar.
Then I used a handplane to flatten the surfaces of the strings for gluing them up to form the post, which would be made from four of them glued together. I glued and clamped them together.
Then I started working on the base which would be hexagonal. I tilted my mitresaw to 30 degrees and set up a stop block so that I could easily make repeatable cuts. With all the pieces cut to length, I could then glue them up using masking tape to keep the pieces together and form the hexagon shape.
I could then trace the internal hexagon shape on to a piece of plywood and cut it out at the bandsaw to create a bottom panel for the base. I glued this inside the hexagon shape.
Then it was time to work on the post again, and unfortunately my glue joints failed as I was working on shaping it with the spoke shave... I had given it several hours to set, however it was too cold in my workshop and also the glue was past it's sell by date...
Rather than salvaging it, I started again using another piece of pallet wood. Unfortunately it wouldn't match the wood on the base, however most of it wouldn't be visible once it was covered in sisal rope anyway so it didn't really matter. I shaped the new post on the tablesaw with the blade tilted to an angle and cut off each corner, then I shaped it in to an oval shape using a hand plane.
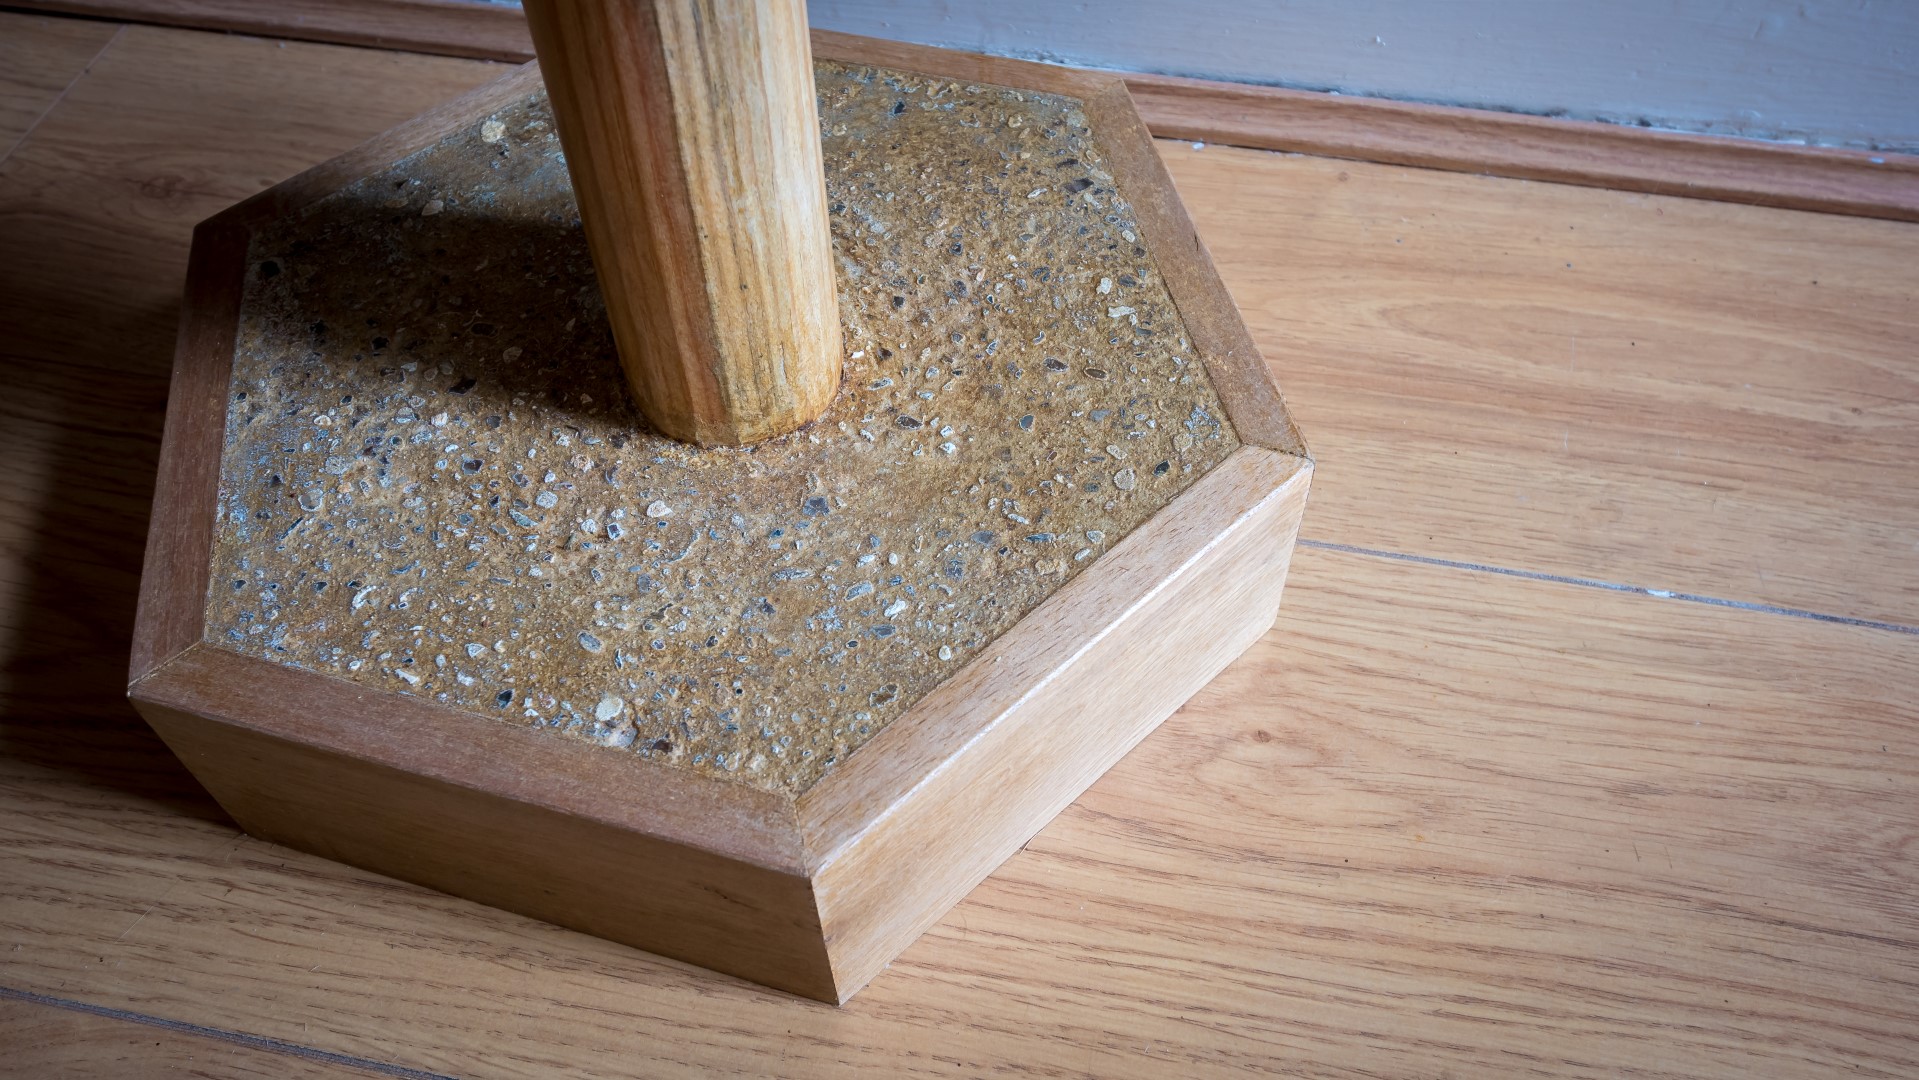
I decided to use concrete mix (just add water) to add weight to the base. I was originally planning to use a piece of laminate kitchen worktop which would have worked well, but I had some concrete spare and thought that it would make an interesting design feature.
I sealed the edges of where the hexagon met the base using a gel super glue and then lined the inside of the hexagon with some parcel tape to help stop the moisture getting from the concrete mix in to the wood.
Then I added a couple of screws to the bottom of the post, which would help to anchor the post in the concrete.
I mixed the concrete as per the instructions on the bag, positioned the post in the centre and added the concrete. I screeded off the excess and then vibrated the base by tapping it with a mallet to remove as many of the air bubbles as possible.
Once the concrete was dry, I sanded the base (wooden parts and concrete) with my orbital sander.
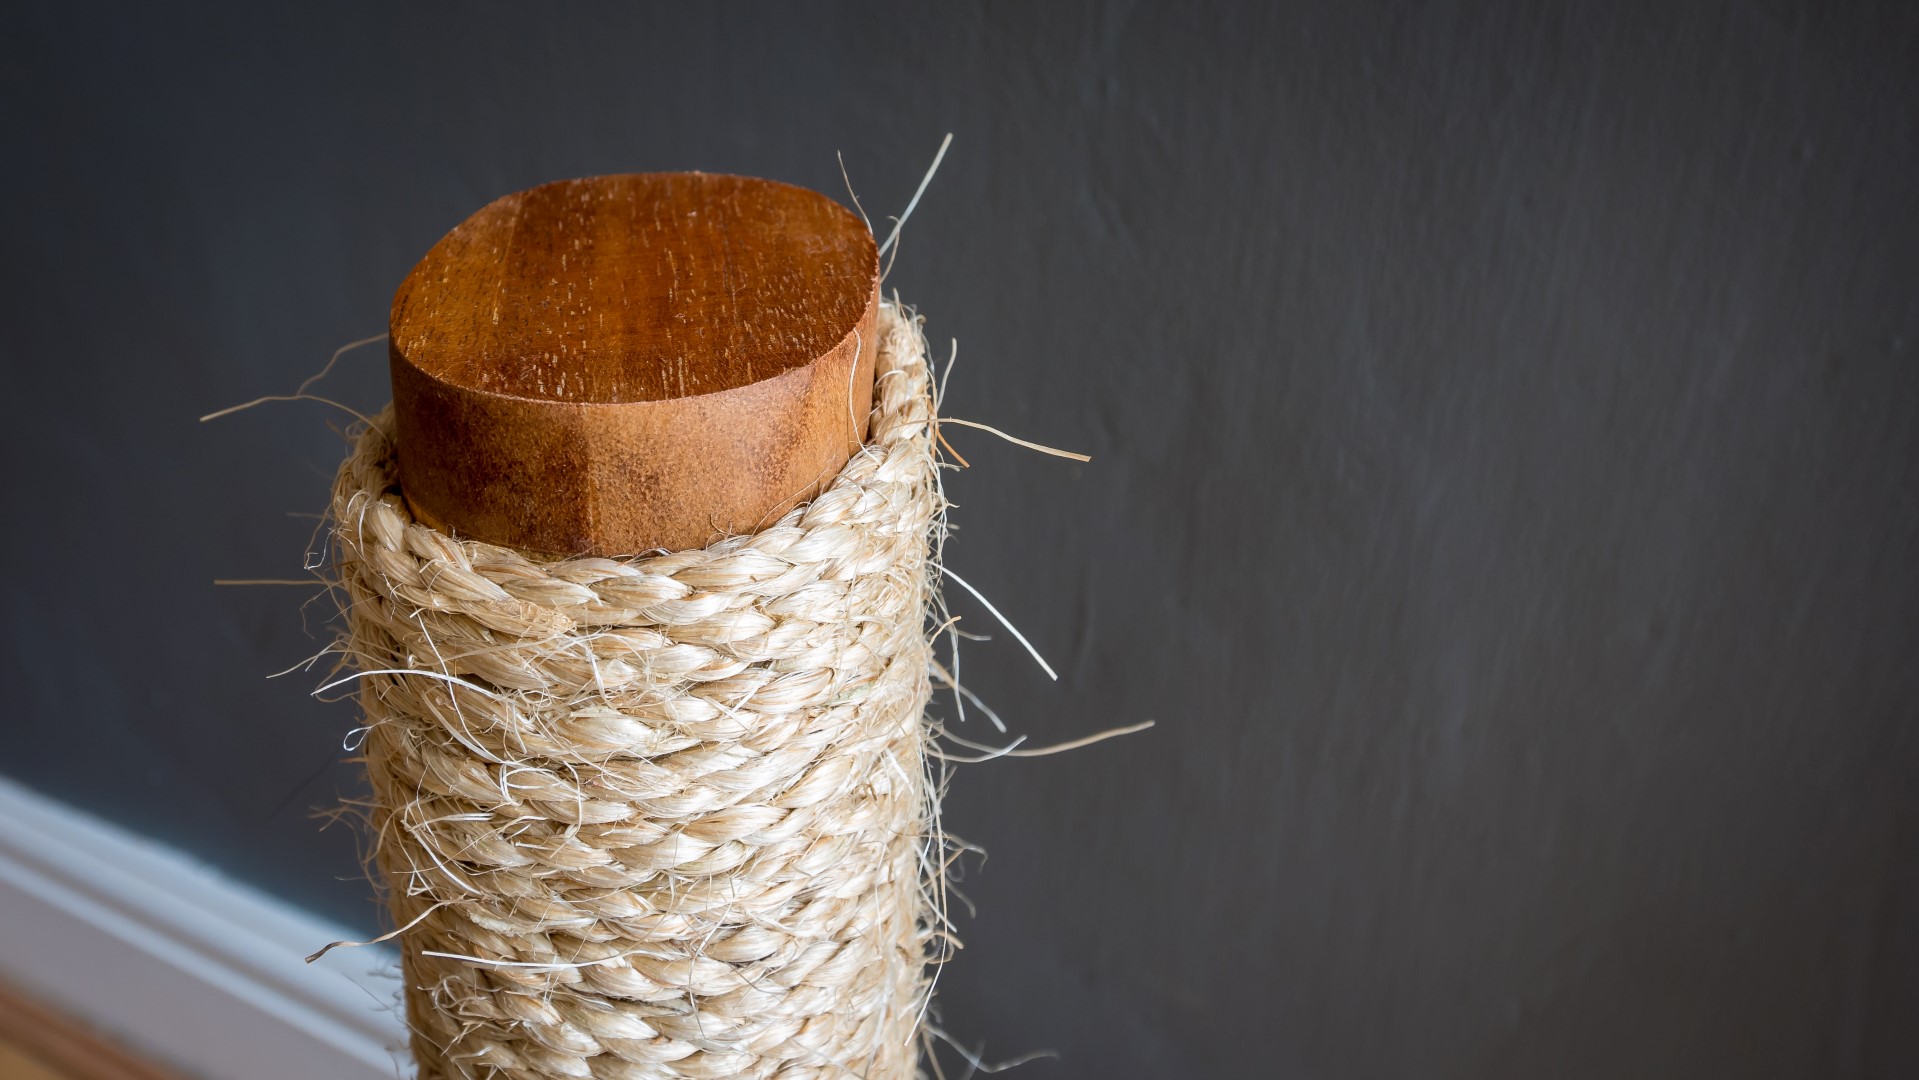
Next, I made a top cap for the post to hide the end grain. I used a scrap piece of sapele for this, glued it in place and weighed it down with a brick until the glue dried. Then I sanded the edges flush with the post.
I added a Rustic Pine Briwax to the post, the base, and the concrete and buffed it out with a cloth.
And finally it was time to add the sisal rope. I picked up 30m of this natural fibre rope on amazon for around £7, and used about half of it on the post. I secured it at the top and bottom with some roofing nails (which would face the wall to ensure that my cat doesn't catch his claws in it) and wrapped it tightly around the post. I considered gluing it with hot glue but it wasn't necessary, as the fibres of the rope when pulled tightly next to each other hold in place pretty well.
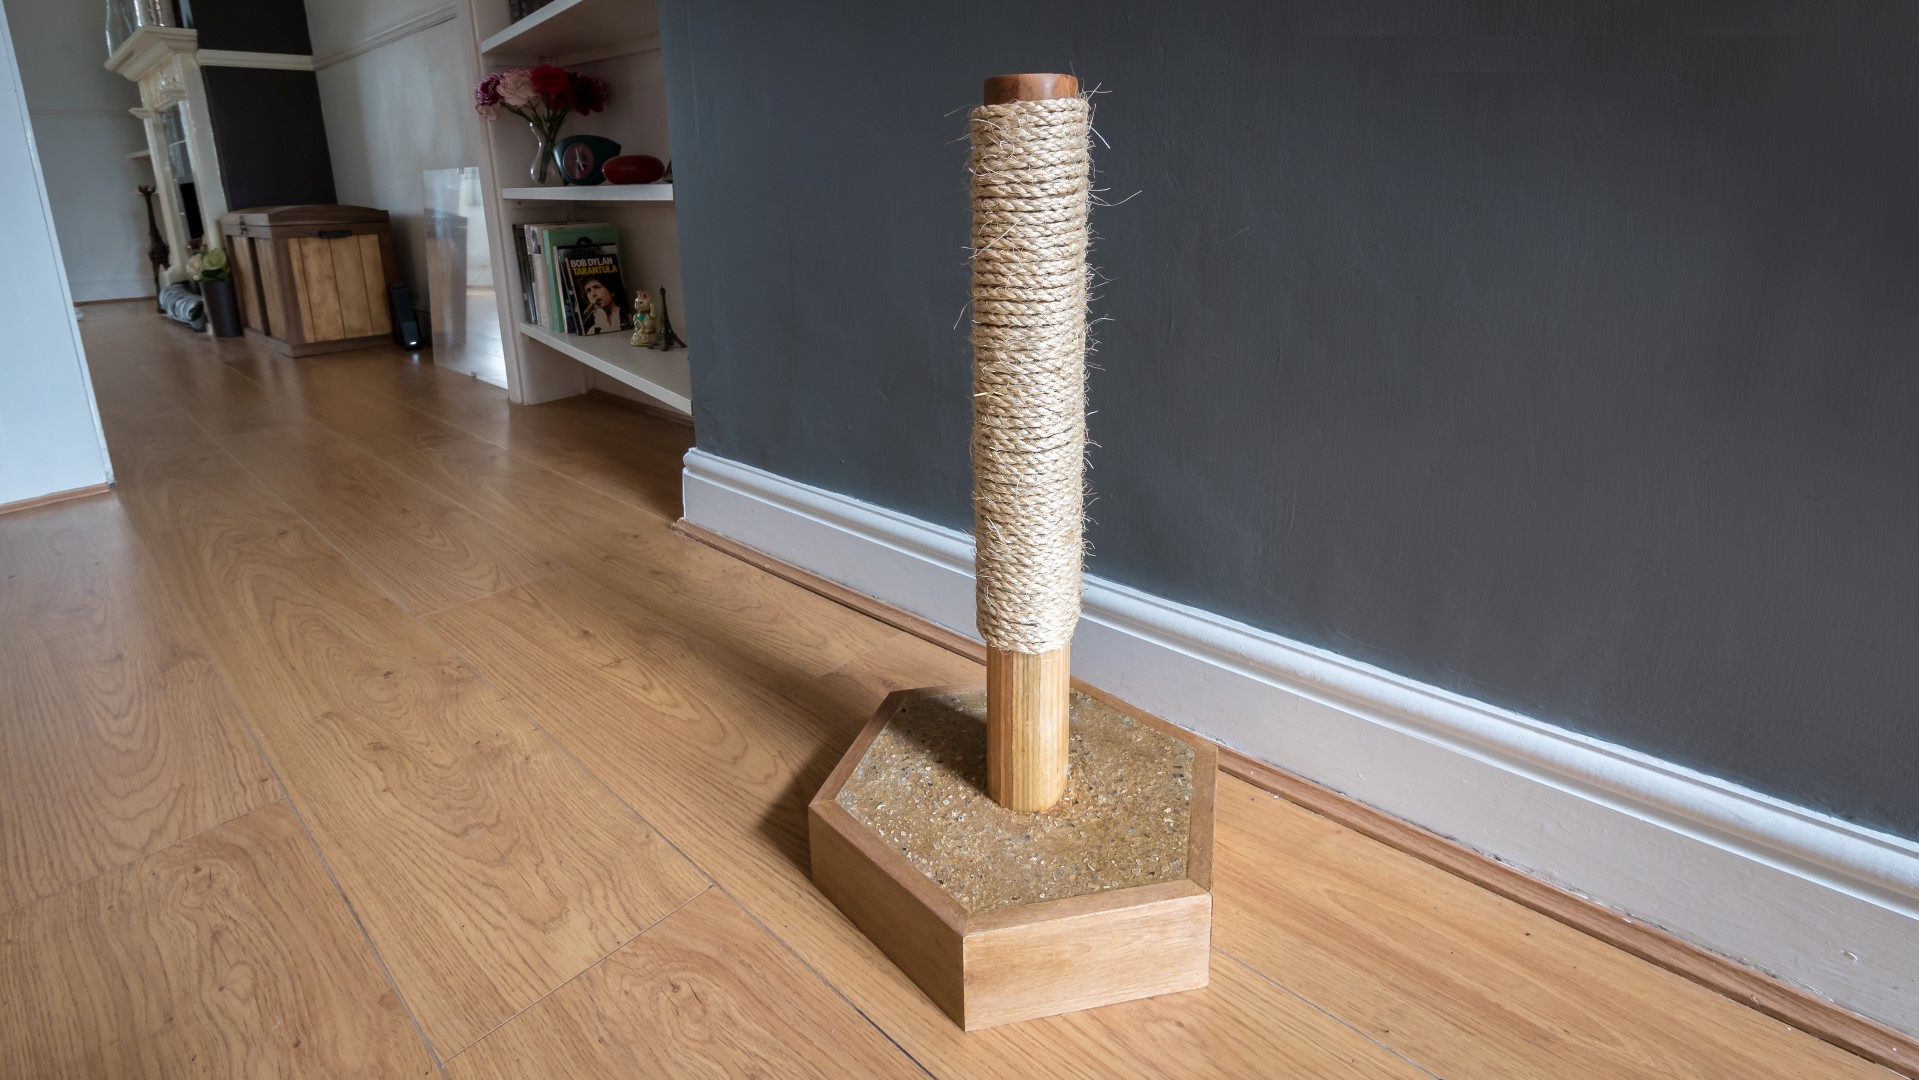
That was the scratching post finished, I was happy with how it turned out despite one or two issues while making it. And my cat Dylan absolutely loves using it. There's some footage of him using it on the Rag 'n' Bone Brown Facebook page if you want to see.
Images: