Welcome to part 2 of the desk build. The next job was to make the drawer and the drawer housing, and before cutting anything I first did a quick sketch just to get my head around the dimensions of everything.
This is the front elevation I'm drawing here, and the drawer needed to be 270mm in width.
The drawer runners I'd use are these bottom mount type, I've used these before for all my workshop drawers, they work well and are inexpensive.
Here's how they go together.
These don't come with any fitting instructions but they're not too difficult to fit. First I used my calipers to measure how much space I need to allow for them within the drawer housing and that's around 11mm so I allowed for 12mm just to allow a bit of extra play for the drawer runners
Then there'll be the side panels of the drawer housing which will be made of 18mm thick ply
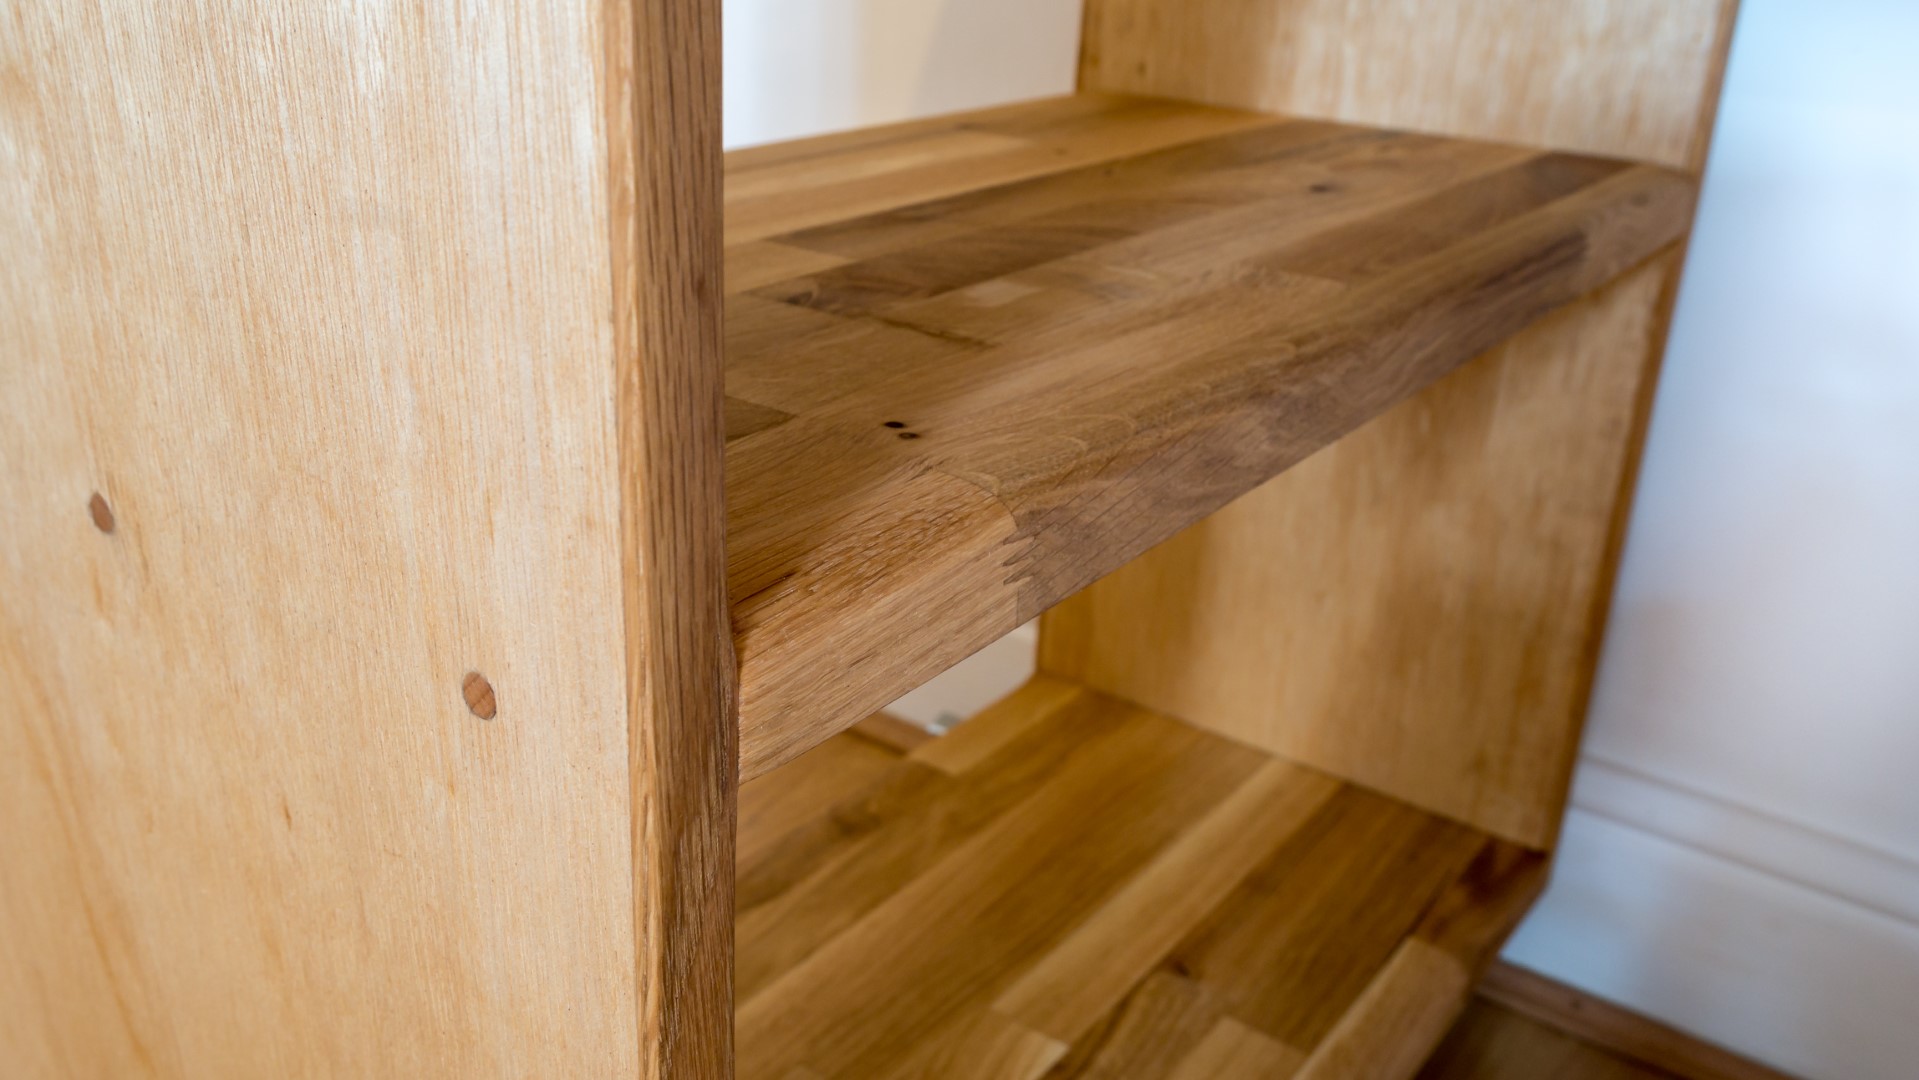
And then if I add all those numbers together I get 330mm which will be the width of the bottom and top panels, but then I deduct 5mm because those panels will have a solid oak trim piece added to hide the plywood end grain.
So those panels would need to be 325mm wide.
And the drawer runners were 450mm so that would be the maximum depth of the drawer so I'd cut the top panel of the drawer housing to 550mm and the bottom panel to 500mm - and the reason for that extra 50mm on the top panel will be explained later.
The height of the drawer would be 110mm so I'd cut the side panels to 125mm, because I thought that 15mm space should give me enough clearance to be able to get the drawer mounted runners in to the housing mounted runners. And they'd also be cut to 500mm in length.
So with all that figured out I started ripping the panels for the drawer housings to width at the tablesaw. And then to length at the mitresaw
Then I could mount the drawer runners to the side panels, and you'll see I'm using my combination square here just to get the spacing equal so the drawer would sit level.
I drilled pilot holes and screwed them on.
I then added the oak trim to one side of both the top and bottom panels - just what would be the exposed side. I used glue and brad nails and then filled the nail holes with some oak filler. And the holes practically disappear
Then I could assemble the box with glue and screws. And I used screws here because none of them will be visible because they'll either be hidden by the desk top which will be added later, or on the under side of the bottom panel.
I then added the drawer runers so I could sense check my measurements one more time and they looked ok based on the diagram I did earlier.
For the drawers I'd use some 12mm plywood. And the drawer construction I'm going to use is going to be pretty straightforward, no rebates, housing joints or dovetails, but the drawers will be plenty strong enough the way I build them and that's all that was needed here. I ripped the four sides of the drawer to 110mm at the tablesaw and then cut all the panels to length.
I glued and nailed the drawer panels using my plywood squares to keep everything square and then added some clamps
I could then cut a bottom panel for the drawers and for this I'm using some thin 5mm beech veneered plywood
I added glue and then used staples to fix the drawer bottoms which helped to square everything up and make the drawers nice and rigid.
Then I drilled pilot holes for the drawer runners to mount to the bottom of the drawers.
The first drawer was a little bit tight but it did fit and worked fine
But the second drawer for some reason was a little bit tight at the sides.
So I removed the runners and then set my tablesaw up to take a tiny amount off the sides of the drawer, with the blade height set to the height of the runners.
Then I added the runners again this time using different mounting holes, and then it fitted really nicely. In fact it worked better than the first drawer, so I ended up doing the same to the other one too.
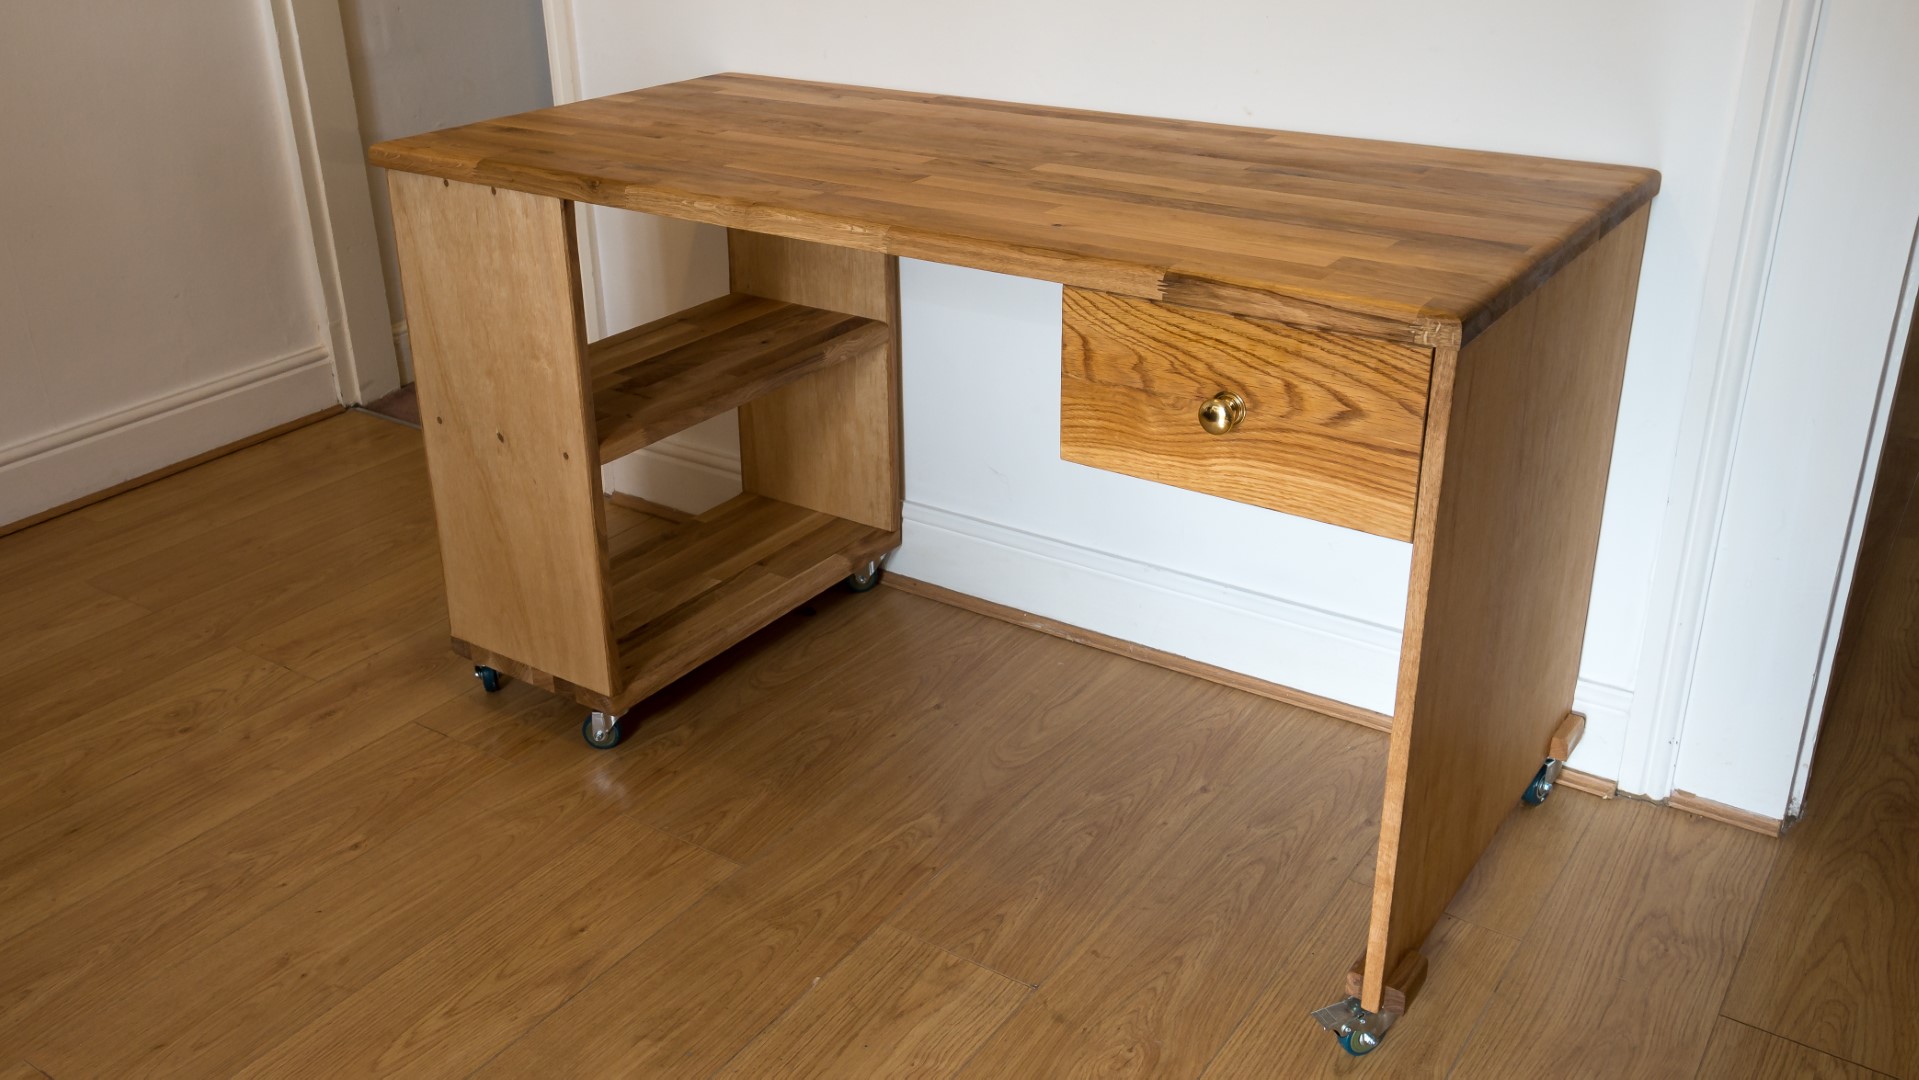
I could then attach the drawer housing to the side panel of the desk. This piece of oak that I'm reaching for here I salvaged from some old library shelving and I'll use this to make the drawer fronts later on, but for not I'm using it as a spacer to set the distance of the drawer housing from the front of the side panel.
Once the housing is positioned right where I want it, I marked around it with a pencil and then added wood glue - there's so much gluing surface avaiable here that there'd really be no need to use screws or anything else to secure it. I used a couple of F clamps and a placed a weight in the centre to get a nice tight glue joint.
Then I could make the drawer fronts from the oak so I cut some pieces to length at the mitre saw, ripped a clean edge on each piece at the tablesaw, and then I could glue them up to form a panel. I glued both drawer fronts up using the same clamps, just using a piece of cling film to separate them so that they wouldn't stick to eachother.
Once the glue was dry I could work on getting the back of the drawer fronts flat and straight so that they would sit flush with the drawers, so I used a handplane take down any high spots, and also to clean up the glue joints.
And I did some scraping on the front face of the drawer fronts to remove the old finish and get the glue joint nice and smooth.
I could then take some measurements for the drawer fronts and cut them to size
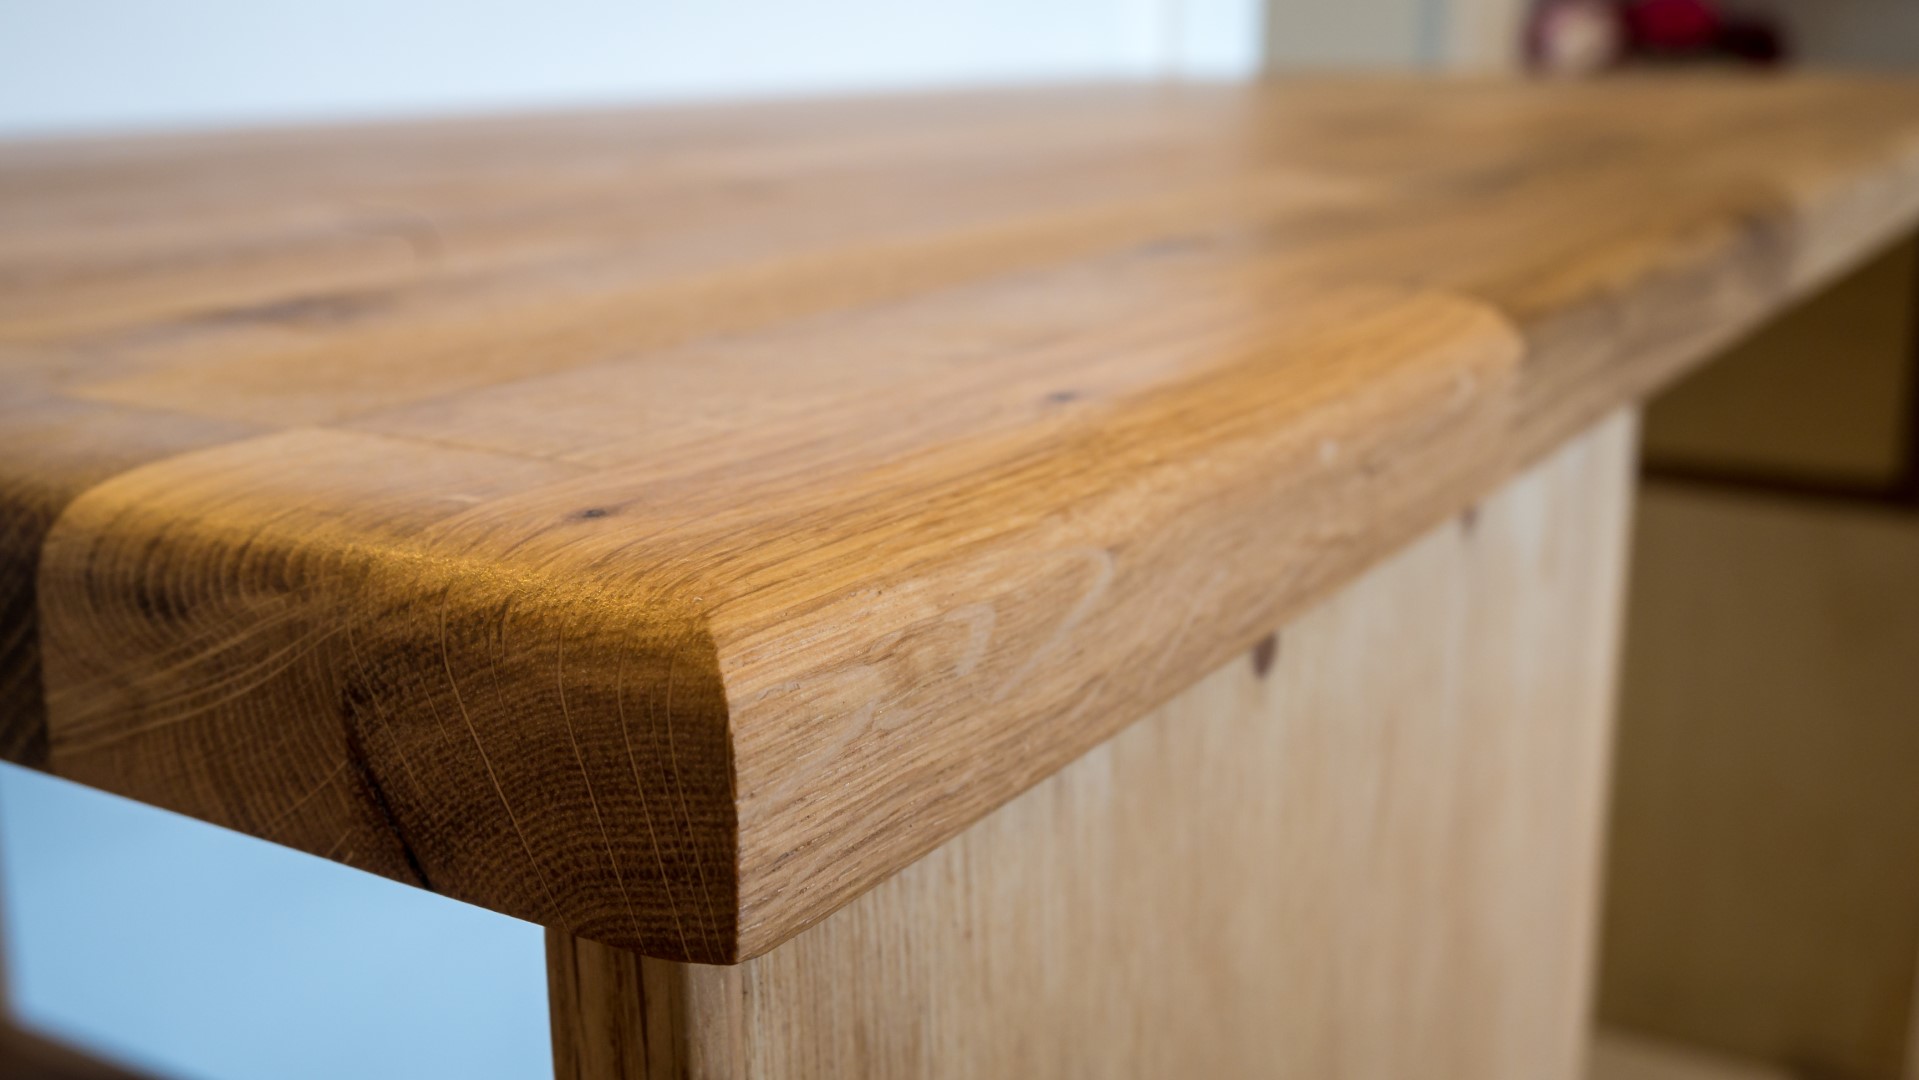
I used my block plane to add a subtle round over to the long edges of the drawer fronts and then I could add some wood glue and position the drawer fronts where I wanted them, leaving a small gap at the top and the side panel to make sure that it wouldn't bind when opening and closing the drawer.
After the glue had set I added some screws from the inside of the drawer to re-enforce them. Probably not necessary for strength, but I did it anyway, and then I added boiled linseed oil to the drawer fronts.
I bought some nice solid brass drawer handles for the drawers - I got these from Amazon, they're really heavy and really nice quality. After finding the centre of the drawer by marking up an X in the middle with a ruler placed corner to corner, I drilled a pilot hole for the bolt and it was a little bit too long so I used a hacksaw to cut it to length and then I could fit the handles.
I mentioned near the start of this video that I cut the top panel of the drawer housing 50mm longer than the other panels, and the reason for that overhang is to make it easier to attach to the desktop which will be added later. I first drilled some pilot holes, and then I used a 15mm forstner bit to widen the holes, and I did this because this should allow she solid wood worktop to expand and contract with seasonal changes.
I drilled some holes at the front of the drawer housing too.
And also through the top panel of the shelving side of the desk, and once the pilot holes were drilled I used the forstner bit to drill from both the top down and bottom up to get a nice clean hole.
That's it for part 2, and there's still lot's more to come, so if you enjoyed this video please subscribe and join me for part 3 - thank you for watching!
Images: