In this video I show how to scribe fit an alcove shelf. This is a project for my friends at Courage Noble, a local independent barber shop.
Bench Seats build video (part 1): https://bit.ly/2Umo2pK
Bench Seats build video (part 2): https://bit.ly/2VIjMkR
Everbuild Polyurethane Glue: https://amzn.to/2XHOFHZ (UK) https://amzn.to/2tSzqy2 (US)
Everbuild Water Based Varnish: https://amzn.to/2HjTfXk (UK) https://amzn.to/2ERUqeA (US)
Denibbing Video: https://bit.ly/2EyVEKL
Gid Joiner YouTube Channel: https://bit.ly/2Upl0RT
Gid Joiner Bay Window part 1: https://bit.ly/2VBFBlW
As an Amazon Associate I earn from qualifying purchases
In this video I'll be scribing and fitting a shelf to an alcove for a local independent barber shop, Courage Noble which is here in Norwich, in the UK. This is the second out of three projects I'm working on for them following the recent bay window bench seating/window display units which I have a video about, link to that in the description box below.
The first job was to cut some battens which I'd later attach to the wall, and I did that back at my workshop using the tablesaw and I'm using 18mm birch ply ripped in to 20mm strips.
When I got to the barber shop I had a look at the alcove. And as is often the case with old buildings, none of the walls were straight or square
First I measured the wall at the back and that measured 1390mm.
And I wanted to cut the shelf over sized initially, so I added 50mm to that measurement and made a mark at 1440mm on to my piece of 18mm birch ply.
I then used my bevel guage to take the angle for the left hand corner, and that was a bit less than 90 degrees.
I could then draw a line to mark up that angle from the mark I'd just made.
And I lengthened that line with a straight edge.
I could then measure the angle at the right side corner of the alcove and that was not 90 degrees either, it was a little bit more than 90 degrees. And I marked that up at the other end of the ply.
I used my circular saw to make cuts along those lines
Next I wanted to figure out the angle I wanted to cut to the front of the shelf, so I offered up a straight edge, and used my bevel guage to take that angle.
I also measured up the depth I wanted the shelf to be, and then I could mark that up on to the ply too.
I could then do the same on the right hand side.
Next I joined those two lines using a straight edge.
And I'd use a straight edge and a couple of F clamps to guide the circular saw cut to get a perfectly straight edge. The problem I had was that my straight edge was not quite long enough so I just kind of wedged some masking tape and a piece of wood to get it to clamp down at the other end. And that actually worked well initially, until I got further along with the cut and that stuff was getting in the way of the motor housing at the side of the circular saw, so I ended up taking it off and just holding the straight edge down firmly with my spare hand.
I could then check the cut was straight, and it looked good.
Next I could offer up the shelf to the alcove, so that I could check how the shelf fits along the back wall.
I made that cut using my jigsaw.
I could then make that cut with the jigsaw too.
And then I offered up the shelf again.
Next I wanted to add the battens. I measured and marked up the height the that the top needed to be, and then used my spirit level to mark a horizontal line.
I could then offer up the batten, drill a pilot hole in the centre and then add a screw. These walls were lined with MDF beneath the blasterboard, so there was no need to use wall plugs - I could just screw directly in to the wall.
I could then use that centre screw as a pivot point for getting the spirit level bubble in the middle again before adding the rest of the screws.
I could also use the spirit level to offer up the battens for the walls at the sides.
I'm going to be using a polyurethane glue to stick the shelf down to the battens, link to this in the description box below, and before I add the glue I first need to add a bit of moisture to one of the surfaces so I used a damp cloth.
I could then add the glue and fit the shelf, and it was a really nice fit.
And then to make sure the plywood was properly seated on to the battens I fired in a couple of brad nails and then filled the holes with wood filler.
After about 10 minutes you'll see that polyurethane glue starts foaming up slightly, which works great to fill any gaps, so I wiped away the excess with a damp cloth. This glue bonds really well.
Because the shelf was pretty long at 1.39m, next I cut a 50mm strip of the ply to use as a front trim for the shelf - this would add more rigidity to the plywood shelf and prevent it from flexing at the front. I marked up and cut it to length. And then I made some marks where I wanted to add some dominos so that I could get the trim perfectly aligned to the top of the shelf. You could use biscuits or dowels for this so that they were protruding about 12mm. Then I could add glue and push it in place.
It would have made more sense to add this trim piece before fitting the shelf, so that you could add clamps to get a nice tight glue joint, but unfortunately I forgot to bring any clamps that were long enough to do that with me, so instead I fired in a few brad nails to hold it in place tightly.
Then I could move on to sanding everything and I used 100 grit for that.
I used the vacuum to clean off all the dust and then I applied masking tape to where the shelf met the walls so that I could apply some white decorating caulk. This stuff is paintable, so later on it can be painted the same colour as the walls and no gaps will be visible.
I smoothed over the caulk with my finger, and then I could remove the tape. Unfortunately the tape also took some of the paint off the wall, but that area of the wall was going to get re-painted anyway so it wasn't a problem.
I applied some water based varnish to the shelf, this will seal the wood and give it a nice satin sheen and make it more hardwearing. I'll leave a link to the stuff I use in the description box.
After about an hour it was dry enough that I could come back and denib with some 400 grit wet and dry paper. I have a separate video all about denibbing which I'll link to below too.
And then I could apply a final coat of finish.
This was the first time I've ever scribed a shelf to fit, in the past whenever I've fitted shelves I've always just made a template out of cardboard and used that to shape the wood, but this method is much quicker and much more accurate too. I learned all about it from another YouTube - Gid Joiner on YouTube - I'd highly recommend checking out his channel - he does some great on site jobs whcih are interesting to see and the videos are always full of excellent tips - I'll leave a link to Gid's channel in the description box below.
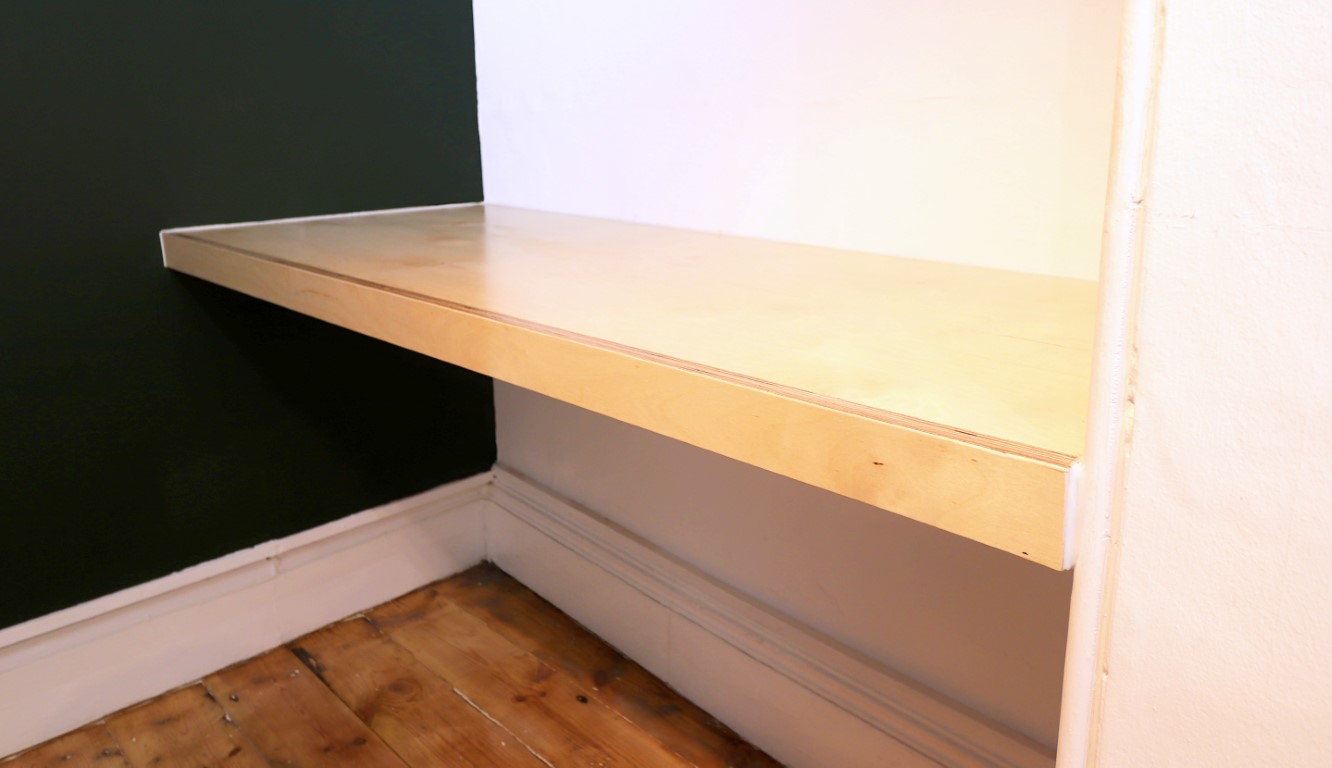
I'm really pleased with how the shelf turned out, if I could do it again I would have definitely applied the trim before fitting the shelf so that I could clamp it on there and get the joint nice and tight, but the dominos and brad nails did a fine job instead, so it wasn't a major problem. I'd also liked to have use a better piece of ply - the piece I used had a few slight imperfections and infills in the grain, which you might have spotted in the video, but it was the only piece big enough that I had leftover from the bench seats commission, and because birch ply is expensive it didn't make sense to buy another sheet.
I hope you enjoyed the video, if you'd like to help support the channel plus get early access to my videos, free project cut lists and plans, exclusive content and a name credit at the end of my videos you can do so via Patreon, link to that in the description box below. Thank you for watching
Images: