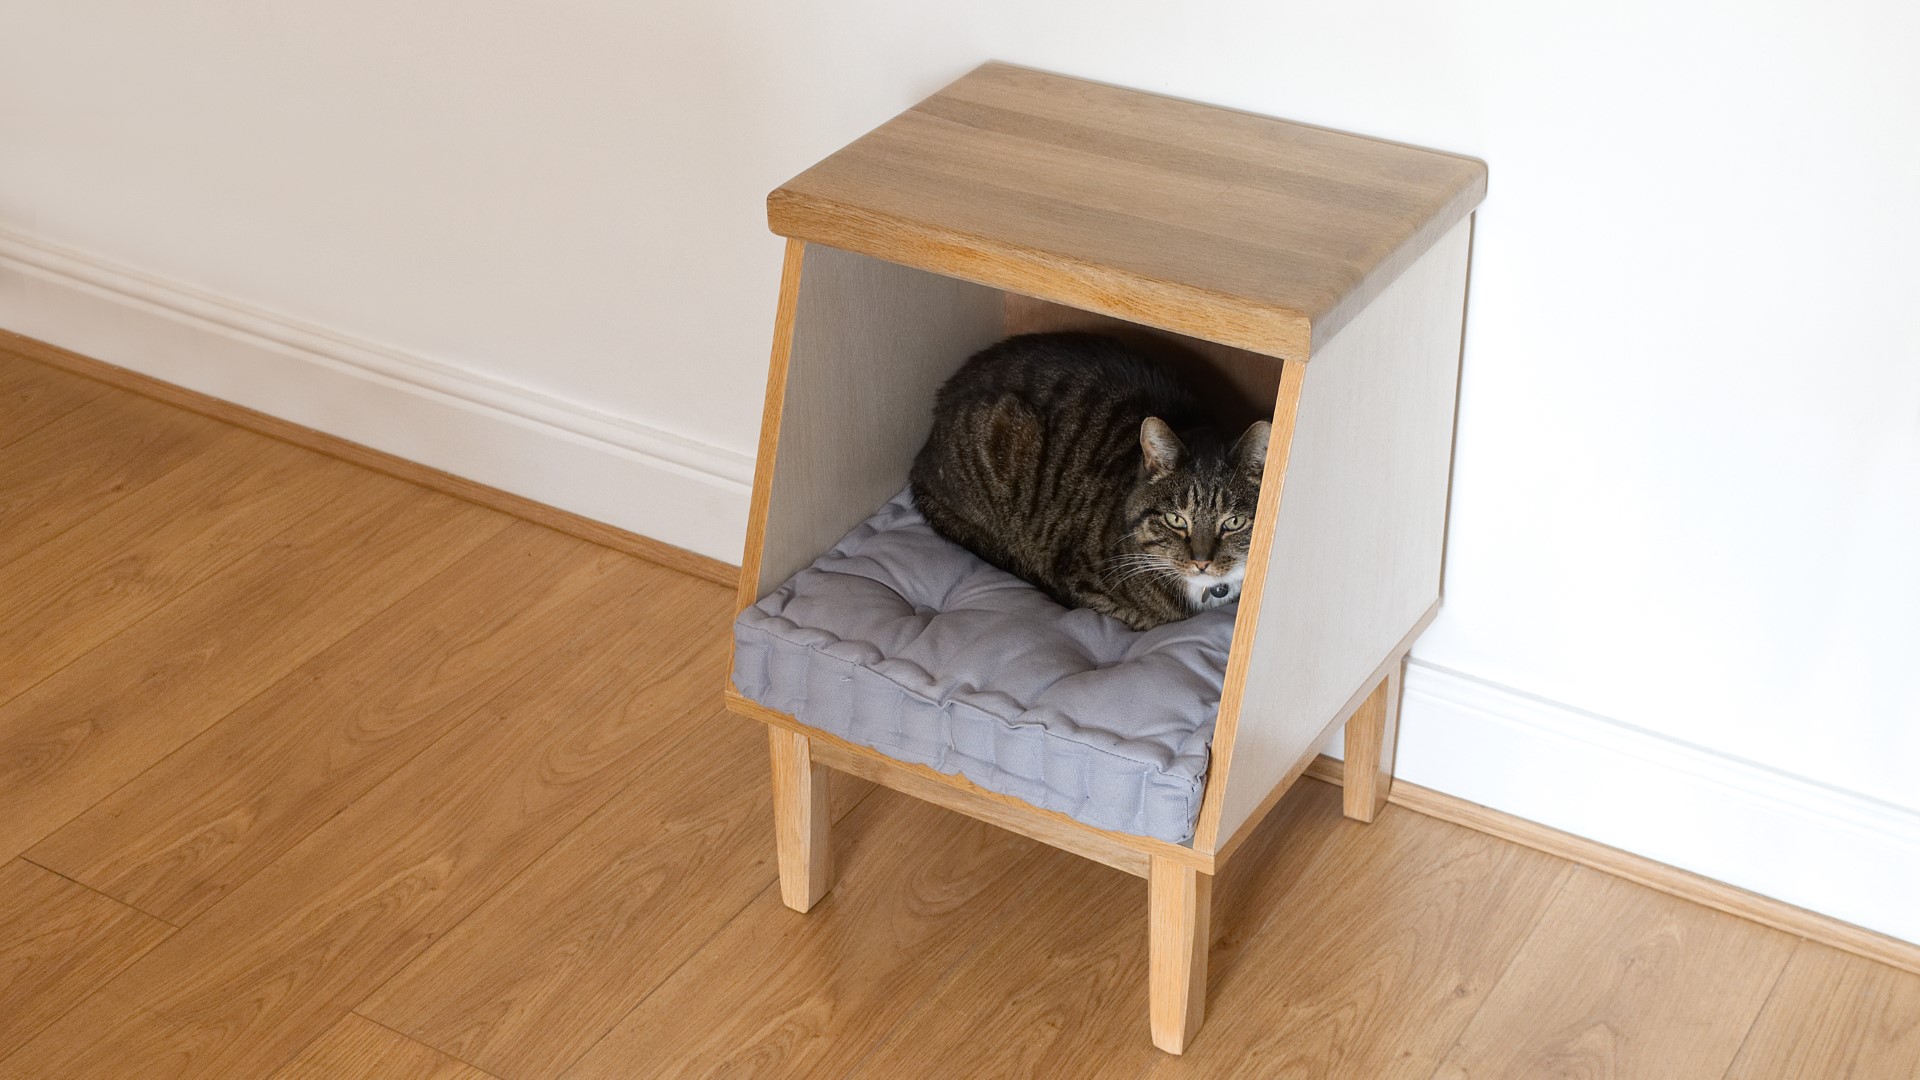
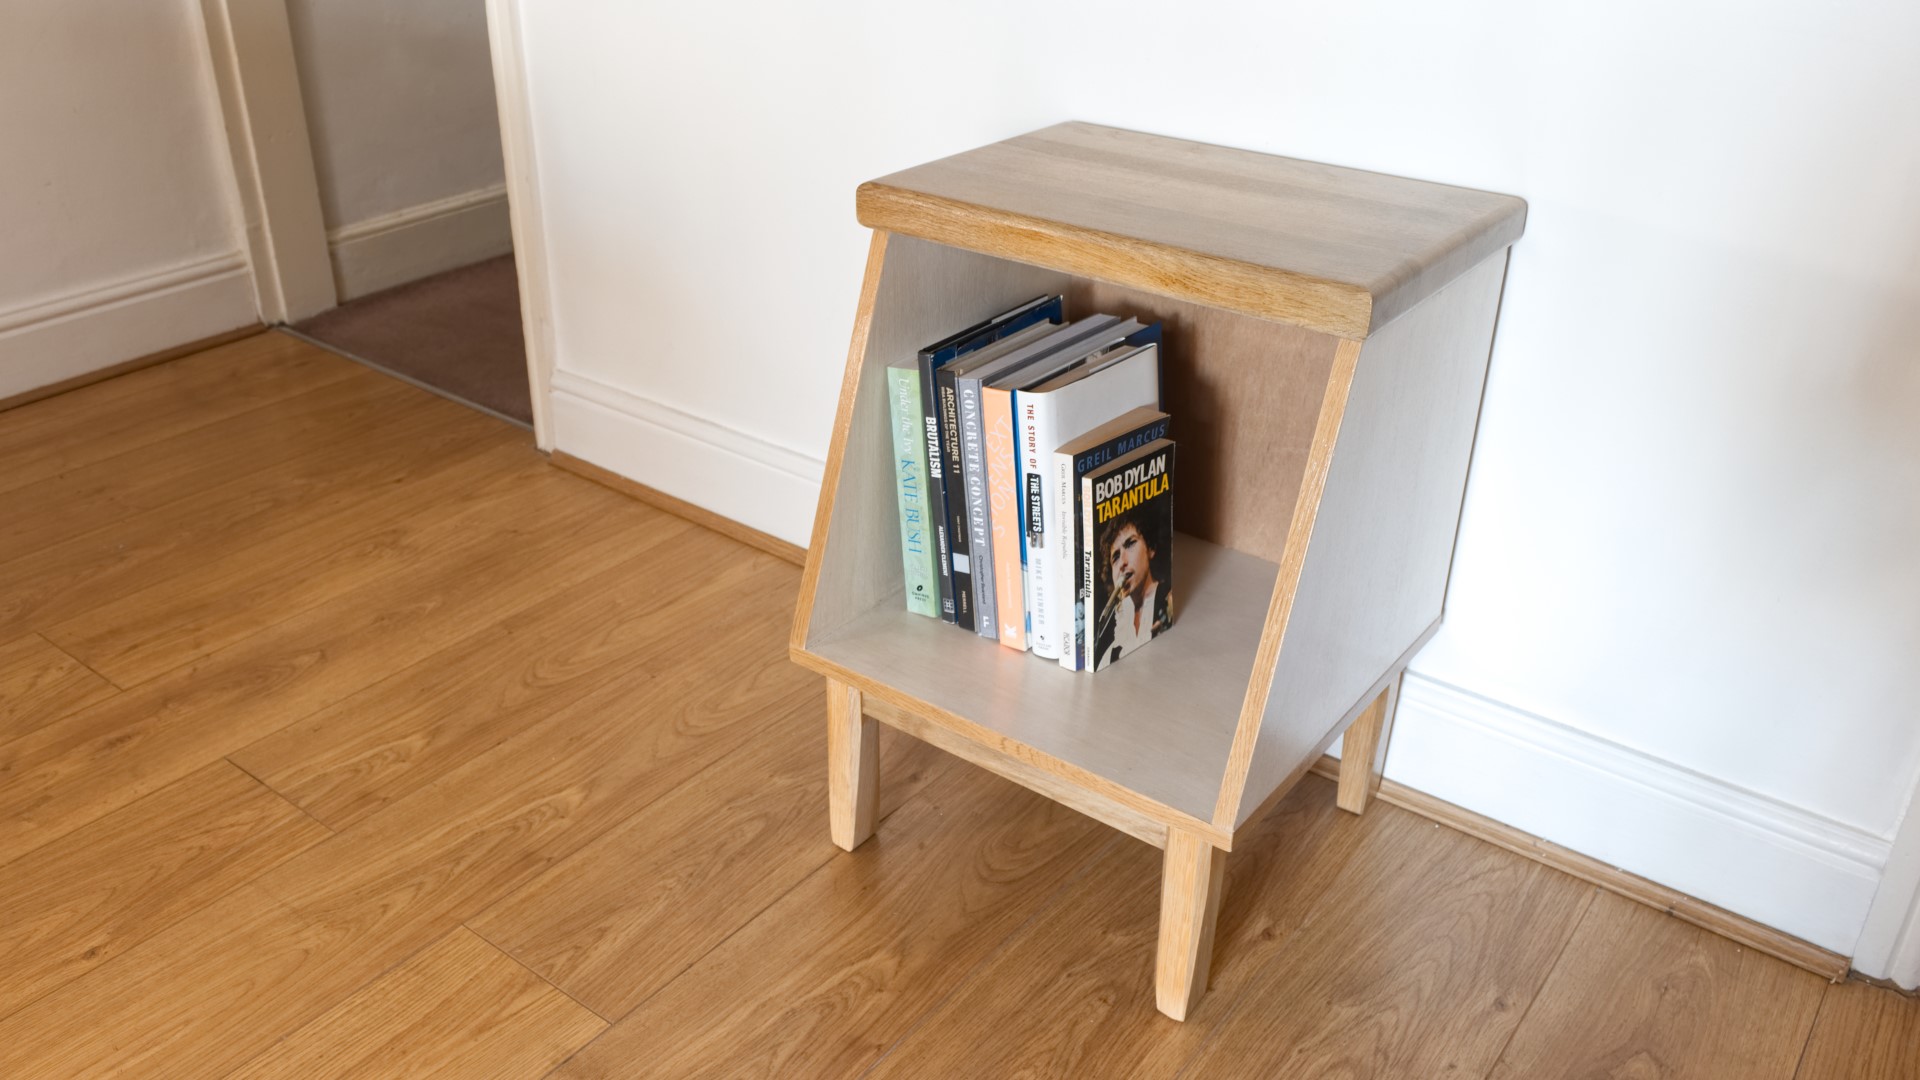
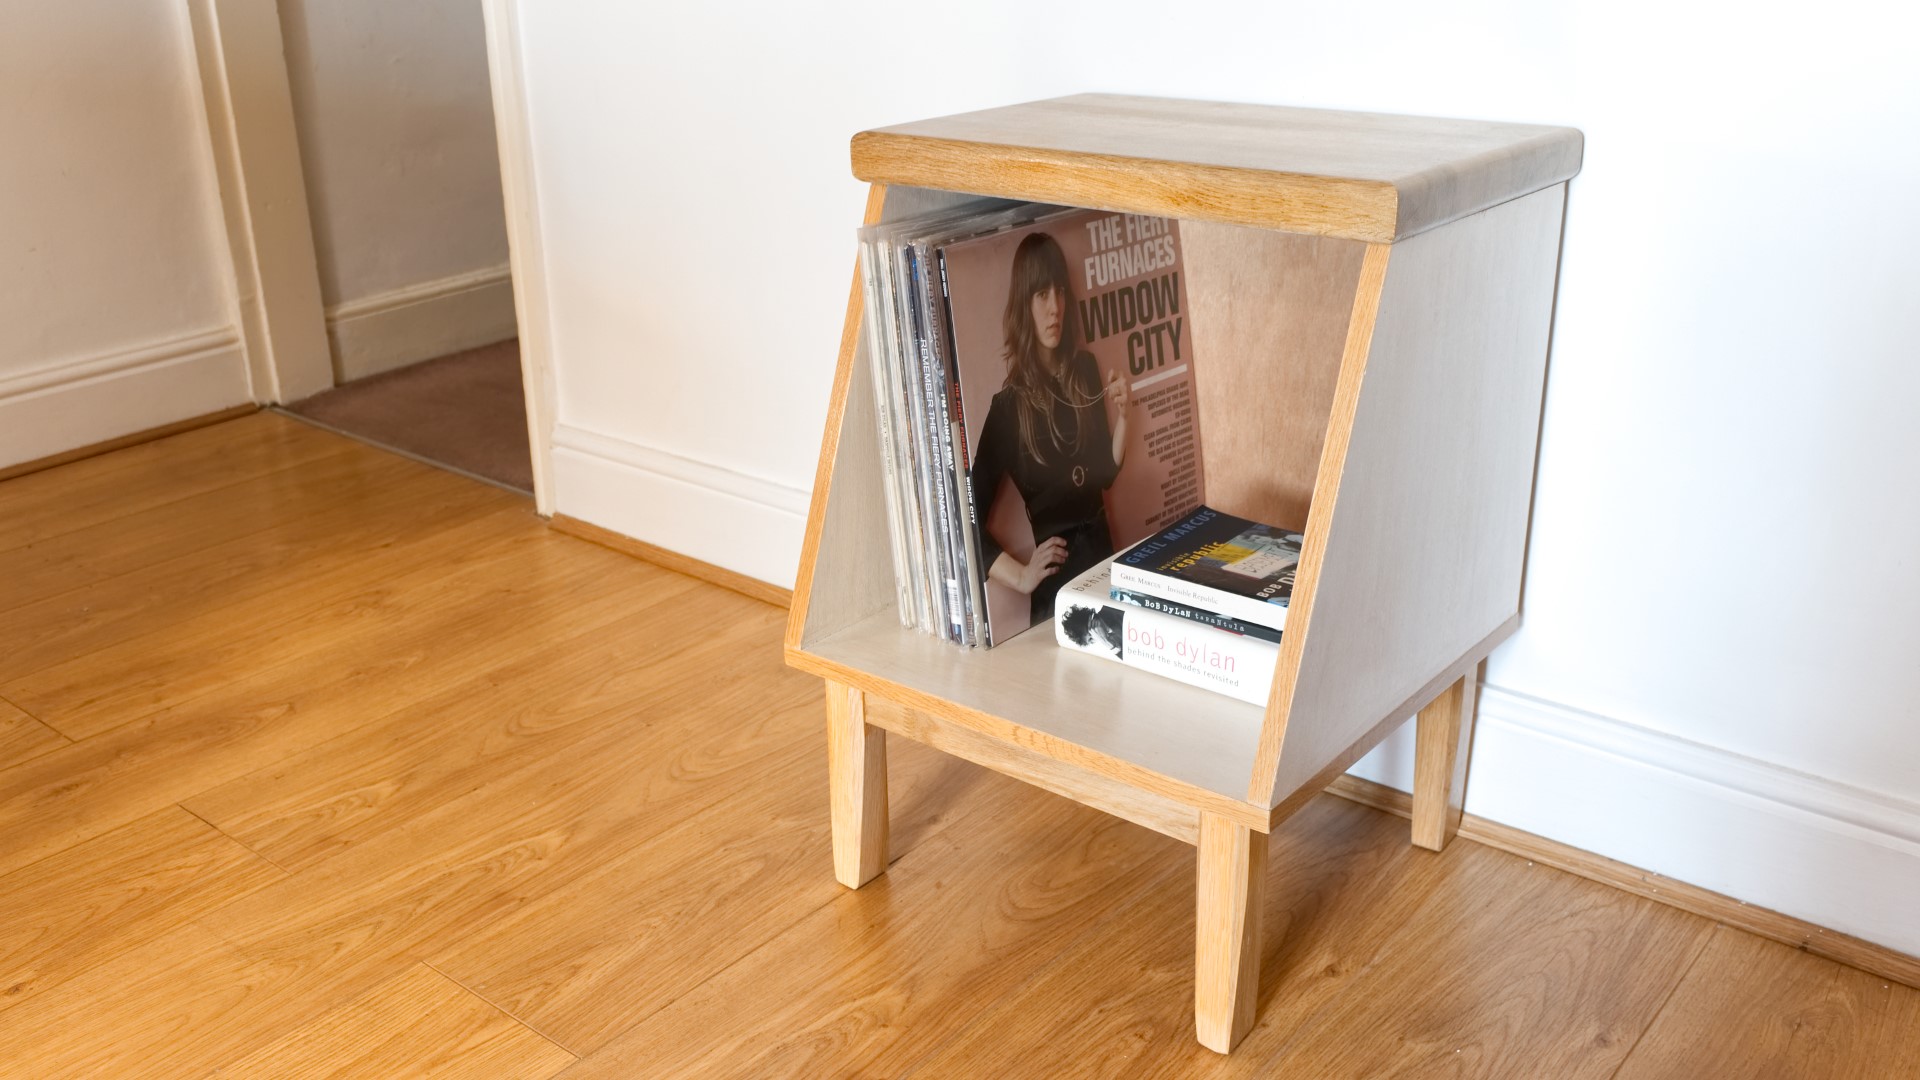
In this video HiKOKI challenge me to make a project with limited tools. To make it a little more interesting I decided not to use my workshop either! I make some cat bed cabinets, but they can also be used as bedside tables / night stands, vinyl cabinets to store records or for book storage. The cabinet has an oak top made from salvaged oak worktop, legs made of salvaged hat and coat stands and a carcass made of 18mm hardwood plywood.
HiKOKI Giveaway Link: http://bit.ly/hikokigiveaway
FourEyes Furniture build video: https://youtu.be/aWoycQK9Msg
Modustrial Maker build video: https://youtu.be/aT-JGSTaRn4
HiKOKI are a manufacturer of high performance power tools, designed and manufactured to meet the demands of professional users. Formerly known as Hitachi Power Tools, The tools are the same high quality as you’ve come to expect, but with brand new innovations like their new Multi Volt platform which provides AC power with DC freedom.
Tools used in this video:
HiKOKI Combi Drill DV36DAX https://amzn.to/2AyhFIN (UK)
HiKOKI Impact Driver WH36DB https://amzn.to/2OSr2vA (UK)
HiKOKI Circular Saw C3606DA https://amzn.to/2ObkqDe (UK)
HiKOKI Random Orbit Sander SV15YC https://amzn.to/2PvcIWT (UK)
HiKOKI Plunge Router M8V2 https://amzn.to/2ZAfFtI (UK)
As an Amazon Associate I earn from qualifying purchases
Visit my affiliate store (link below) for more of my tool recommendations
This video is in collaboration with HiKOKI tools, formerly known as Hitachi - a manufacturer of high quality tools with innovations such as their new multivolt battery platform which provides AC power with DC freedom.
HiKOKI have challenged myself and two other makers to make a project with limited tools. They're also offering you the chance to win three of the tools I use in this video - circular saw, cordless drill and impact driver plus batteries and a charger. Stay tuned to find out how you can win those later in the video.
Now instead of just limiting myself to a using a few tools, I'm going to take it one step further and I'm not going to allow myself to use my workshop either, I'm going to do everything in my garden with an old decrepid workmate and a couple of saw horses. And that's because I want to demonstrate that you don't need a workshop, nor do you need a table saw, mitre saw, bandsaw, planer, and all of those other wonderful large machines that I use regularly in my videos in order to make things. And as is usually the case, I'm going to be using salvaged materials too. A while back I saw this solid oak kitchen worktop sitting by some bins in someone's garden so I knocked on the door and asked if it was being thrown away, they said yes, so I swung by and picked it up in my van.
This worktop had obviously not been cared for correctly, as it had some really bad black water stains.
I started by marking up where I wanted to make a rip cut through the oak. I bought a track saw recently, but I'm not going to be using that, instead I can get great results with my circular saw using a straight edge and a couple of clamps and some careful measuring.
This 36v HiKOKI saw has all the power of a corded saw. In fact I think a lot of corded saws would struggle cutting through 40mm thick solid oak, but the the thin kerf blade in this saw coupled with the 36v power got through it no problem.
Next I wanted to clean up the oak, and normally I might use my planer thicknesser for that, but I can get great results just using my belt sander with an 80 grit belt working diagonally across the grain first to help ensure it stays flat, and then doing the final passes with the grain to help remove the sanding marks.
Then I could use a large speed square to make cross cuts through the oak, first to get a perfect 90 degree end, and then to cut it to the size I wanted.
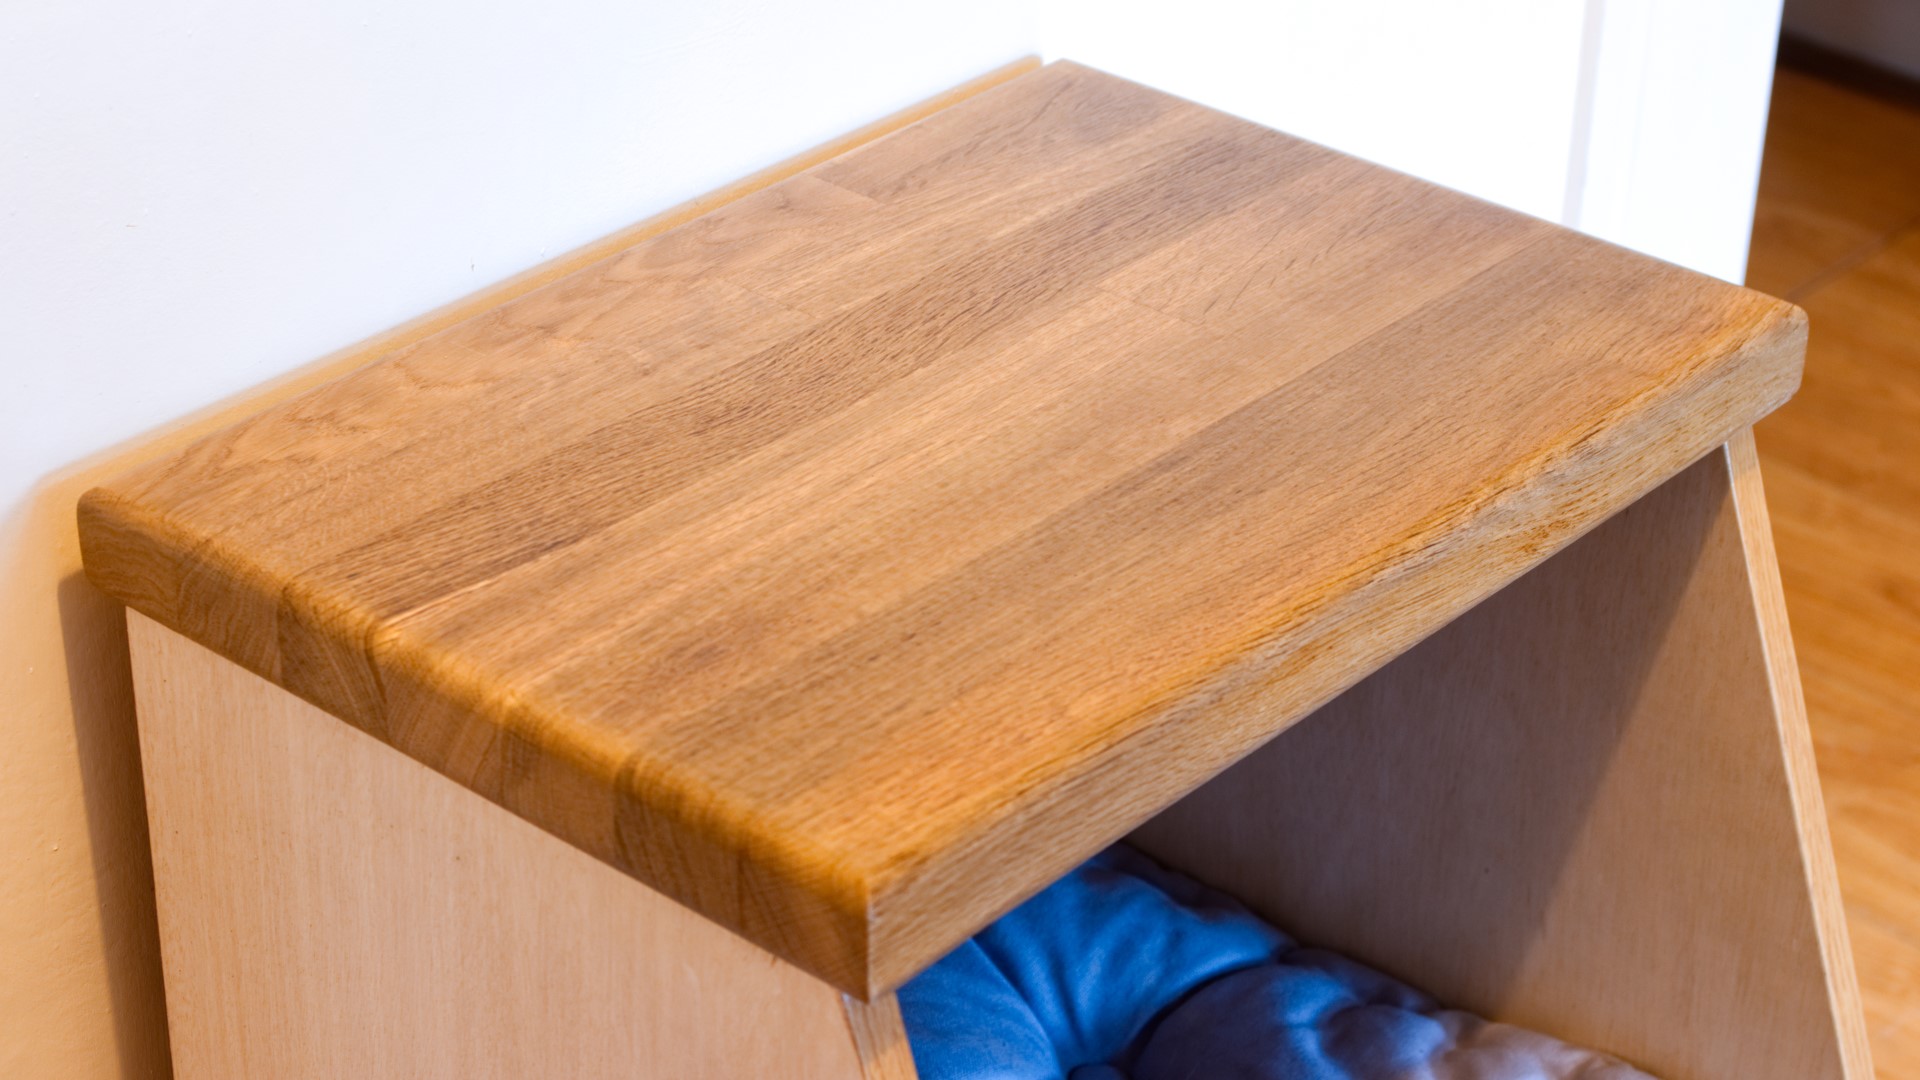
These pieces of oak are going to be the tops for some cabinets, and I want to round over the edges. For that I'm using the router with a roundover bit. And I did that to both the top and the bottom.
Then I did some finish sanding to remove any sanding marks left by the belt sander. This random orbit sander from HiKOKI has a turbo switch, which rotates the sanding pad at high speed, and really helps to speed up sanding, a job which most people love to hate! It also has variable speed, and I turned the speed down low so that I could sand the roundovers carefully without removing too much material.
Next I can make the carcasses for the cabinets, and for that I'm using some 18mm hardwood plywood left over from another project.
I cut this in the same way, using the circular saw and straight edge. For the cross cuts though I was a little bit worried about the grain tearing out on the face veneer so I added some masking tape to help hold it down.
And those cuts came out really clean.
With all the panels cut to size, next I want to cut a taper to the side panels to give the unit a bit more character.
First I placed the panels together flush. And then I marked up the taper and clamped the pieces together. Because I'm making multiple of these units at the same time, I decided to make a simple jig using some hot glue and some scraps of plywood which would help me to make repatable consistent cuts.
Here I'm making a cut just to make sure that the jig is positionsed so that my blade is in line with my pencil line and it looked good.
So then I add another block to the back of the jig which will help me to butt it up to the edges each time consistently.
And then I could make the cuts. This jig worked out great.
Here I'm markins up positions for some screws that I'm going to be adding through the bottom, so that the screw heads won't be visible. I can then add wood glue.
And then I drill pilot holes with a countersinking bit and add the screws.
While doing this I used a speed square just to check that the panels are at 90 degrees, and then I can use the top panel, which is this small one to get the positioning right for the next side panel.
And then I can glue in the top panel. The reason this top panel is so small is because it's only purpose is going to be to keep the unit square and hold the oak tops which I worked on earlier in place. I don't want it to be visible from the front of the cabinet, so that's why I'm setting it in the middle of the top of the side panels.
I added clamps and left it for a few hours for the glue to dry, and then I could mark up for some dowels which are going to help reenforce these joints. I used some masking tape here which is going to help keep any glue squeeze out off the side panels.
I used a brad point bit in my drill so that the hooles were cut nice and clean and then I could glue in some 8mm dowels.
I cut off the excess using my japanese pull saw which works great to cut the dowels flush with the panel.
And then using a sharp chisel I can pair the dowel ends nice and smooth.
I sanded the carcasses by hand because I didn't want to risk sanding through the veneer, which is quite easy to do with an electric sander.
The plywood I'm using on this project isn't particularly good quality, and there were some inconsistencies between the face veneers used on each of the pieces I was working with. So I decided to stain the plywood and for that I'm going to use some white stain. The reason I'm using stain instead of paint is because I want it to still look like wood, I want the grain to be visible through the stain.
I used a paint brush to apply the stain. And the stain raised the grain of the wood a bit, so I used some 240 grit wet and dry paper to smooth it over.
To hide the plywood edges I'm going to be applying some oak iron on edge banding which will match the tops really nicely. The iron heats up the glue, and then I can press it down firmly with an offcut of wood. I can then trim the ends with a knife and do a bit of sanding to refine it. I can then use my block plane to trim it to width, holding it at a slight angle so that I don't gouge away any of the plywood bottom panel.
I wanted to make a leg base for the cabinets too. For that I'm going to be using some salvaged oak hat and coat stands. Regular viewers of my channel will be familiar with these as they've been featuring in my projects for a long time. I flushed up the edges using my speed square and then clamped them together, and then I can mark up the length of the legs, and cut them again using my speed square to guide the saw.
These pieces of oak have fluted corners, and I don't really like that look so I clamped them in to my workmate and used my handplane to bevel the corners instead.
And I want to cut a taper to the legs, ordinarily I'd use the bandsaw for that, but today I'm going to use the belt sander clamped upside down in my workmate.
This took a while, but eventually they looked pretty good.
I'd also need some apron rails for the legs, and I'd use more of the oak worktop to make those, but I wanted to avoid these finger joints which join the end grain of the oak staves together as much as possible, I'd rather use the bits without those joints.
After marking up the thickness of the rails that I wanted, I made a series of cuts to get the best material possible for the rails.
I then need to cut those to length and I'm using some clamps and a speed square for that too.
I marked up which legs I wanted where, and also where I wanted the joinery for the apron rails just so I wouldn't get confused and cut the joints in the wrong place.
And then I spent some time marking up where I would add dowels which is what I'm going to be using for the joinery. Usually I'd use my domino mortiser for that, but dowels are just as strong, they just take a little extra effort to set up and get accurate and I use my marking knife and a combination square for that.
Now I did venture in to the workshop for a little while because it started raining and at this point in the project I just wanted to get this done, but I could have easily done this in my workmate had it not been for the rain.
I marked up the position of the dowels using an awl to help centre the drill bit.
I can then drill the holes using a brad point bit being careful to hold the drill perfectly upright at 90 degrees and the masking tape on the bit helps me to drill to the correct depth for the length of the dowels.
Then I had a visitor.
I could then glue in all the dowels and start to assemble the leg frame.
I managed to get most of the joints together with the mallet, but one of them needed a little extra force so I used clamps to pull it all together for tight joints and I also clamped it down to a flat surface.
I could then check the measurements from corner to corner to see if it was square, and the measurements were close enough, so I left it for the glue to dry.
Once it was dry I centered it to the bottom of the carcass, just by eye, and then drilled some pilot holes through the rails in to the bottom panel and used some 50mm screws to secure it in place.
I didn't use glue here as I want the option of removing the leg base so that it's easier to post, as these units are going to be available for sale on my online Etsy store.
I also drilled some pilot holes in the top panel for securing the oak tops. Because these holes will be quite central to the oak tops, that will allow the wood to move as it expands and contract with seasonal changes.
And I used some 40mm screws to secure the tops in place.
I could then blow away all the dust ready for finish, and I'm going to be using some water based varnish. Usually I'd just brush it on and denib between coats but because I made three of these units, I decided to set up my paint sprayer to help save some time. I am using varnish because it is really hardwearing so it'll protect the wood from moisture.
I left the first coat to dry and then sprayed on a little water so that I could wet sand at 400 grit to de nib the finish to get everything nice and smooth.
And then I could wipe away the slurry and apply the next coat.
I added my makers mark to the bottom of each unit.
And finally I wanted to add a back panel. After removing the tops, I clamped on a piece of wood to help support the base of my router so that I could route a rebate for a back panel to sit in. I used a chise to square up the round corners left by the router,
I added glue and then added a 3mm plywood back panel which I'd already cit to size with the circular saw.
I secured that in place with some pin nails.
And then I could add the tops again and that was the units finished.
These units were designed to fit these cushions which I bought online, so that they can be used as cat beds, and here you can see my cat Dylan modelling one of the beds. But they're kind of multifunctional, because they're also a great size to use as bedside tables, vinyls or books too. They are now available for sale on my Etsy store and you can find a link to that in the description box below
As mentioned at the start of the video, this project is in collabration with HiKOKI, I've been using Hitachi and HiKOKI tools for over a year now. I've said in the past that you don't need high quality tools make great things, I really believe that, but for me, transitioning from making things as a hobby to making commissions and items for sale professionally, there's a certain standard of performance and reliability that I want from my tools, and I've been more than happy with all the HiKOKI tools I have used and I haven't encountered a single issue with any of them either even after much use and abuse.
If you'd like a chance to win a circular saw, combi drill and impact driver plus batteries and a charger, click the Instagram link in the description box below, give HiKOKI tools a follow and comment #makergiveaway and tag a friend in the post. This is open to anyone worldwide, although you may have to source your own plug adapter depending on the country that you are in. You can also find links to the limited tool builds by Chris Salamone of FourEyes furniture and Mike from Modustrial Maker in the description box below this video, both fantastic makers so I'd recommend checking them out.
I want to say a big thank you to HiKOKI for helping to support myself and the maker community as a whole
I hope you enjoyed the video, Please subscribe if you haven't already for more weekly woodworking videos. You can also support the channel on Patreon if you'd like to receive early access to my videos, exclusive content, free project plans and cut lists and a name credit at the end of my videos.
Thanks for watching.