I mentioned in my last vlog video that I had an unusual find recently, 16 snooker cues, which I found leaning against a wall behind a bin.
People who've been watching my channel for a while will know that I predominantly like to use salvaged materials in my projects, so I gave some thought to what I could use these for and the first idea I had was using them to make some tapered legs for a coffee table.
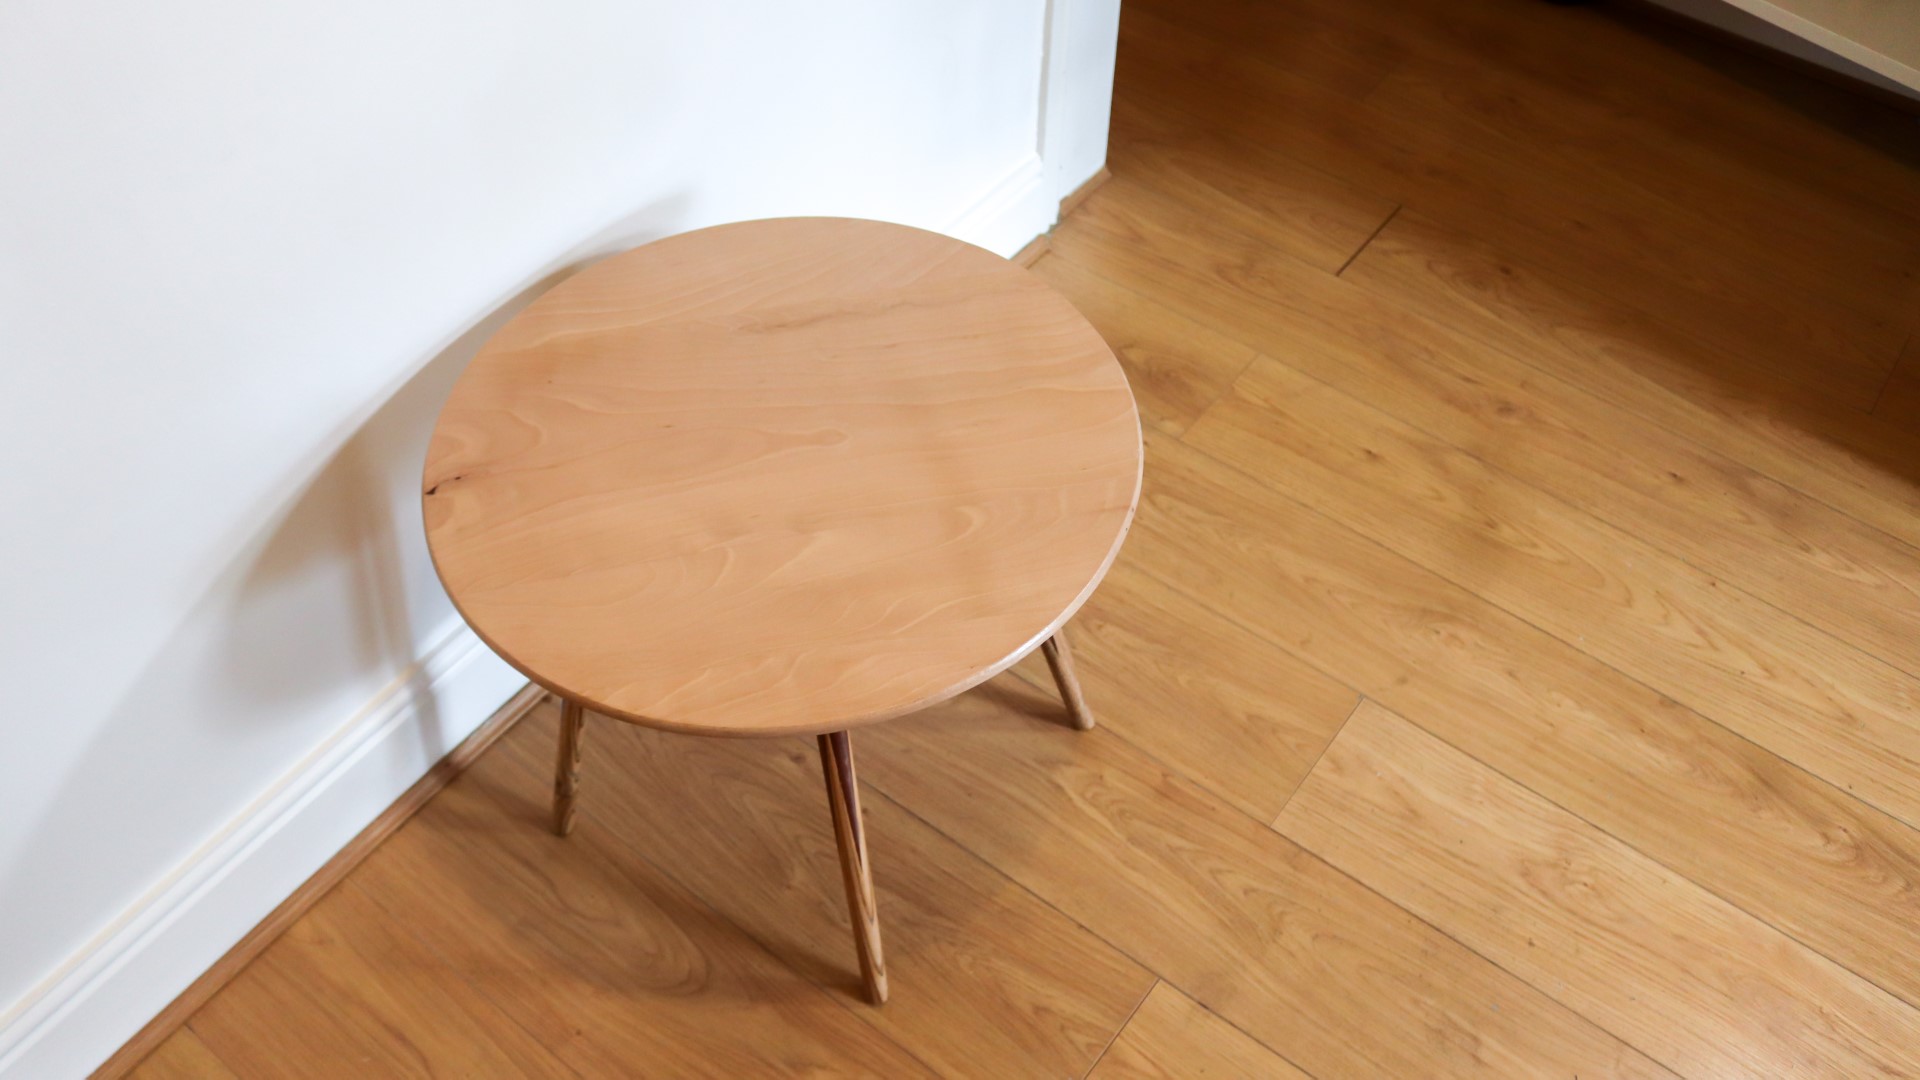
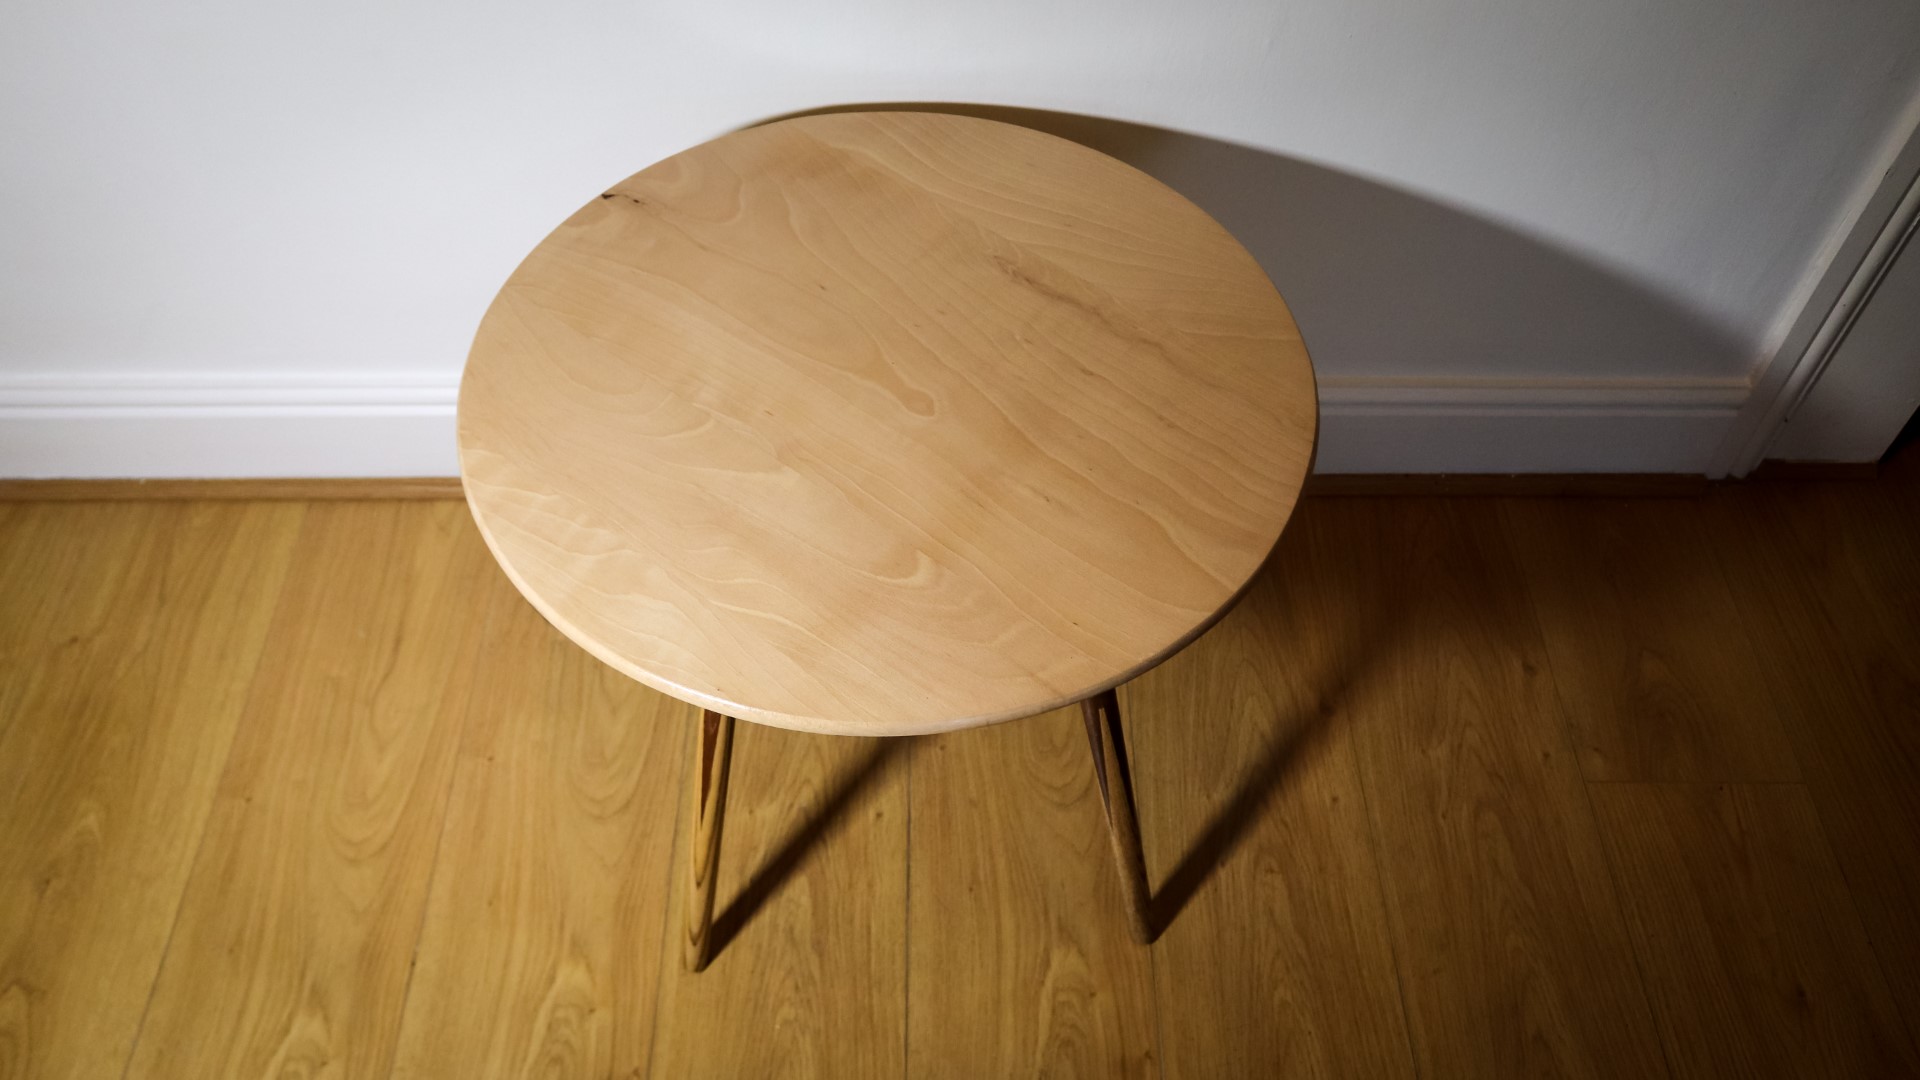
First I wanted to make a top for the table, and for that I'd use this slab of beech.
It was about 25mm thick. I took some measurements and there were a few imperfections at one end that I'd need to cut away.
And I started marking up where I would make some cuts which I did with my circular saw just to make the pieces more manageable in size.
These slabs were rough sawn and were not very straight so I set up the planer.
And then I could use that side against my tablesaw fence to cut a parrallel edge.
Here I'm positioning the pieces to see if I had enough material to work with - I was aiming for between 550 and 600mm in diameter.
Before I could do the rest of the planing I had to rip one of the pieces to be less wide so that it would fit through my thicknesser.
And then it was lots and lots of planing one face, followed by lots and lots of thickness planing the opposite face.
During this process my planer stopped working and I found that the drive belt had snapped, so I had to order a new one of those and wait for a few days and then I could fit the new belt so that I could finish off the job I'd started.
With the pieces all cleaned up I offered them up next to each other and then marked up a circle using my beam compass which I made a few months ago - I'll link to the video I made for that in the description box below.
I also marked up some notches where necessary which would give me a solid area to clamp to for when I glue up the top, I cut those out at the bandsaw. I realise I could have just ripped these edges earlier at the tablesaw, but I was really trying to maximise the size of the table I could get from the slab of beech, so that's why I kept the outer edges as they were.
I added glue. Then I clamped it up and had a quick look underneath just to make sure that the underside was sitting flat against the bars of my parrallel clamps, and it was so I knew it would be nice and flat.
I'd use my circle cutting jig at the tablesaw to cut the circle to shape once the glue was set.
I drilled a pilot hole in the centre of the table top and then I added a pin to my jig set at the right distance from the tablesaw blade to give me the radius of the circle I wanted to cut. This pin is just a nail with the head cut off.
I wanted to make a bevel cut so I tited the blade to 45 degrees.
And then I could put the pin in to the pilot hole on the underside of the tabletop so that it spins on it.
This method of cutting a circle is not one that I would recommend trying as there's a high risk of kickback when making cuts like this so it can be very dangerous. It's really important to not rotate the workpiece while it's in contact with the blade, so I'm pressing down really firmly to prevent it from spinning. I'm also taking these cuts nice and slowl. Please note this footage is sped up quite a lot
I made a series of cuts to remove the excess material bit by bit.
Once it's very close to being a perfect circle I could gradually advance it in to the blade to nibble away to form the perfect circle.
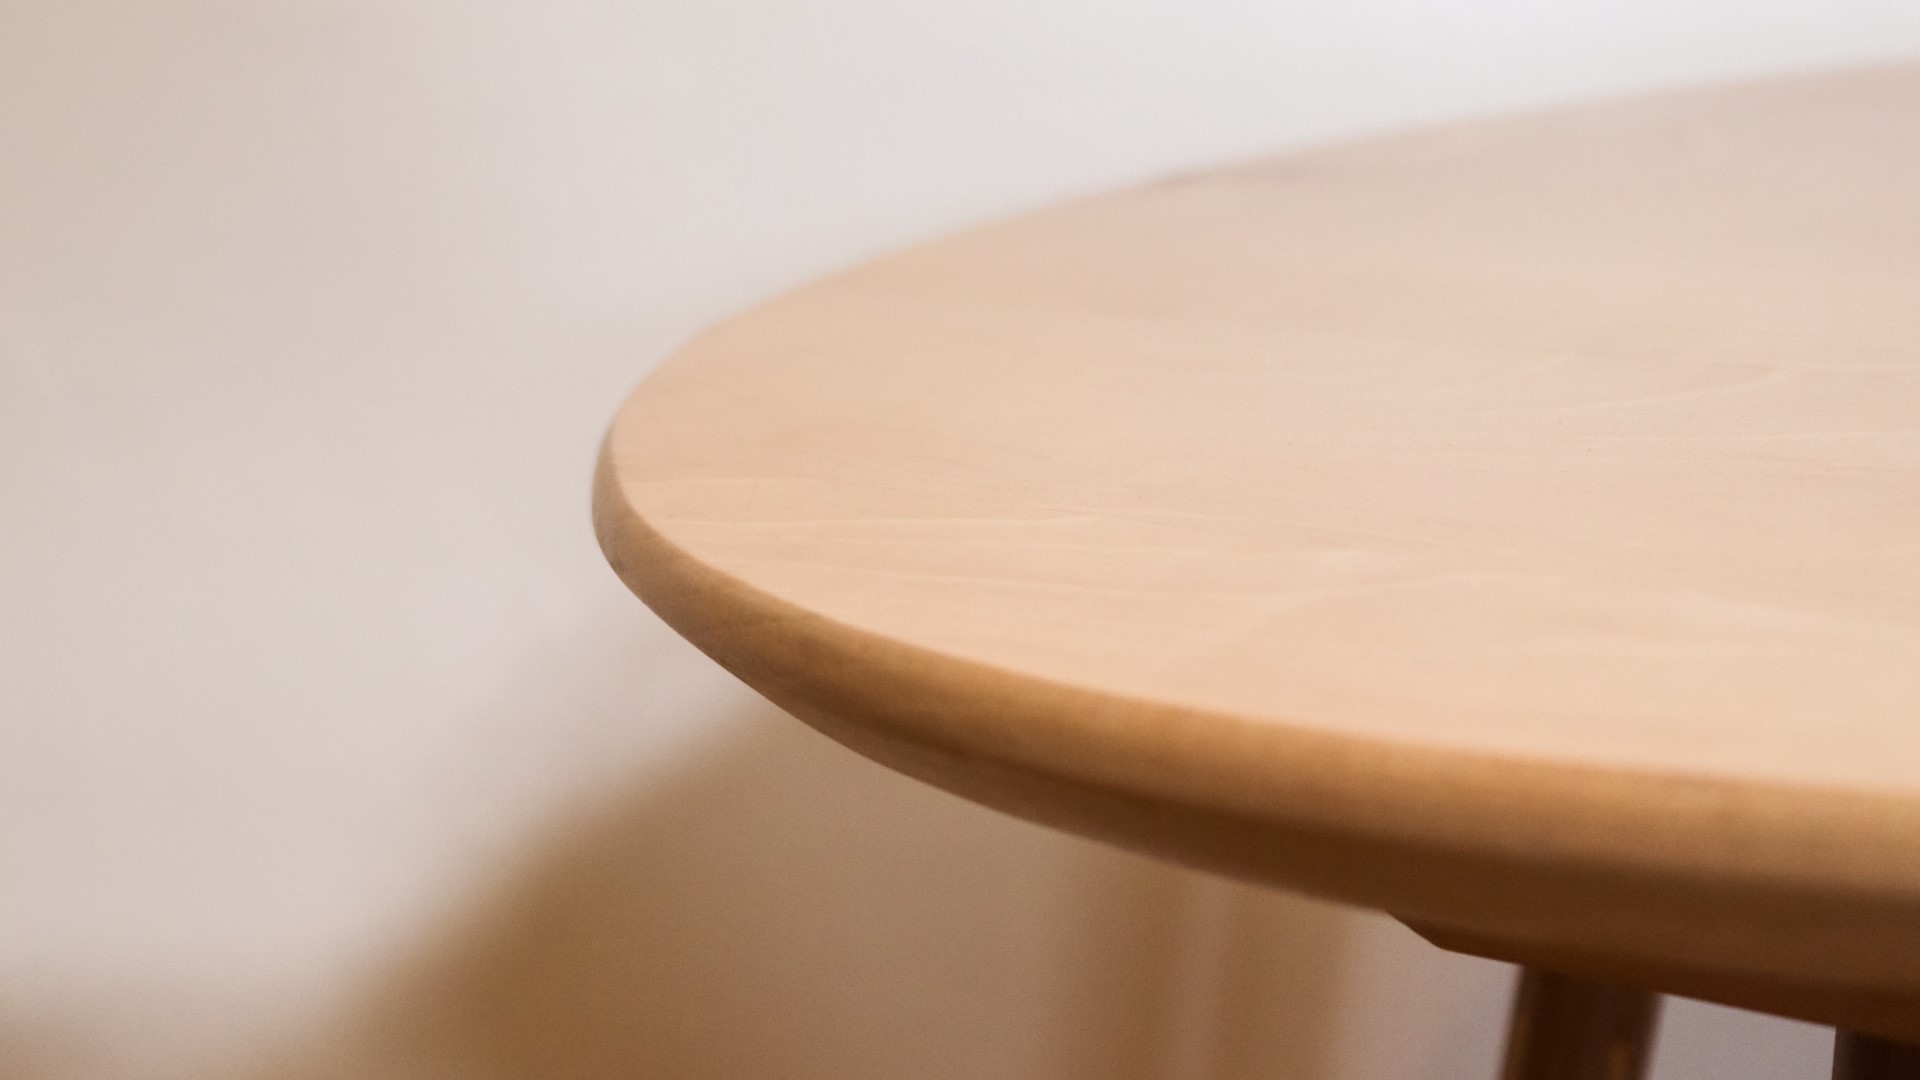
Next I took a roundover bit and used my trim router to ease over what would be the top edge of the tabletop. And I wasn't sure how this would work because the bearing of the bit was riding on a 45 degree angle rather than a 90 degree angle, and that meant it took a heavier cut, but it actually worked fine.
It did leave some sharp edges though so I sanded those back.
Then I could scrape the joints with my card scraper to remove any excess glue. I really should have done this much sooner because at this point the glue was really hard.
I sanded the faces and the edges at 80 and then 120 grit.
Next I could get started making the legs.
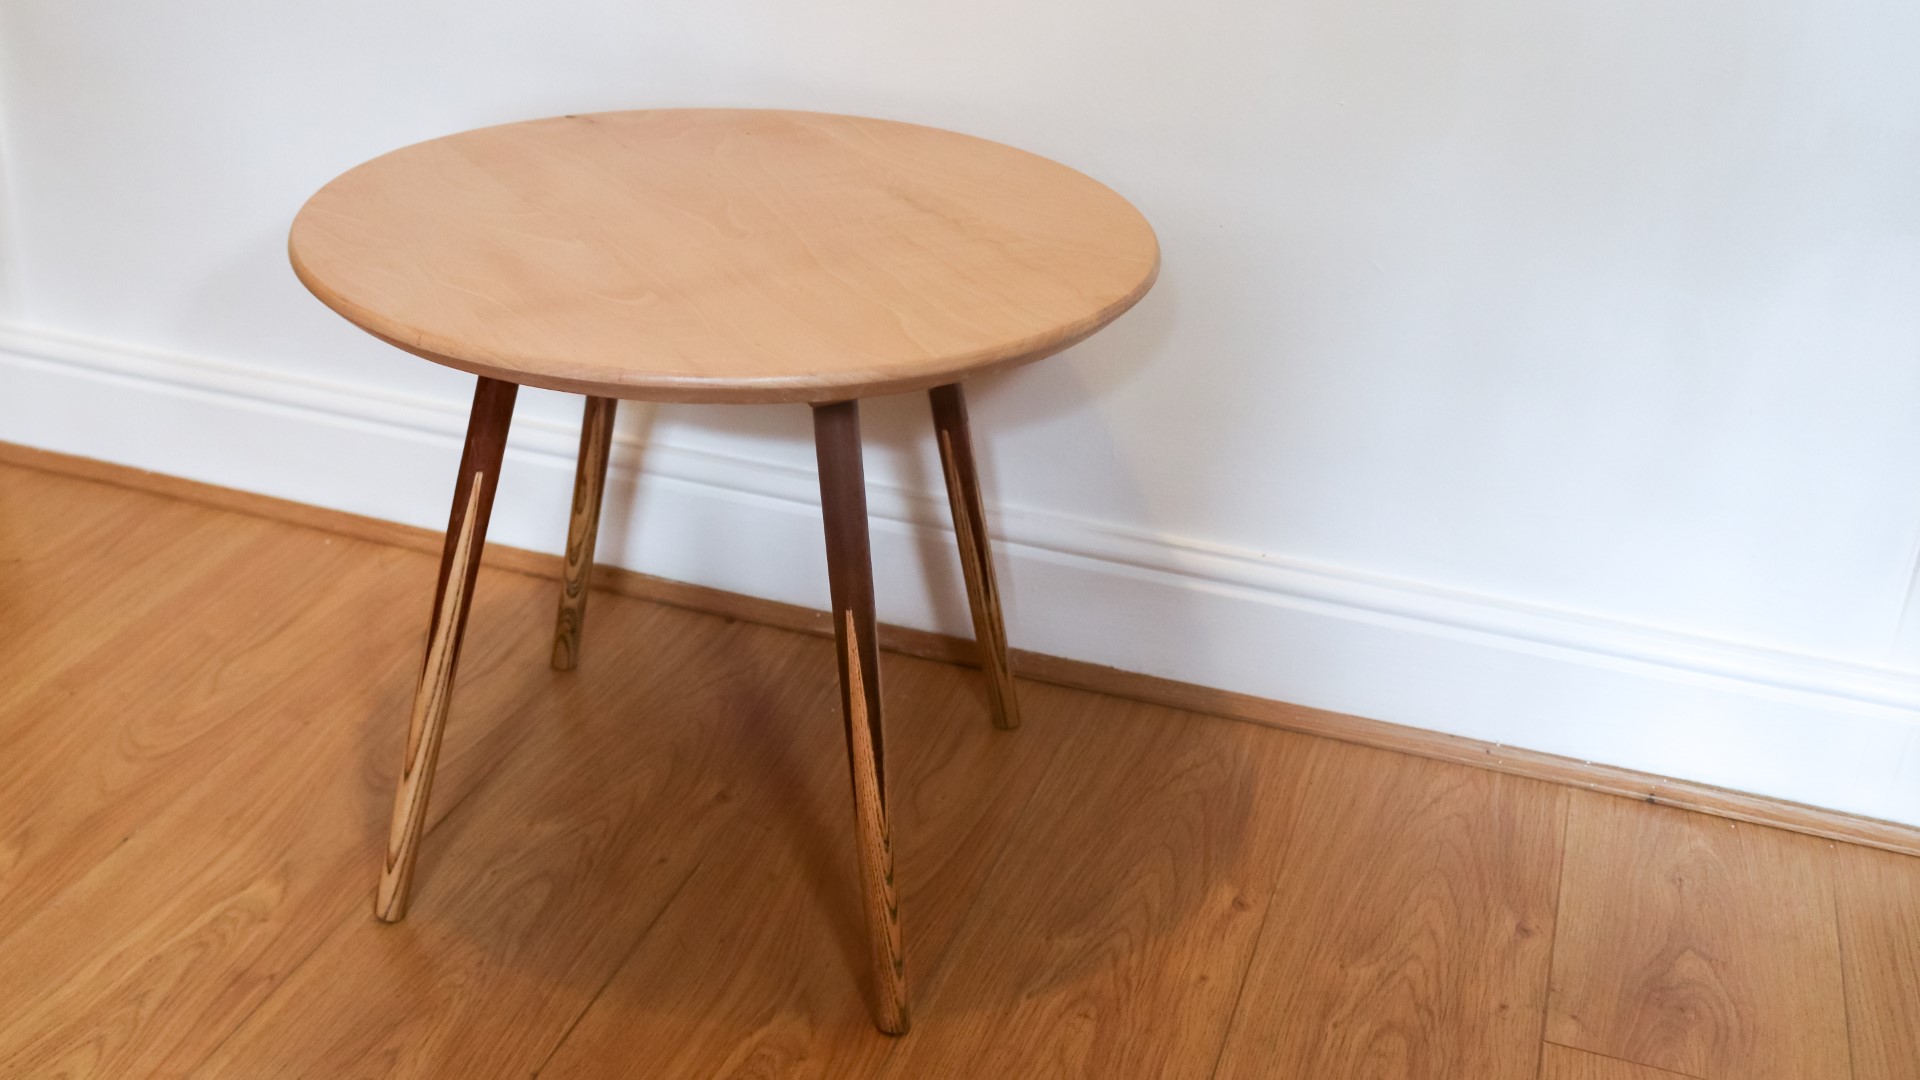
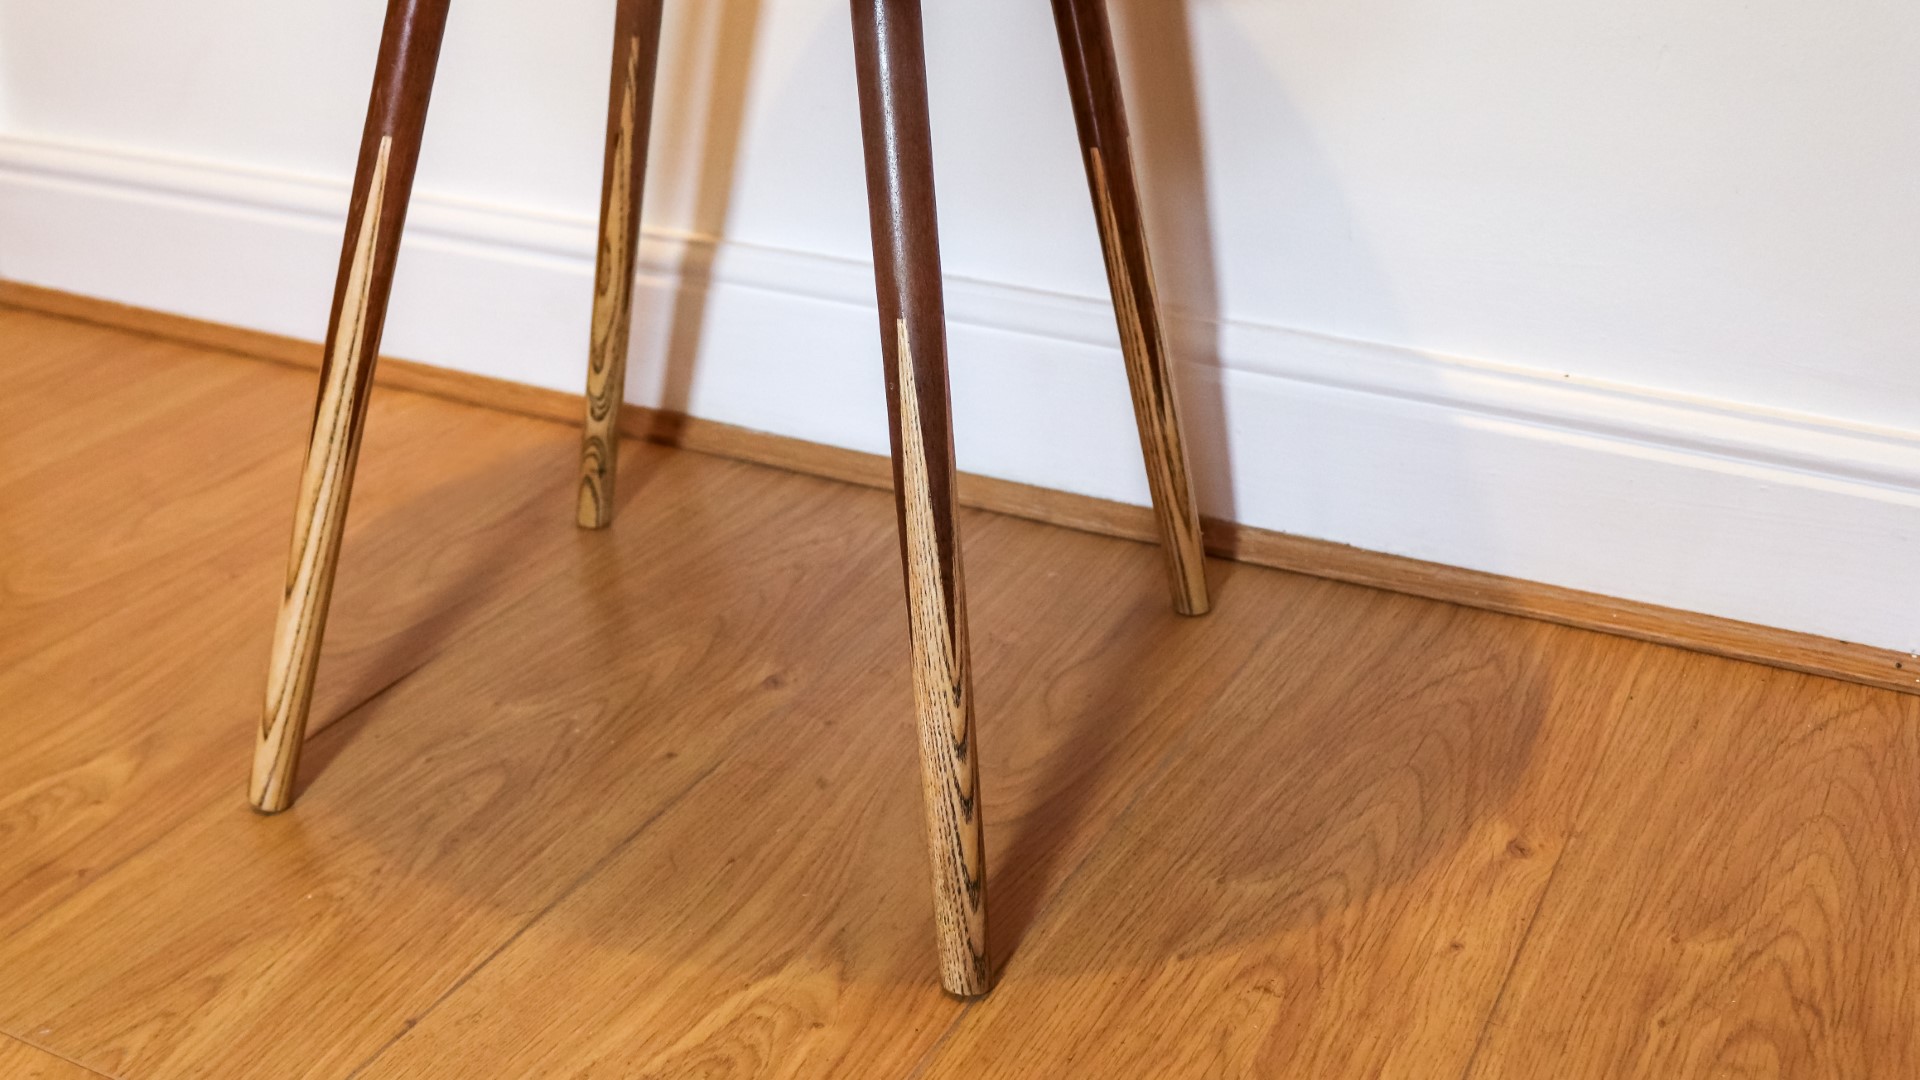
I picked out 4 snooker cues that looked pretty similar, the pale wood here is ash I think, I'm not sure what the darker wood is. Originally I thought I'd use 3 legs, but I wanted to make more of a feature of the snooker cues, so I decided to go with 4.
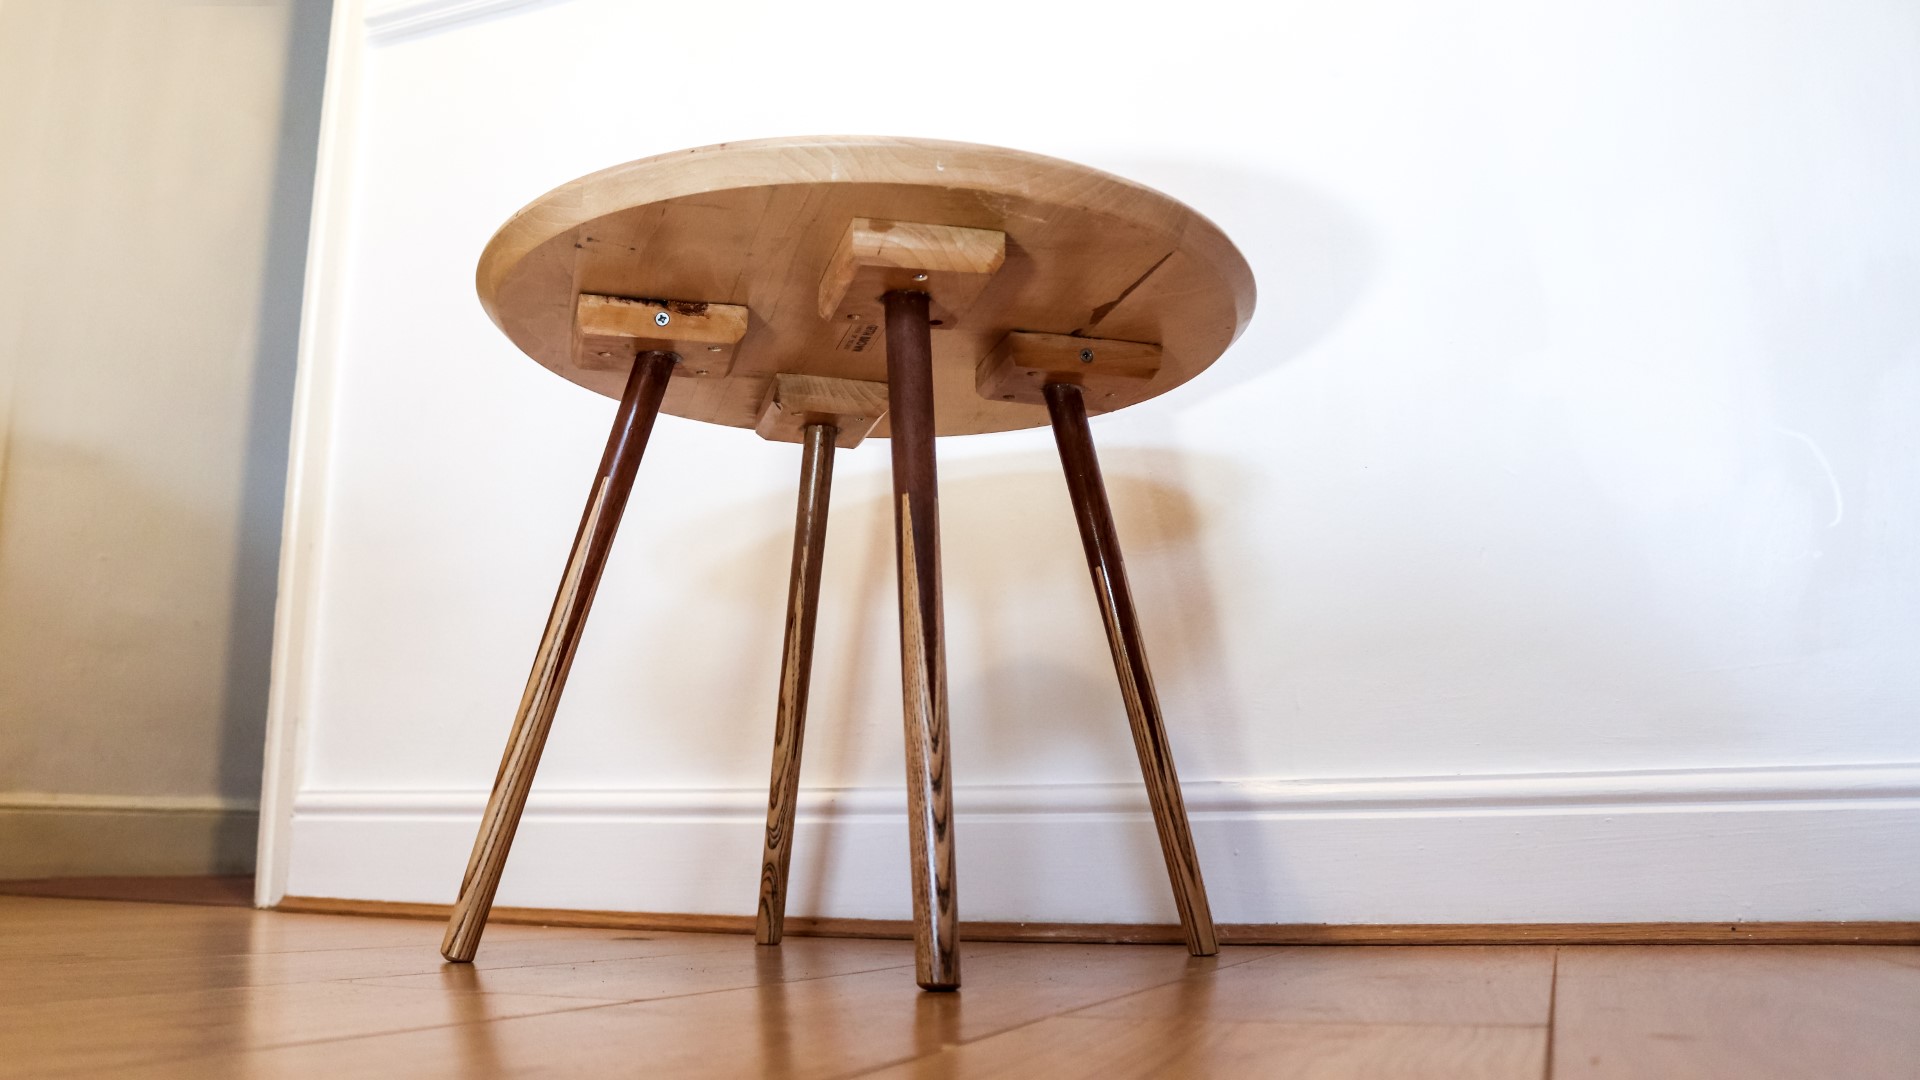
I used the offcut of beech from easlier, the bit with all the knots and cracks in, to mark up 4 blocks which would be mounting blocks for the legs.
I cut those out at the bandsaw.
I cleaned them up with a handplane as by this point these pieces were too small to safely plane using my thickness planer.
Then I marked a centre point on to each block.
And then using a scrap piece of mdf and a couple of wedges plus some hot glue I made a simple jig which would help me to drill holes through the mounting blocks at an angle. I added a scrap piece of wood to the front too just to help position each block consistently.
The snooker cues measured around 29mm in thickness at their widest point and the nearest bit I had was a 30mm forstner bit so I'd use that to drill the holes. I offered up the centre point to the centre of the forstner bit and drilled all the way through.
I also decided to add some bevels to what would be the bottom of each block and I did that with a handplane.
I made some marks where I wanted to cut the legs to length.
Next I measured the angle of the hole that I'd drilled using my bevel guage and I could then use that to set the angle of my mitresaw ready to cut the legs to size.
Before I did that though, I first used an old handsaw to cut through the cues just to make sure that there was no metal or anything that would damage my blade on the inside of them and it didn't look like there was.
But when I made the cuts at the mitresaw, this happened. So yes, there was metal inside. How annoying. Looks like I might need to buy a new blade.
So rather than cutting the legs at an angle I instead cut them using a hacksaw, but ofcourse when I did that, the inside was all wood. Typical!!
Next I did some light sanding just to clean up the legs as they had quite a bit of wear and tear to them.
Most of the legs looked fine, but on one of them I found that the contrast between the dark and light wood wasn't as prominent once sanded, so I pulled out another snooker cue to use instead.
To glue the legs in to the mounting blocks I mixed up some epoxy, as it's great as a gap filling resin so it wouldn't matter that my holes were drilled a little bit too wide for the legs.
I first added it to the top of the mounting blocks to try and get a seal all the way around, and then I left it to dry, and then I turned the legs upside down and filled the gaps from there too.
And finally I added some screws through the mounting blocks and in to the legs to help secure them in place even more.
I could then cut away the excess at the bandsaw. And for the bottom of the legs I just had to take a bit of a guess to get the angle right, and I could further refine that later on when I level the legs. I rounded over the bottom of each leg at the disc sander. You can see here that I'm using a block just to guide each leg at a consistent angle. And then I did some sanding by hand to clean up any burn marks. I could also offer the legs together upside down to check by eye that they were all roughly the same length. I wasn't aiming for perfection, as I'm going to be levelling the legs later, I just wanted them to be pretty close.
I added some oil to the cues to make the grain pop, and after a couple of days once I was sure that the oil had cured, I applied a top coat of spray varnish to restore their shininess.
I also sprayed the leg blocks
Then I could work on finishing the tabletop. I first sprayed on some water. This is a trick I saw in a Jay Bates video, and It works really well to raise the grain. The water raises the grain, and once it's dried off I could sand it back with some 400 grit paper. With the water raising the grain rather than the waterbased finish raising the grain, which means it's a bit easier to sand it back and get a nice smooth surface. Next I can add finish, I'm using waterbased varnish. I brushed it on in the direction of the grain and took care of any drips around the edges. Then once dry, I sprayed on some water and wet sanded at 400 grit to keep things nice and smooth and wiped away the dust. I then finished the underside.
And then using some of these blocks with a screw through them, I can balance the table top on those while the bottom coat is still wet and apply another coat to the top so I could carry on working.
I gave it three coats of varnish, wet sanding in between each coat.
The final job was to mount the legs to the table top which I did with some screws and no glue, because this table is going to be available for sale on my Etsy store and if the legs are detachable, it'll make sending the table much easier.
I used a framing square to help position the legs where I wanted them and then I could secure them. After drilling pilot holes and counter sinks I added the screws. I didn't use any glue here because this table is going to be for sale on my Etsy store which means I'll need to send it to the buyer and it'll be much easier and with less chance of damage for the table to be send disassembled. Each leg block got three screws in to the underside of the table top.
Finally I could level the table, I placed it on a flat surface to check the wobble
And then by placing some course sandpaper beneath the longest two legs, I could remove any wobble.
Images: